In this article
- Overview
- Theme Builder (VIDEO)
- Available Templates + Creating a Campaign (VIDEO)
- Adding Discounts to your Campaigns (VIDEO)
- Front-End Customer View (VIDEO)
- Testing and Sending your Campaigns (VIDEO)
- Campaign Statuses
- How to Fix a Blocked Campaign
- Reviewing Campaign Stats (VIDEO)
- Best Practices
🎓 Commerce7 Academy Callout
Did you know that there's a Commerce7 Academy course all about Campaigns? Click here to access concise video modules that guide you through the process step by step.
Overview
As you likely know, email campaigns can be incredibly effective in our space. When used correctly, email marketing should be driving between 20-30% of your total revenue. While there are more robust apps like Mailchimp and Klayvio, Commerce7's Campaign tool allows you to market to your customers (and see resulting analytics) directly inside of Commerce7.
Theme Builder
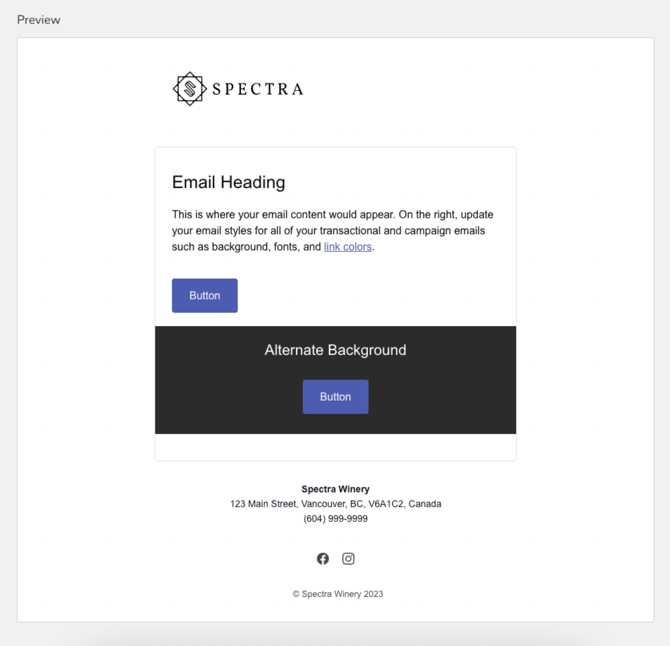
It all starts with the Theme Builder. Once you've configured the design elements in the Theme Builder, those elements will apply to both your Transactional Emails as well as your Email Campaigns. This ensures consistent branding across all of your communications.
Editing your email theme
Watch the tutorial or follow the steps to learn more about editing your email theme through the theme builder.
- In Admin, go to Settings > Emails and click Edit Email Theme at the top right.
- On the left, you'll see a preview of your email theme. The content here is just to show you what the design will look like so it can't be edited.
- On the right, you'll see sections for Header, General, Content, and Footer where you can edit your email settings. As you make changes to the settings, you'll see the preview update automatically to you can see what they'll look like.
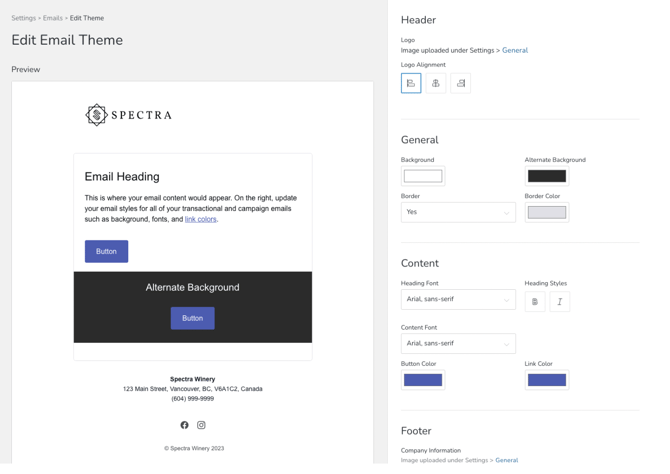
- Header
- Logo: The logo automatically uses the file uploaded under Setting > General. Keep in mind if you want to change it, that this is also the logo used for your website Checkout page.
- Logo Alignment: Update the alignment for your logo to Left, Center, or Right.
- General
- Background: The background color of the email itself. (Currently, the background behind the content cannot be changed from white.)
- Alternate Background: This is used for Campaign emails only. When creating a campaign email it can be toggled on and off for different sections of content that you want to stand out.
- Border: Choose if you want a border to display around the email content.
- Border Color: If you chose to have a border, you have the option to adjust the color.
- Content
- Heading Font: Font used for headings (such as Heading 1, Heading 2, etc.).
- Heading Styles: Click the "B" button if you want your headings to be bold and "I" if you want your headings to be displayed in italics. (Please note that some smaller headings in transactional emails are automatically bolded to stand out for customers.)
- Content Font: Font used for main content.
- Button Color: Background color for buttons.
- Link Color: Text color for links. Make sure you select a color that stands out and is dark enough to read.
- Footer
- Company Information: Select if you'd like to display your address and/or phone number in the footer. This information is pulled from Settings > General and cannot be edited per email.
- Social Links: Click to add a social link for Facebook, Instagram, or Twitter.
- Once you're happy with your changes click Save Theme.
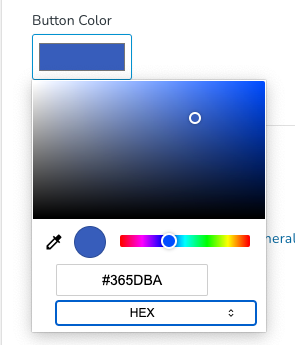
Tip: Using hex colors with the color picker
If you have a hex color for your brand that you'd like to use, click to open the color picker, then click on the RGB until the HEX option appears. Now you can type in your specific color.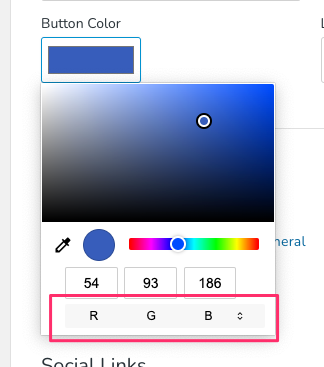
Available Templates + Creating a Campaign
When creating a campaign, there are four pre-built templates and one "Build Your Own" template to choose from. Each pre-built template has a collection of content blocks pre-added for you to accomplish a specific goal. You can simply edit the pre-added content blocks, but you also have the option to add additional blocks or remove some of the existing ones. If you want to start completely from scratch, choose the "Build Your Own" template option.
- To create a new campaign, click on Marketing > Campaigns. Then click Add Campaign.
- Next, choose a template option. Templates are pre-built emails with a specific goal in mind. With each email template, you still have full control to re-arrange, add, or remove content from the email, but they're an easy way to get started.

- Visit Us: Drive tasting room visits or reservations.
- Wine Club Signup: Convert customers into club members.
- Wine Club Retention: Remind customer the value of their club membership.
- Event Announcement: Drive sales for a specific event.
- Exclusive Promotion: Drive purchases with a one-time coupon or discount.
- Shop Now: Quick and clear message to invite customers to shop online, with a "Shop Now" button with a customizable link. For more info on this template, click here.
- Product Launch: Announce one or more new products to your customers. You can include product images, price and discounts. For more info on this template, click here.
- Sale: Notify your customers about an upcoming or current sale. You can include product images, product details and an add to cart button with a customizable link. All customers will receive an email with their discounted pricing. For more info on this template, click here.
- Customer Welcome: Send a message to your customers letting them know that you have switched systems, with instructions on how they can login to access their new account in Commerce7. For more info on this template, click here.
- Build Your Own: Use this if you'd prefer to start from scratch and add your own content blocks.
-
Please note: Designers cannot edit or create custom email templates within Campaigns.
- Once you've selected a template, an email will be started and based on the specific template, you'll get a series of fields and blocks to edit.
- At the top you'll always find general information about your campaign:
- Title: This is not customer facing.
- Tag: The list of customers that this email should be sent to. This searches for customer tags only. A campaign can only be sent to one customer list.
- From Name + From Email: This is what customers will see in their inbox when they receive the email. (The defaults here are populated from Settings > Email > Campaign Sender.)
- Subject Line: The title that appears in the customer's inbox.
- Preview Text: The email description that appears under the title in the customer's inbox.
- Scroll down to find a preview of your campaign. You can click and interact with the preview to add, edit, rearrange, and delete blocks of content.
Learn more about each block and how to edit them here.
Customer Front-end View
Adding Discounts to your Campaign
You will only see Coupons in the Campaigns tool. Promotions will continue to automatically apply for Customers online. If a Customer qualifies for both the Coupon in the email and a Promotion, they will receive both discounts at Checkout (as long as these are in a promotion set together).
"Coupon" Content Block
When you add a Coupon content block, you can search for existing Coupons to apply to it. When a Customer clicks the button from their email, it will auto-apply whatever Coupon you added.
Customers must still qualify for the coupon in order for the discount to take effect. For example, if the coupon has criteria that customers must purchase a minimum of 6 bottles to receive the discount, the coupon will be "applied" when the button is clicked, but the discount won't kick in until they've added at least 6 bottles.
Learn more about the coupon content block or coupon discounts.
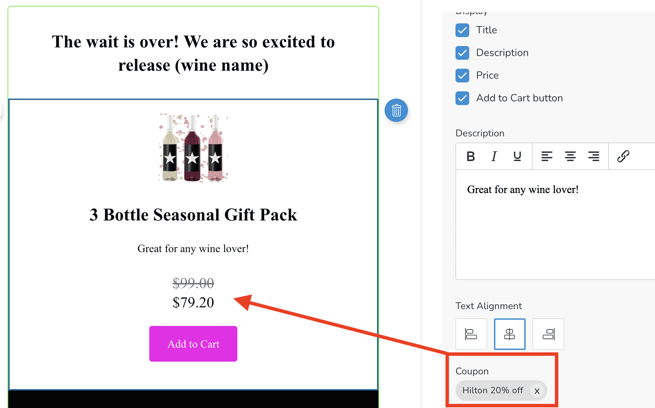
"Product" Content Block
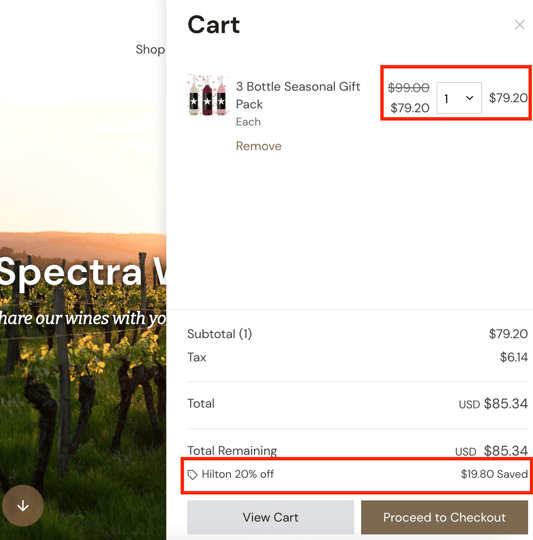
When a Coupon is added to a Product content block, the Product price in the email will showcase the discount to all Customers who qualify, showing the original price and the discounted price.
- The discount price will also only show to Customers who actually qualify for the discount. This means, you can send an email to a Customer Tag containing Customers who do qualify - and - Customers who don't qualify. Only Customers who qualify for the discount will see it displayed.
When qualified Customers click the "Add to Cart" button from the email, it will bring them to a new Cart on your website with the Coupon already applied.
Learn more about the product content block or coupon discounts.
Adding a coupon to an email template
- When in your campaign (Marketing > Campaigns), you can either edit an existing coupon block or add a new coupon block to a template.
- When a "coupon" or "product" content block is added, on the right, there will be a field to search for a Coupon.
- Type in the title of the coupon you want to add and select it from the dropdown.
- For "product" content blocks, check the option to display Price so that qualified customers can see the discount applied.
- When a customer clicks the Add to Cart button (or your custom button using the "coupon" content block), it will direct them to your website cart:
- If this was a "coupon" content block, the coupon will be applied.
- If this was a "product" content block, the specific product will be added and the coupon will be applied.
Testing & Sending Your Campaign
Campaigns can be sent to any Customer Tag that you have set up in Commerce7. You can either send a campaign right away or schedule it to be sent at a future date and time.
Campaigns will be sent in progressive batches to ensure emails are trusted and not bouncing. As emails are flagged as trusted, the batches increase in size.
- At the bottom of your email, click Save & Review. This should bring you to the "Review" screen.
- From here, if you haven't tested your email yet, you'll see that Send Test Email is the only action available.
- Commerce7 requires you to send at least one test before sending to your full customer list to reduce mistakes and email errors. We recommend re-reading all of your content and testing any/all of your links.
- Once the button is clicked, a window will open where your email address will be auto-populated, but you can change or add an additional person to send the email to as well.
- Click Send Test Email from the window to confirm and an email will be sent to you.
- After you're happy with your email, you can now send it immediately, or schedule the send for a later date.
- Send Now: Sends your email immediately. When clicked, a window will pop up to confirm before it begins sending in batches. Once the email is started, you will have the option to cancel it mid-way. Learn more about campaign batch sends here.
-
Schedule Send: Will allow you to specify when you want the email sent. When clicked, a window will pop up where you can enter a date and time.
Please note: Date and time is based on local winery time. This time zone can be setup under Settings > General. For more information on configuring your General Settings, click here..png?width=670&name=Commerce7-Review-Welcome%20(5).png)
- If you've scheduled your campaign, you will see the future send date on the campaign list page. A blue alert will also display on the Review area as a reminder.
- If you want to change the date, you can simply click the "Schedule Send" button again and edit your send date.
- If you want to change the date, you can simply click the "Schedule Send" button again and edit your send date.
- If you've sent your email right away, your email will begin sending in batches. Learn more about how campaign batch sends work or reviewing your campaign send stats.
Campaign Statuses
- Draft: When your campaign is first created or hasn't been sent yet. (Even if it's been scheduled.)
- Processing: When your campaign is in the process of sending.
- Executed: All emails have sent. You can now review the stats related to this campaign. Learn more about campaign stats.
- Blocked: The campaign has been blocked and future email batches have been cancelled and will not send. Learn more about blocked campaigns.