This template is designed to be sent to new customers, giving them a warm welcome and informing them about the system switch. It also includes instructions about how they can log in to access their new account on your site.
The following is a quick overview. If you're new to the Campaigns feature, we highly recommend checking out our comprehensive article. It will provide you with all the information you need to create, edit, test, and send your Campaign successfully.
Step 1: Tagging Customers Who Have Purchased in the Last Two Years
Finding Your Audience
The first thing to think about is who your audience should be for the Welcome Email. It's tempting to send it to everyone on your list. But we'd argue that you should narrow that down to Customers who have purchase in the last two years. These are your most engaged people, and therefore the ones who will be receptive to this communication.
Take a look at the following video to learn how to find and tag this segment:
Step 2: Editing and Sending the Campaign
Now that you have defined your audience, it's time to create the Campaign.
- Be sure that your Email Theme Builder elements are configured with the design elements that you want. Learn about the Theme Builder here.
- Once your Theme Builder elements are all set, click on Marketing > Campaigns, then Add Campaign.

- You will see 5 email templates. Click the template called Customer Welcome.

- Enter general information about your campaign:
- Title: This is not customer facing.
- Recipients (choose a tagged segment): The 'To' field searches for Customer Tags only. If you do not have a tagged Customer segment with the desired list, you can learn about creating Customer Queries and how to Tag those results here. Note: A campaign can only be sent to one Customer list at a time.

- From Name + From Email: This is what Customers will see in their inbox when they receive the email. (The defaults here are populated from Settings > Email > Campaign Sender.)
- Subject Line: The Title that appears in the customer's inbox.
- Preview Text: The email description that appears under the Title in the Customer's inbox.

- Next up, let's edit the content!
Editing the Content Block(s)
Here are some quick instructions about how to edit/add content. If you're new to the Campaigns feature, we highly recommend checking out our comprehensive article. It will provide you with all the information you need to create, edit, test, and send your Campaign successfully.
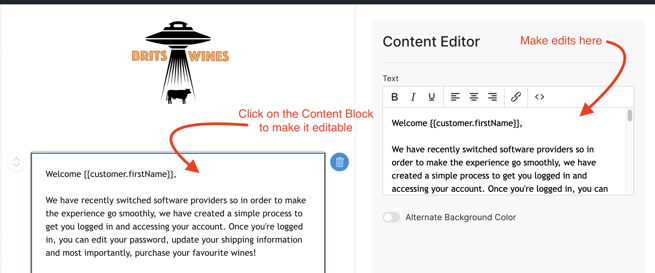
- To edit the content, click the content block in the email preview on the left.
- This will open up the editable content fields on the right.
- Edit the content accordingly.
- Note that the default merge fields for the Forgot Password and Company Name automatically populate and do not need to be edited in the campaign. If you find that the info is incorrect, however, you can make this change in Settings > General.

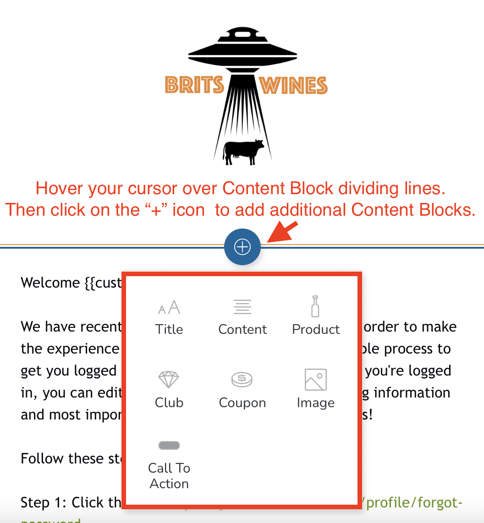
- From here, you can add additional content blocks (if you'd like to).
- Replace the 'XXX' placeholders (at the bottom of the default message) with your winery's information.

- Test and Send your Campaign. Learn how here.