Who is this article for?
- If you do not have a front-end website, but want to be up and running quickly, then Commerce7's Storefront solution is a great option.
- If you do have a front-end website and simply want to point Purchase, Login, Club links etc. to Commerce7's Storefront pages, then you're in the right place.
Who is this article not for:
- If you are fully integrating your front-end website (using a developer/designer), then this article is not geared toward you.
In this Article
Enabling the Storefront and Configuring the Basics (VIDEO)
Defining which Collection(s) display in the Storefront (VIDEO)
Editing the Homepage welcome Personalization Block (VIDEO)
Customizing Language/Verbiage for Customer-Facing Areas
Pointing pages from your Frontend Website to pages on the Storefront (VIDEO)
This video lays it out for you:
Let's get started!
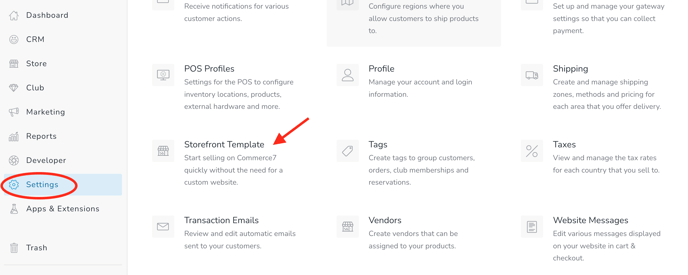
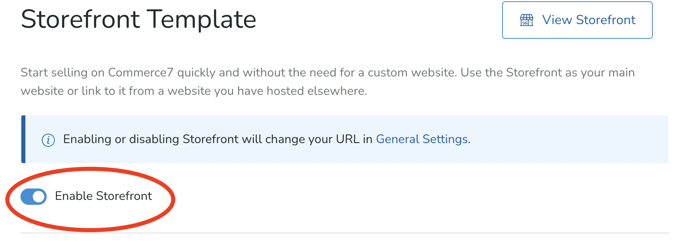
- Click on Settings > Storefront Template
- Toggle Enable Storefront
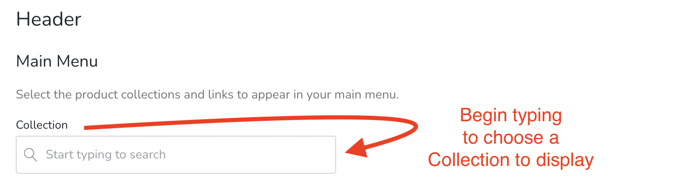
- Choose a Collection to display. To learn more about Collections, click here.
- You can choose multiple Collections. Use the up/down arrow icons to define Collection display order.
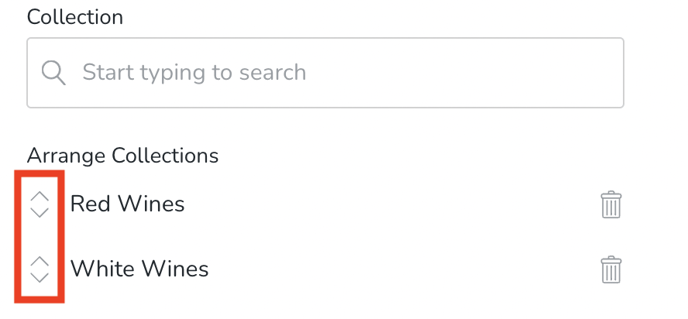
- You can choose multiple Collections. Use the up/down arrow icons to define Collection display order.
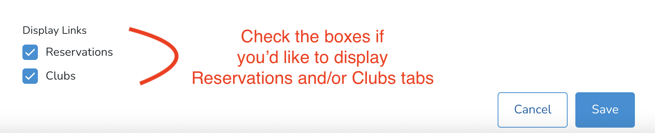
- Select the checkboxes to indicate whether you want to display Reservations and/or Clubs on your Storefront.
- (Optional) Add Browser Icon, Social Sharing image, Font and Primary (Button) color.
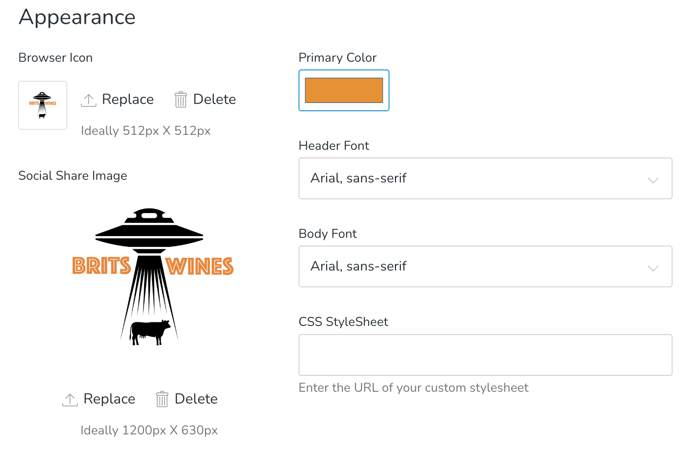
- Browser Icon: This is the little image that appears on the browser tab.
- Social Sharing image: This is the image that appears when you share a link from your Storefront on social media.
- Primary Color: This will define the color of your Buttons.
- Fonts: Define font for both Header and Body of the pages.
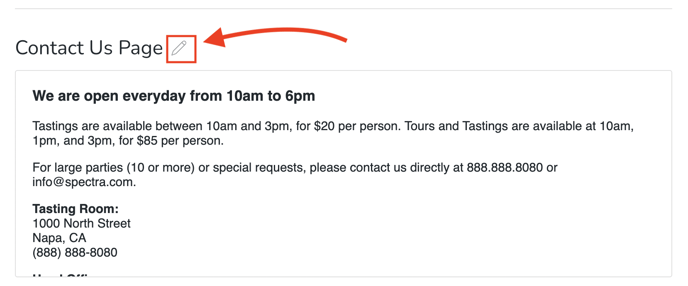
- Adjust the text that will appear on the Contact Us page (linked from your Storefront Footer). Click the pencil icon to edit.
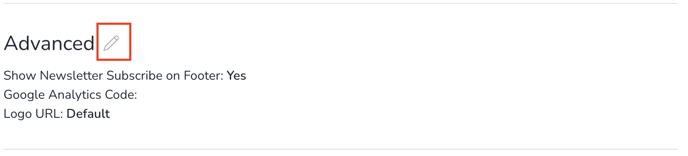
- Advanced Section
- Toggle whether you'd like to offer Newsletter Subscription on the Footer.
- Add Google Analytics Code (if applicable).
- Enter a Logo URL (By default the logo will link to your Storefront Homepage. Enter a URL to have it link to another website or page).
- Custom HTML and Tags Section
If your Designer would like to enter customized HTML into your Storefront, they can do so in this section.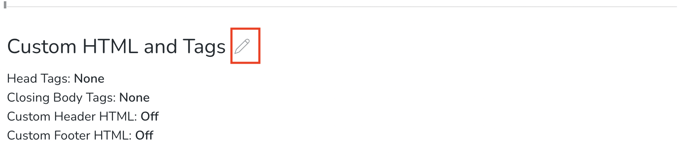
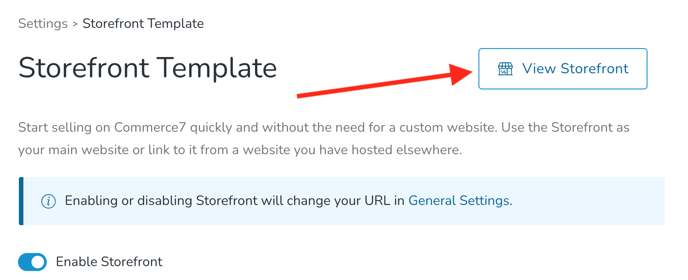
- Review your Storefront. In the top right corner of your screen, you'll see the View Storefront button. Review all the content on your website and make any changes necessary.
- Note that you can edit the Logo that displays in the upper left and the phone number listed in the footer by navigating to Settings > General in the Admin panel.
Defining which Collection(s) display in the Storefront
Collections are a grouping of Products to display to your Customers.
New to Collections? If you are new to Collections, click here to learn all about how they work.
Homepage Welcome Message (Personalization Block)
Create a Homepage Welcome message with a Personalization Block
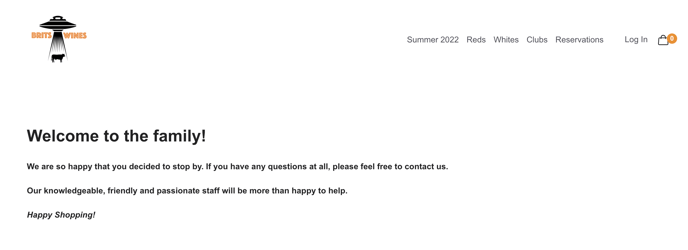
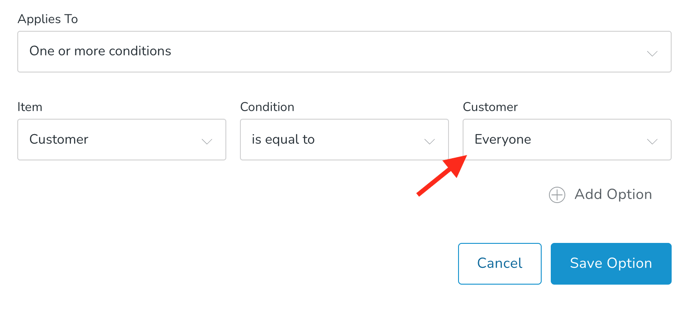
- By Default, you're going to see this block of text on Homepage:
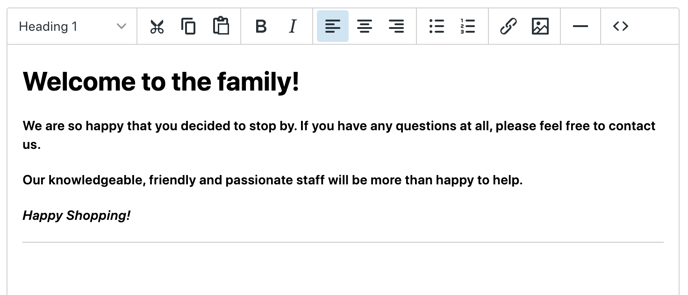
- To change this text, navigate to Marketing > Personalizations and click the block labeled "Homepage".

- Edit on the Product Collection section.

- Edit the text, confirm that the Condition is set to "Everyone" and then click the "Save Option" button.
Personalization Blocks are incredibly powerful! If you'd like to learn more about Personalization Blocks and how to use them effectively, click here.
Customizing Language/Verbiage for Customer-Facing Areas
Customize verbiage to better fit your brand
Finally, there are several editable messages/fields in the Storefront that can be customized.
- Go to Settings > Language.

- To learn all about how the Language feature works, click here for a full article and video.
Pointing your Frontend Website pages to your Storefront
Whether you use WordPress, SquareSpace or any other web-building application, it's easy to point pages from your Frontend website to pages on your Storefront! This video shows you how: