In This Article
- What are Collections & how do they work?
- Manual Collections: Collections where you (as the Admin) manually select which Products display.
-
Dynamic Collections: Collections where the system automatically groups Products based on the criteria that you (as the Admin) define. Example: All products with a "Product Type" of "Wine" will display in the 'Wines' Collection.
-
Personal Collections: Collections where the system uses an algorithm to suggest Products to your Customers based on their recent Orders and past buying history. (This Collection type is only used on your website, and is not an option on the POS).
- Changing Display Order & Which Products are 'Featured' (VIDEO): Changing the Display Order of your Collection so that specific Products are featured at the top.
What are Collections?
Collections are Product groupings used for display purposes on your website and/or in the POS. They can also be used to configure Promotions and Coupons.
Examples:
- Create a Manual Collection of your Gift Packs available for Mother's Day so that your online Customers can easily see them.
- Create a Dynamic Collection of your Reds so that it's easily accessible for your POS staff.
How Do They Work?
A Product can belong to multiple Collections at once - and you can create as many Collections as you'd like.
When you create a Collection, a page for that Collection will be created on your website (and/or POS portal) to display all of the Products that it contains. (If the Collection is not showing up on your website, contact your designer).
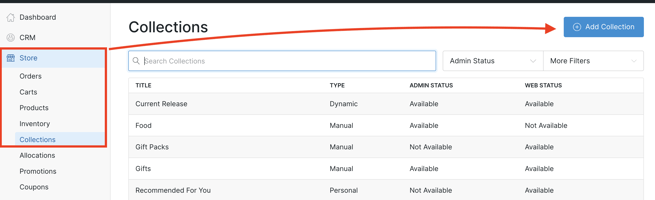
Creating a Manual Collection
- Go to Store > Collections and then click the Add Collection button.
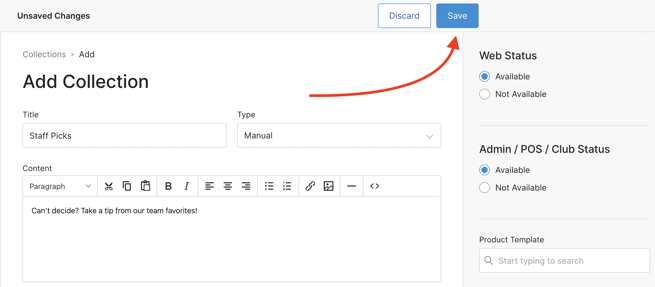
- Enter a Title (example: 'Staff Picks').
- Add Content to explain the Collection if applicable.
- Under Collection Type, choose Manual
- Click the Save button.
Adding Products to your Collection
You can do this either through the Collection itself, or by editing your specific product.
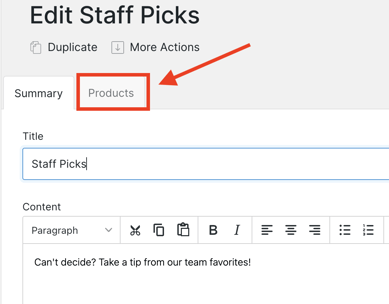
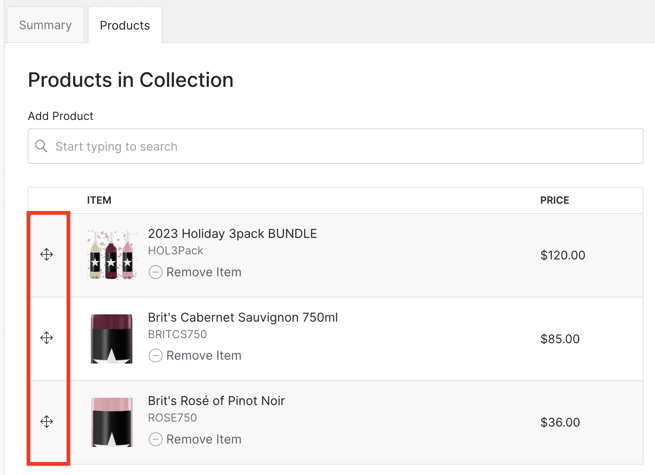
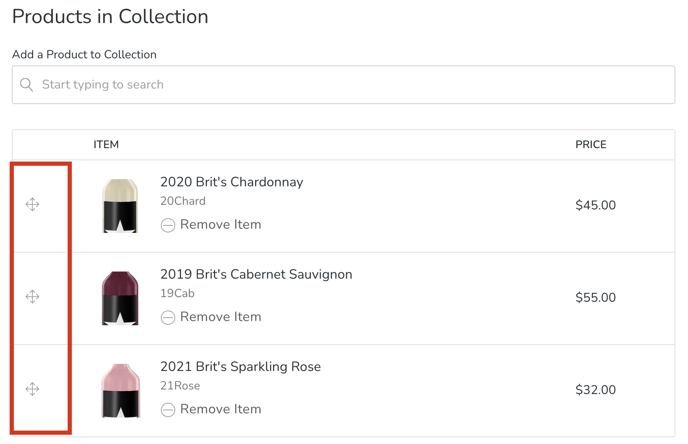
- Click into the Collection, and choose the Products tab.
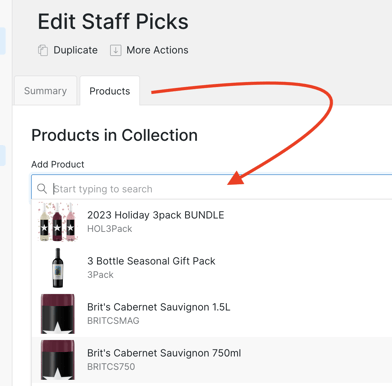
- Search for and select the applicable Products to add to the Collection.
- Edit the display order: Select the cross arrow to the left of the product, hold and drag to the position you'd like.
Adding Products to a Collection from the Individual Product Page
- Click into to the applicable Product, in the right-hand column, scroll down to the Manual Collections field.
- Select your new Collection and click the Save Product button.

Viewing your Collection on your Website
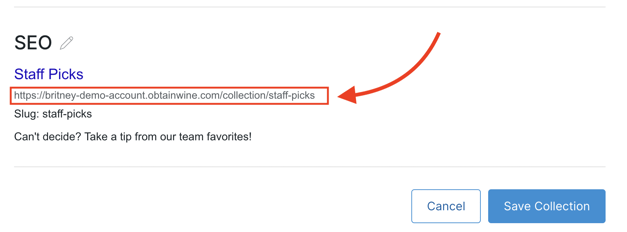
- Click into the Collection and scroll down to the SEO section.
- Visit the URL that is displayed here - and you'll be taken to this Collection's page online. You will see any Products that you've added to the Collection. If you don't see any products, this just means that you need to add some.
Viewing your Collection on the POS
Read a more in-depth step-by-step on how to manage Collections on the POS here.
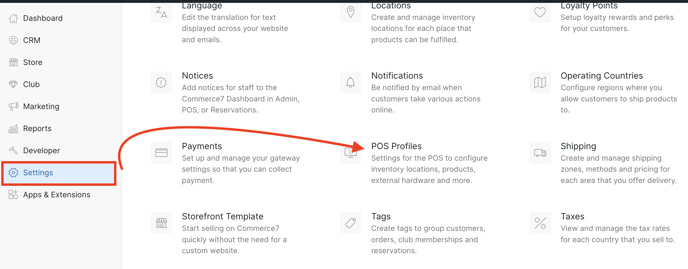
- If you have a Collection that you want to use as a category on the POS, go to Settings > POS Profiles.
- Scroll down to the Collections section. Search for and choose the Collection you'd like to display. Note that you can drag and drop to change the display order.
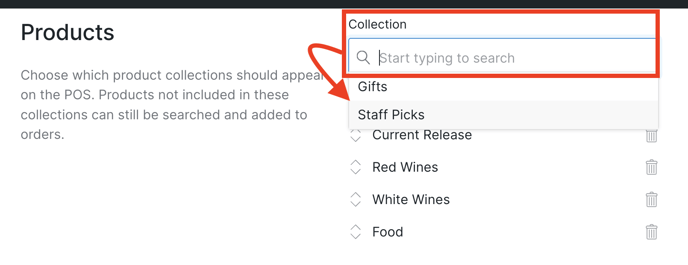
- After making your selection, click Save.

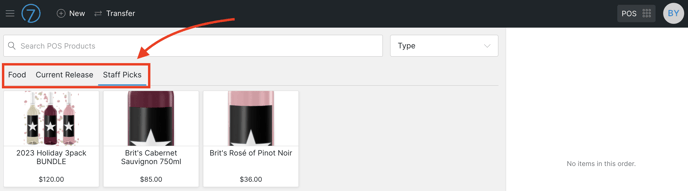
- To test, log into the POS and take a look. You'll see the Collections filter at the top. If you don't see any products, this just means that you need to add some.
Creating a Dynamic Collection
Dynamic Collections automatically display and group your products based on specific criteria that you set.
- Go to Store > Collections and then click the Add Collection button.
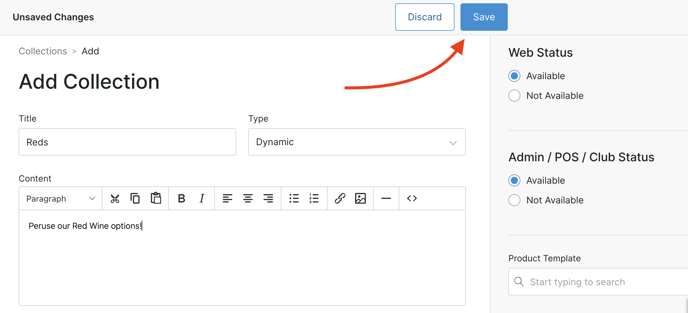
- Enter a Title (example: 'Reds').
- Add Content to explain the Collection if applicable.
- Under Collection Type, choose Dynamic.
- Click the Save button.
- Select the Condition(s) that a Product must meet in order to automatically be assigned to your new Collection. For our example, I'm selecting Wine Type is equal to 'Red'.
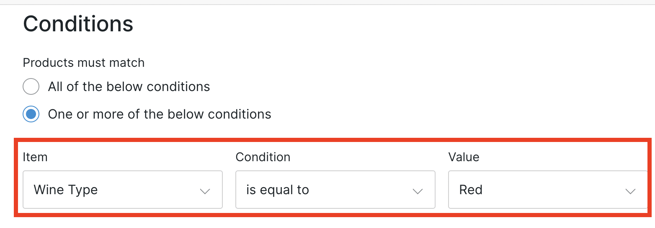
- Save your collection.
- Now that it's created, any Products that have a "Wine Type" of "Red", will automatically be added to this Product Collection.
Click here to learn how to add, remove and sort Collections on your POS.
Creating a Personal Collection
Personal Collections are created to showcase a tailored selection of products for each individual customer on your website. It is highly recommended to set up these personalized collections as part of your Commerce7 setup.
While it may require some design work, the benefits of enhancing the shopping experience for your customers, especially on the homepage, are well worth it in terms of improving customer satisfaction and boosting wine sales.
How Personal Collections Work
Commerce7's algorithm uses the Customer's recent Orders and past buying behavior to suggest similar Products that the Customer is most likely to purchase. In the cases where there is no customer record (i.e. an anonymous user), the system will use the most recent 50 web orders to suggest the most popular Products.
Note: When the system uses the last 50 web orders to suggest Products, it considers all Products that have been previously purchased on the web.
Avoid using "fake SKUs," such as a "Shipping Sku" added for shipping charges, as these may impact the products displayed in personal collections.
It's important to maintain clean data in the system to ensure accurate suggestions.
Setting up a Personal Collection
- Go to Store > Collections and then click the Add Collection button.
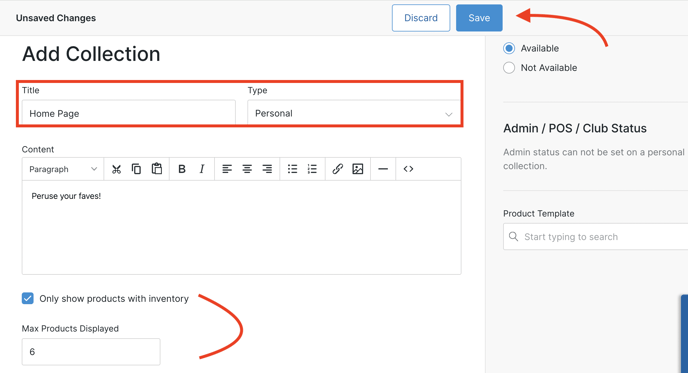
- Enter a Title (example: 'Homepage').
- Add Content to explain the Collection if applicable.
- Under Collection Type, choose Personal.
- 'Show Products with Inventory' checkbox: Choose whether you want the Collection to show only products that are currently in stock.
- Max Products Displayed: How many Products to you want displayed to your Customer?
- Since Personal Collections are most effective when displayed on the Homepage of your website, it's important not to set the maximum number of products too high. This ensures that the recommendations remain targeted and relevant to the customer, based on the range of Products you offer.
- Click the Save button.
- Once your Collection is fully configured, collaborate with your designer to incorporate it into your website, ideally on the Homepage. This allows Customers to quickly see personalized Product suggestions, encouraging them to make a purchase.
Featured Items & Changing the Collection Display Order
What are Featured Products?
Featured Products appear first in the Collection and have a background color. Here's what they look like:
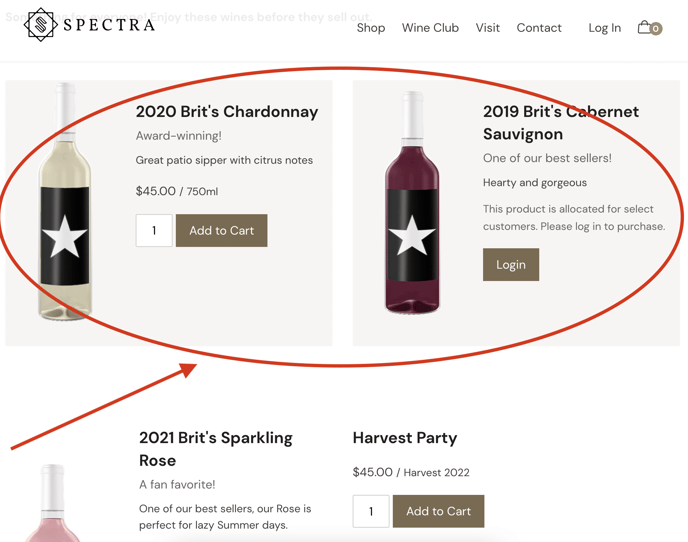
Changing the Display Order & Which Products are Featured
Change the order the Products appear on your website by dragging and dropping each Product. (Select the cross arrow to the left of the Product, hold and drag to the position you want). The Products that you place at the top will be the ones that display in the featured boxes.
Want to disable the Featured Product section altogether? Click here to learn how.