The Property Map gives you a daily overview of all Reservations occurring at that Location.
Here's what you can do from the Property Map:
- Check in, Close out, Capture Payment and more
- Start a POS order
- Link to review the full Reservation
- Move Guests from one table to another using the interactive map
- Manage Walk-up Reservations - Learn how here
Integrating a Property Map
- You will need the help of a designer/developer to set this up. Designers can reference the documentation Reservation property map setup for designers/developers.
- Check out the free and fast Reservation Map Generator developed by 5Forests. Upload your property map, add your tables, enter table codes and titles, copy the JSON code to your clipboard, paste into Commerce7.
- If you are a designer/developer, reach out to us in Slack for questions. If you aren't in our slack channel, email support@commerce7.com for an invite.
There can be multiple Property Maps for wineries with multiple Locations. This can work for multi-location wineries as well as multiple areas at a single location. Toggle between Locations by selecting the property map title at the top above the time slots.
After your map has initially been set up by your designer/developer, any time you create a Reservation Experience, the default Location you select for your Reservation type will correlate with a Location on your map. When a Reservation is booked, the information will automatically populate on the map.
Select a date & time on the slider and you'll see an overview of all activity on the property at that given time. The slider time slots are populated from Reservation Settings > General (Available Start Time and Available End Time).

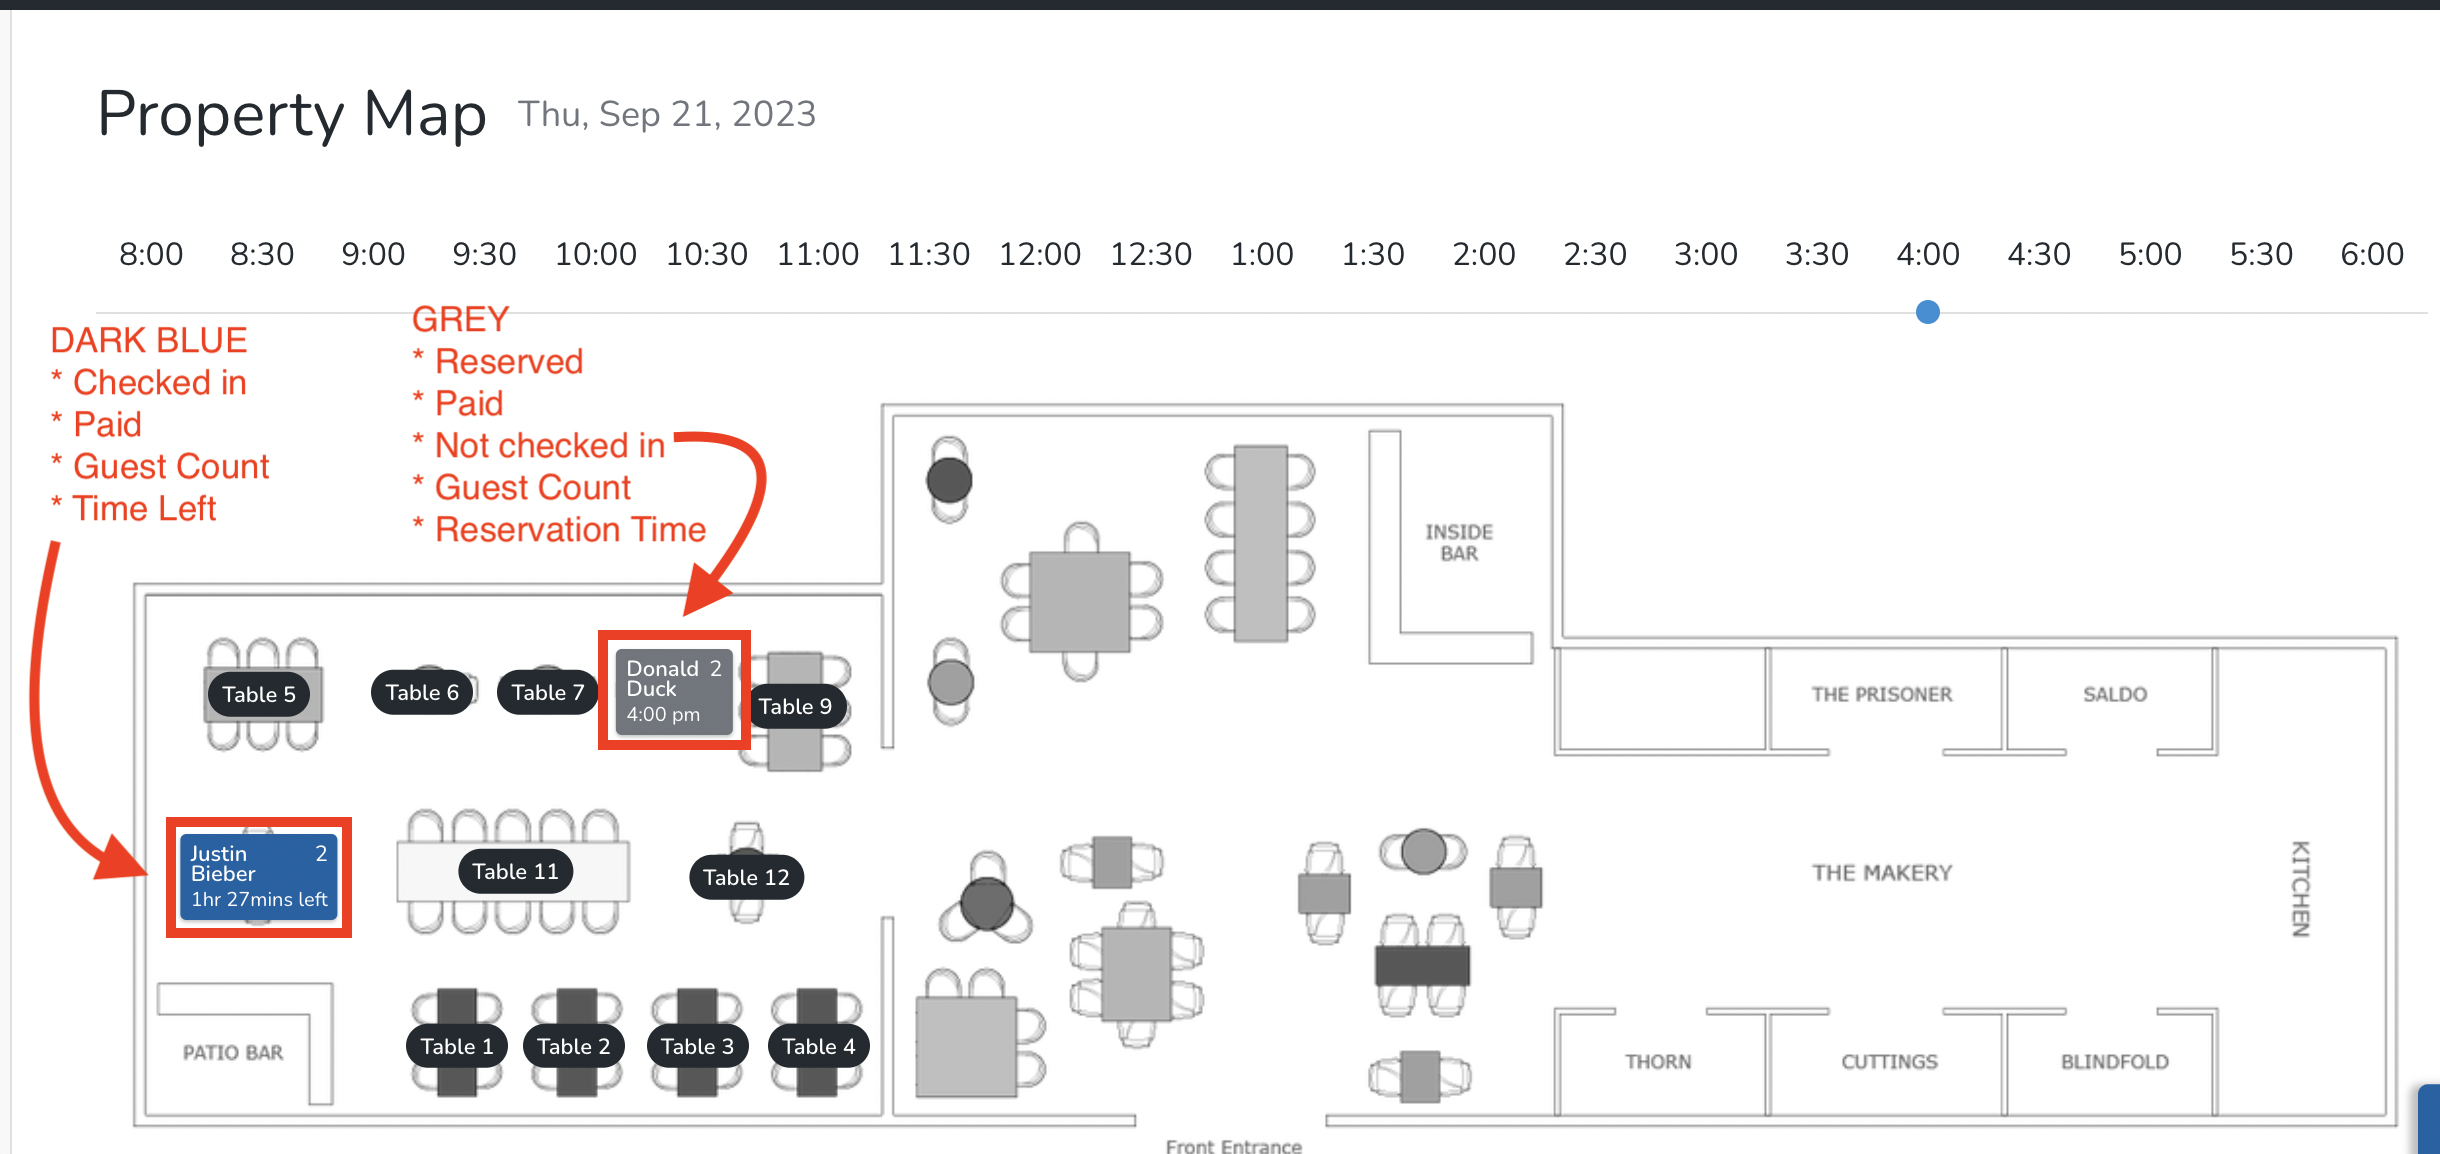
What do the different Colors mean?
| Color | What does it mean? |
| GREY |
|
| DARK BLUE |
|
| LIGHT BLUE |
|
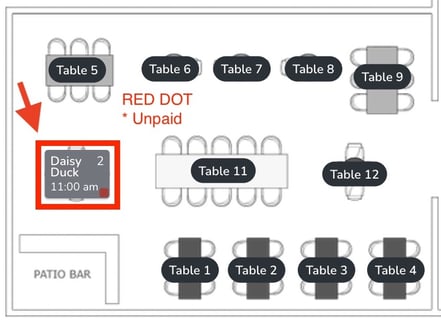
| RED DOT |
|
Examples of Grey and Dark Blue:
Example of Light Blue:
%20copy-jpg.jpeg)
Example of Red Dot:
Move Customers from one table to another
Need to move a Customer from one table to another one? Simply drag and drop!
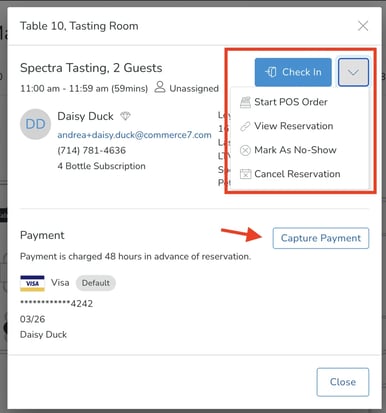
Check in, Close Out, Capture Payment and More!
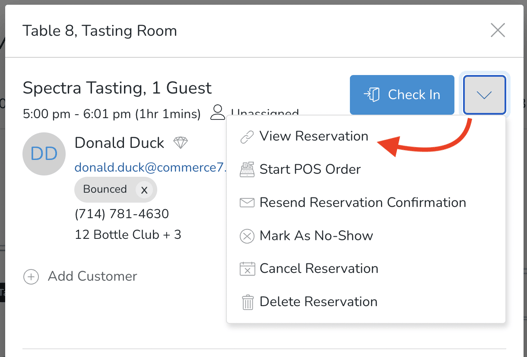
Click on the table, and you will be able to Capture Payment and Check in. Use the dropdown to Start a POS Order, View the Reservation, Mark as No-Show or Cancel the Reservation.
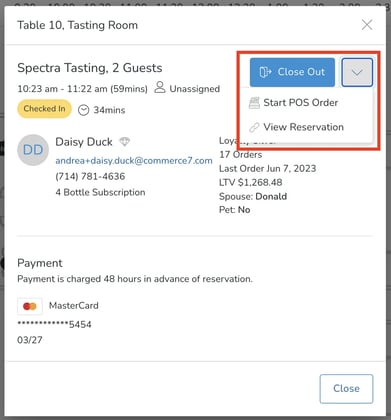
Once the party is checked in, you'll be able to click on the table, and will still be able to Start a POS Order, View Reservation or Close Out.
Viewing the complete Reservation
Choose View Reservation from the dropdown list.
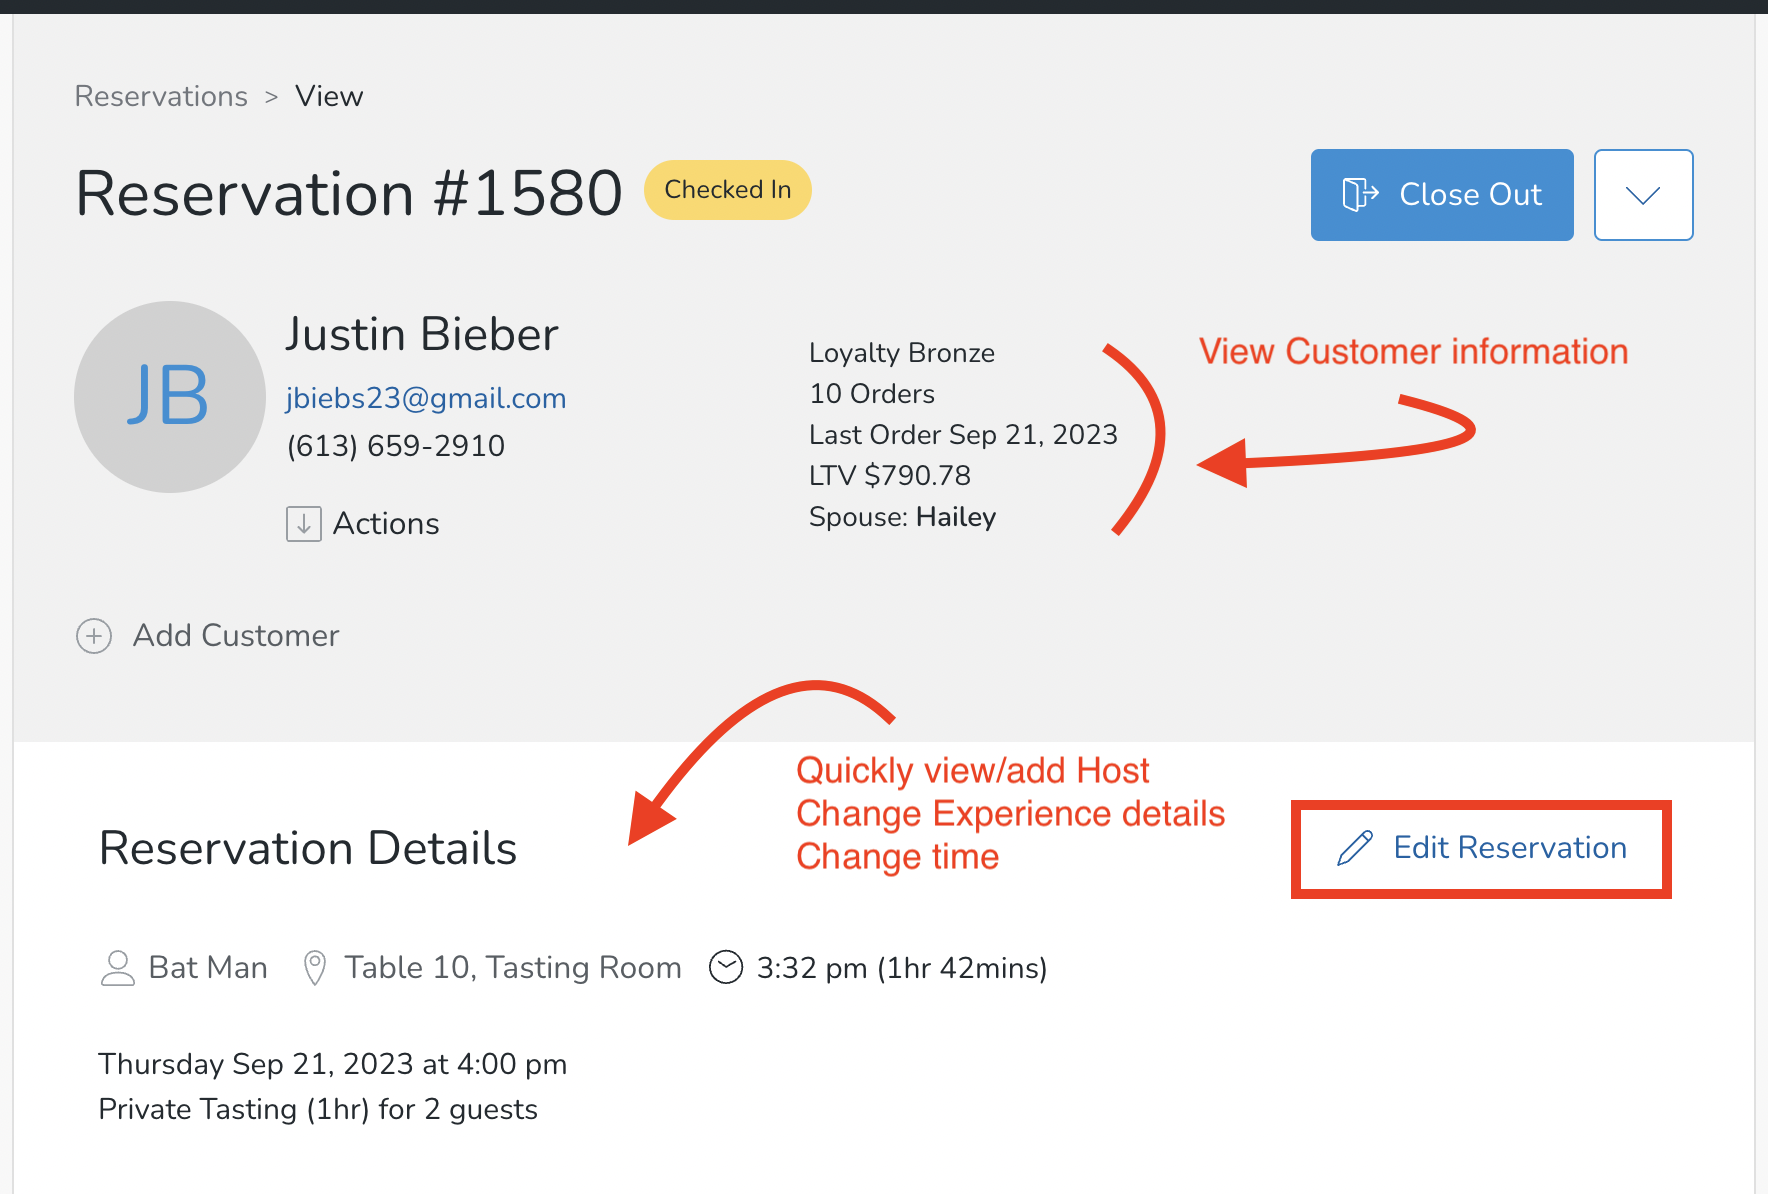
Once you are viewing the complete Reservation, here's what you can do:
- Check In or Close Out the Reservation.
- Review/Add/Edit the Host on the Reservation.
- View Customer information i.e. Club Membership and life time value.
- View/edit start and end time of the Reservation.
Starting a POS Order from a Reservation
- From the Property Map, choose a table.

- When you select 'Start POS Order', you can attach the Order to a Reservation.
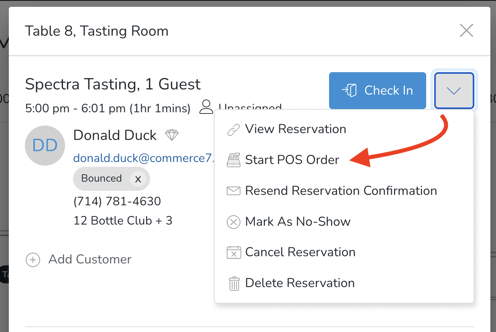
- When you select 'Start POS Order' it will automatically toggle to the POS and create a Cart. If there is more than one Customer tied to the Reservation, you will be prompted to choose the applicable Customer.
- Once the POS Order is complete, you can toggle back to the Property Map or Reservation List with one click.
- Customer might be adding more bottles to their POS Order? Not a problem. You can toggle between the POS and the Reservation without losing the Cart.
