- In Reservations, Select Property Map in the menu.
- Click the Today button to automatically choose today's date.

- Choose a time and click on any open table in the map.

- In the pop up modal, enter Customer and Reservation information.
- Search for an existing Customer, enter a new Customer - or if the Customer wants to remain anonymous at time of reserving, you will be prompted to enter a Reservation Note prior to saving. (Anonymous Reservations will only place a Reservation hold and not complete a booking. The table can only be checked in after a Customer is added to the Reservation).
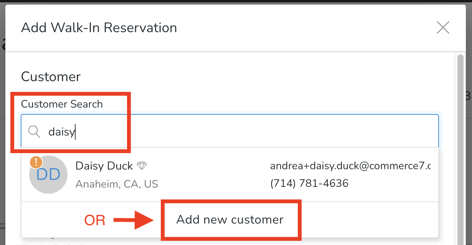
- Search for an existing Customer, enter a new Customer - or if the Customer wants to remain anonymous at time of reserving, you will be prompted to enter a Reservation Note prior to saving. (Anonymous Reservations will only place a Reservation hold and not complete a booking. The table can only be checked in after a Customer is added to the Reservation).
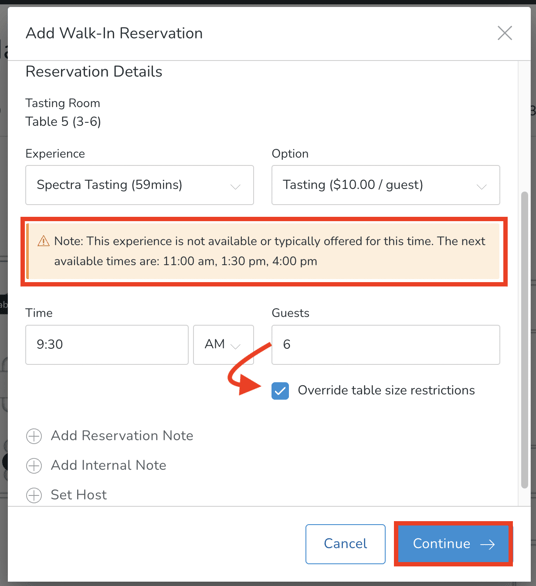
- Enter the Experience, Option, Time and Guest count.
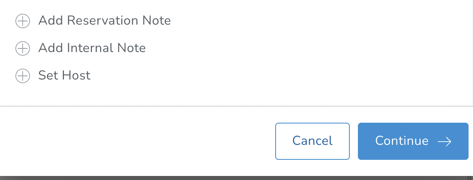
Note: If you did not choose one of the available times for this table, you will see a flag notifying you of when the next time is available. You can then enter one of the available times (and the flag will go away), or you can simply click Continue. You will also have the opportunity to override the max Guest count if-needed by clicking the Override box. - Add Reservation Note (optional unless Customer is anonymous), Internal Note (optional) and Set Host (if applicable).
- Once you've filled in all information, click Continue.
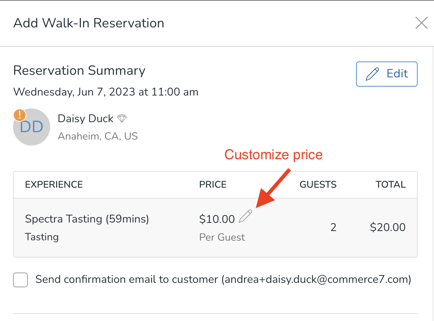
- Take a look at the Reservation Summary.
- If you'd like to edit the price, click on the pencil icon.
- Note: If the Reservation Experience is set to 'Charge on Booking', then you will have the opportunity to add a Coupon, if applicable.
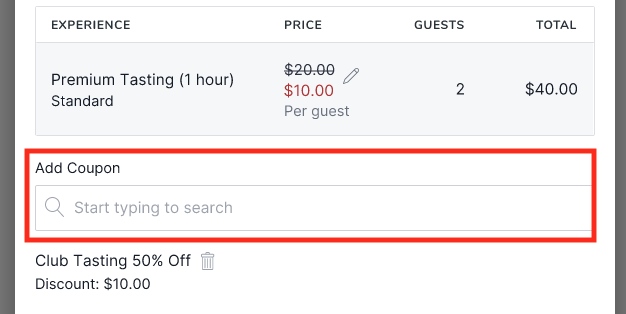
- Note: If the Reservation Experience is set to 'Charge on Booking', then you will have the opportunity to add a Coupon, if applicable.
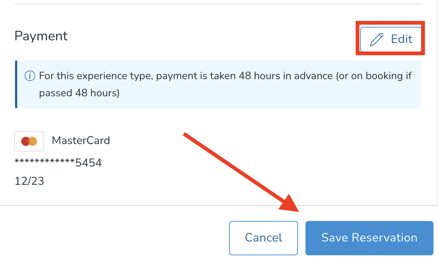
- Enter or Edit payment information and click the Save Reservation button.
Note that if this is an anonymous Customer, you will not see the Payment entry information in this screen. Instead, the Reservation will display as unpaid until you click into it to add the Payment.
- If you'd like to edit the price, click on the pencil icon.
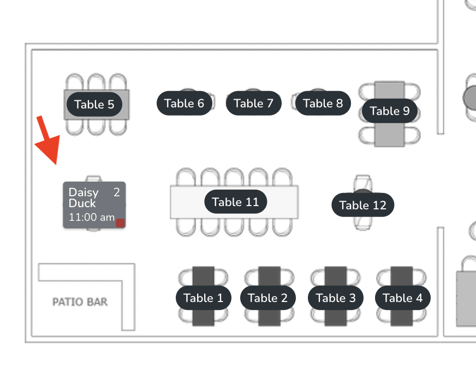
- Here is what it will look like on the Property Map.
- Any table that is unpaid (card missing or no payment on the Reservation) will display a red dot on the table).
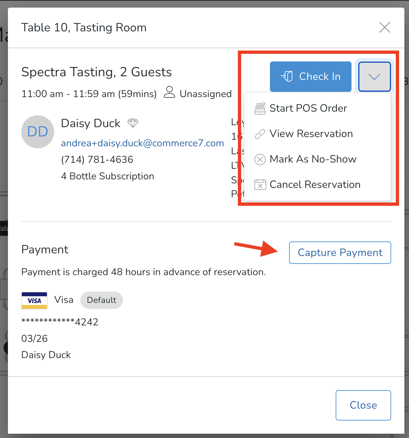
- Payment will automatically be captured based on the Reservation Type settings. If payment is supposed to be captured 48 hrs in advance of reservation time (and you are within the 48 hr time-frame), then that payment will be captured automatically within an hour.
- You have the option to manually capture it if you'd prefer.
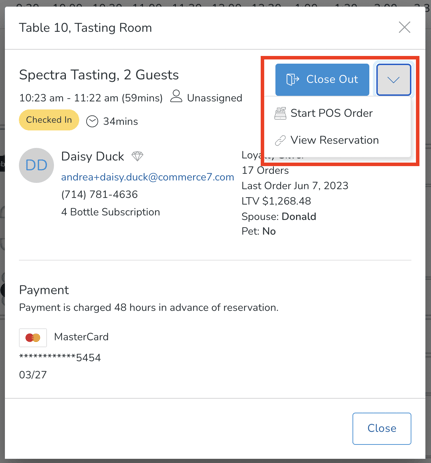
- Click on the table, you will be able to Capture Payment and Check in. Use the dropdown to Start a POS Order, View the Reservation, Mark as No-Show or Cancel the Reservation.
- Once they have Paid and Checked in, the table will turn blue and look like this:
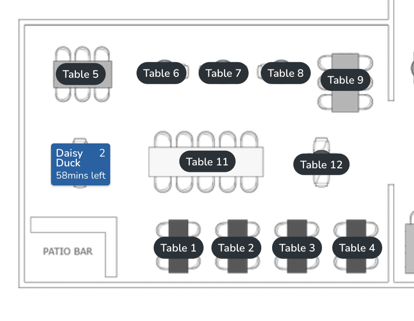
- Now if you click on the table, you will still be able to Start a POS Order, View Reservation or Close Out.