The Corporate Orders extension enables you to generate multiple orders, each with a different shipping address, all under a single purchaser.
This means that the customer responsible for payment will only receive one consolidated charge reflecting the total amount for all Orders placed.
The Corporate Orders feature is not available for C7 Lite users.
If you would like to upgrade to the full version of Commerce7, please contact Support.
🎓 Commerce7 Academy Callout
Did you know that there's a Commerce7 Academy course all about Corporate Orders? Click here to access concise video modules that guide you through the process step by step.
In this Article:
Enabling the Corporate Orders Extension
Enabling the Corporate Orders Extension
- Go to Apps & Extensions and clicl on the Corporate Orders extension.
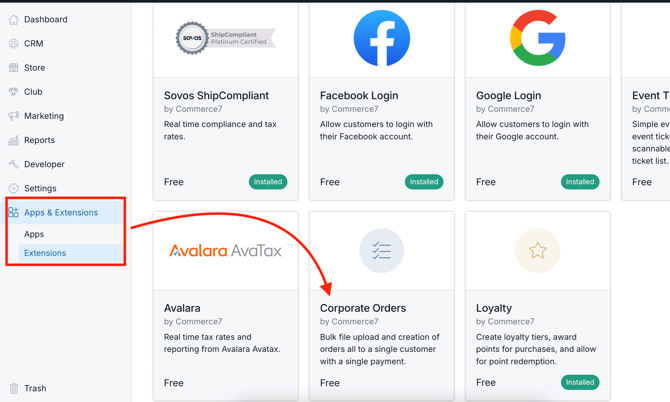
- Click the Add Extension button.
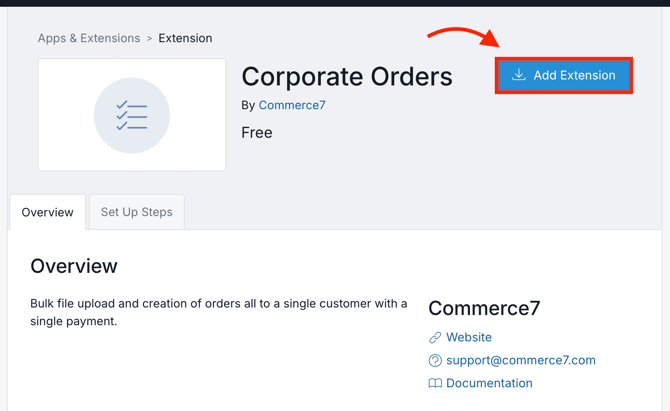
- That's it! It will now show as Installed.

Adding a Corporate Order
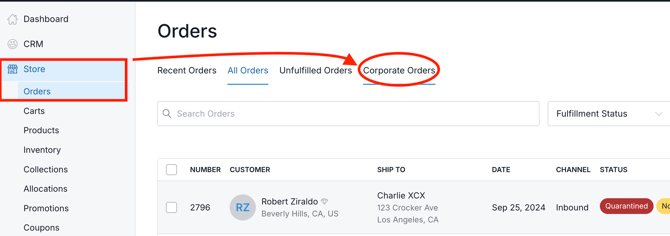
- Go to Store > Orders and select Corporate Orders at the top.
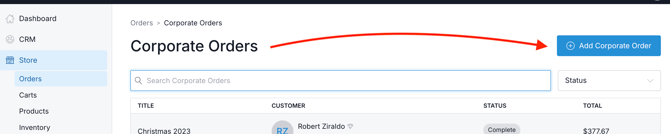
- Then click on Add Corporate Order.
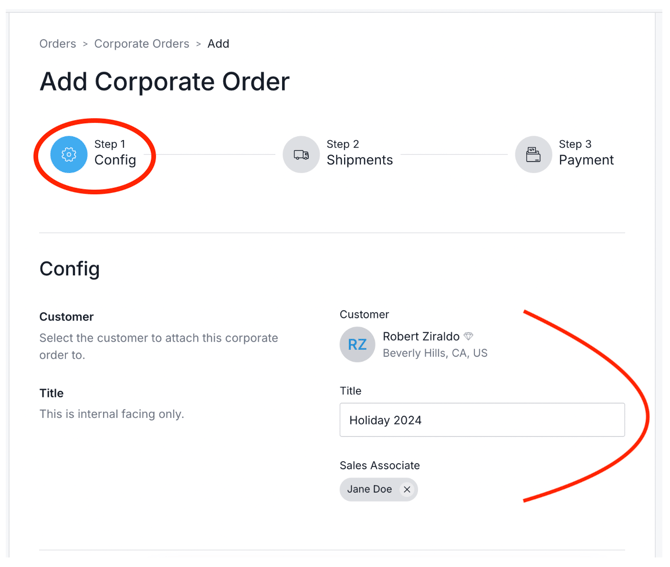
- Step 1 Config
- Customer: Refers to the person purchasing the Corporate Orders.
- Title: This is an internal-facing name for this Corporate Order (example: Holiday 2024).
- Sales Associate: Choose a Sales Associate if applicable.
Filling out CSV File
The CSV file is very specific. It's important to not edit any of the column headers and to follow the format laid out below.
- At the bottom of the Step 1 Config screen, download the sample file.
 File Link: download a sample .CSV
 - Fill out the CSV being mindful of the following:
- BirthDate field must be in the following format: YYYY-MM-DD

- ShipDate field must be in the following format: YYYY-MM-DD
- Shipping Code field must match one of your existing Shipping Methods (if you're not sure, go to Settings > Shipping to confirm).
- Shipping Price
-
Yes, I want Shipping Rates to apply as they would to any Order
Shipping Rates will automatically apply if the ShippingPrice field is left blank in the upload template.
-
No, I don't want Shipping Rates to apply automatically
Enter a value into the ShippingPrice field. For example, enter a '20' in the ShippingPrice field if you'd like the Orders to calculate a $20 flat shipping fee.
-
- Item Price
- Yes, I want Promotions to apply
Promotions are applied if the Gifter is eligible for the Promo and if the ItemPrice field is left blank in the upload template. - No, I don't want Promotions to apply
Enter a value into the ItemPrice field that is less than the original price. Whatever you enter there will override any other pricing/discounts. (Note that if you enter a value that is equal to (or more than) the original price, applicable promotions will still apply).
- Yes, I want Promotions to apply
- Country Code: Must be a valid (2 character) country code (ie. US, CA, AU, ZA, etc.).
- BirthDate field must be in the following format: YYYY-MM-DD
- Once filled out, save the file as a CSV.
Note: The Corporate Orders feature is designed exclusively for shipping orders and does not support pickup orders.
Uploading the CSV File
Now that you have a saved CSV file, it's time to upload it so that the Orders can be created.
- Click the Upload CSV File link.
- Click the Save Corporate Order button.

- At this point, you may receive error messages. A common one is the Date Format error. If you receive this, open the file, edit the date formats to YYYY-MM-DD and save (but don't close) the file. If you'd like to see a video about how to resolve this error, click here. Once you've done that, re-attempt the upload.
- Once the file is successfully uploaded, you will be taken to Step 2. If you don't immediately see the Carts created, please refresh your browser.
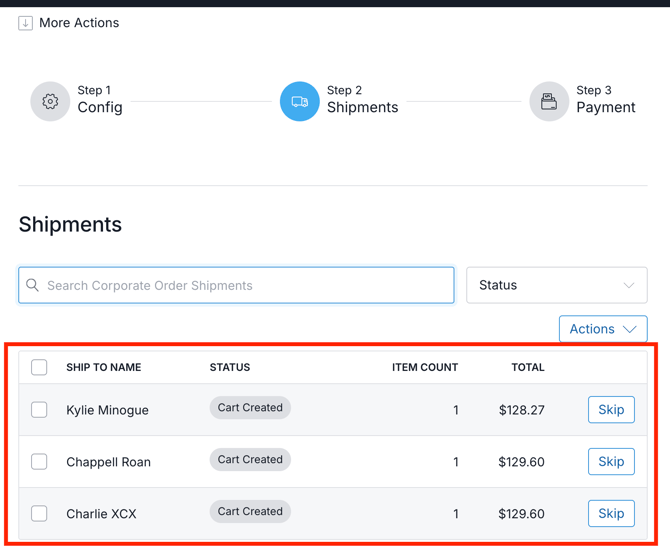
- In this screen, you'll have the opportunity to Skip / Unskip recipients prior to creating and processing the Orders.
Processing Corporate Orders
No transaction emails are sent during Corporate Order processing. However, fulfillment-related emails will be sent to the main customer on record.
- Go to Step 3 to process the payment. (The amount displayed will be the sum of all processable Corporate Orders in Step 2).
- You can choose to pay with a Credit Card (either new or on file) or External Tender.
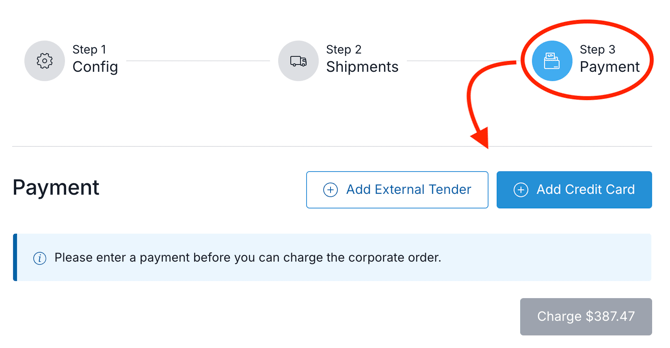
- Click on the Charge button.
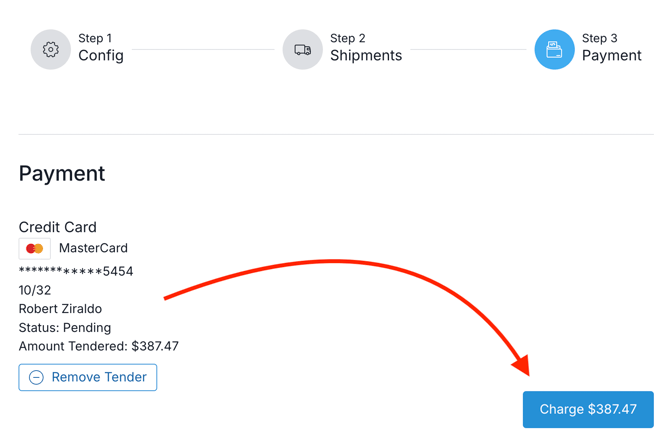
- Once processed, go back to Step 2, where you'll see the Status of each Order.
- You can filter and/or export from this screen as well.

- Completed Orders will appear with all other Orders under the Store > Orders tab. (They will also appear under the purchaser's Customer Profile).
-
Inventory note: Corporate Orders will pull from Inbound shipping inventory location.
Generating a Receipt
Receipt for Purchaser
There is no transaction email or receipt that is sent to the Purchaser. So here is what we suggest:
After completing the payment for a Corporate Order, you have the option to generate a detailed PDF receipt. This receipt will outline the breakdown of each recipient's items, including order SKUs, shipping information, and total costs. Additionally, it will provide a summary of the overall totals, shipping charges, and taxes for the entire Corporate Order.
- Go to More Actions > Print Receipt.

- Here's an example of what it looks like:
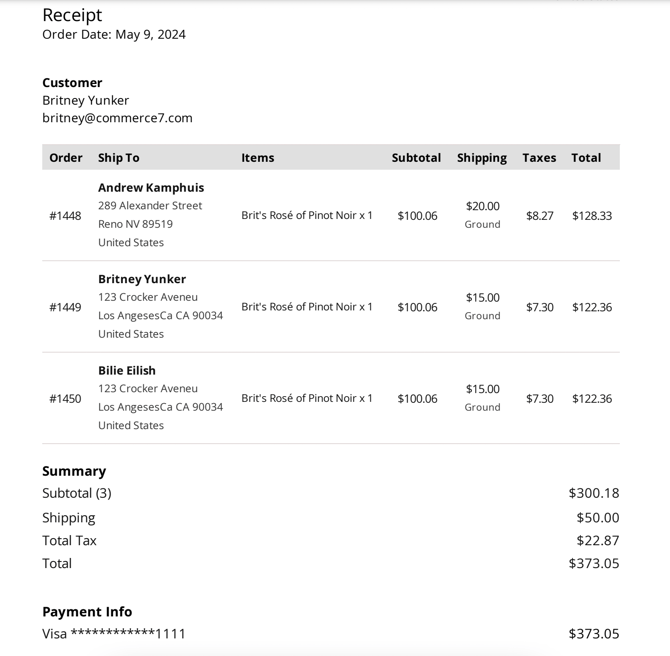
- Send this receipt as an attachment to the Purchaser along with a personal thank you email.
Refunding a Corporate Order
Did you add the incorrect shipping rate or vintage? Need to refund the Corporate Order to start over? Click here to learn how.
Reporting on Corporate Orders
Reporting on one specific Corporate Order
If you'd like to report on all Orders associated with one specific Corporate Order, here's how:- Go to the applicable Corporate Order and navigate to Step 2.
- In the Actions dropdown, choose Export Corporate Order Shipments.
- The export will give you all data for each Order, including dollar totals.
Reporting on all Corporate Orders
If you'd like to see ALL Corporate Orders for a particular time period, you can Tag them and then use that in an Order Query. Here's how:- From the Orders screen, enter the email for the Purchaser so that you're only seeing their Orders in the results.
- Add a date filter to define the Pay Date. Use 'Between' and enter in the date paid for both beginning and end dates.
- From the Actions menu, you can Tag the results (something like, 'Nov Corp Orders').
- Repeat these steps for each Purchaser.
- Now you can run an Order Query using that Order Tag. Export that to get all of the Corp Orders for that time period. To learn more about Order Queries, click here.