Utilizing Commerce7 forms is an effective method for collecting customer data.
When visitors complete the form, a new contact is generated or the existing contact details are updated.
Additionally, you have the option to send form submissions via email to a staff member for evaluation.
Create customized questions (example: How did you hear about us? or What is your favorite event?). While this information may not be visible on the contact record, it can be easily accessed within Commerce7.
Creating a form
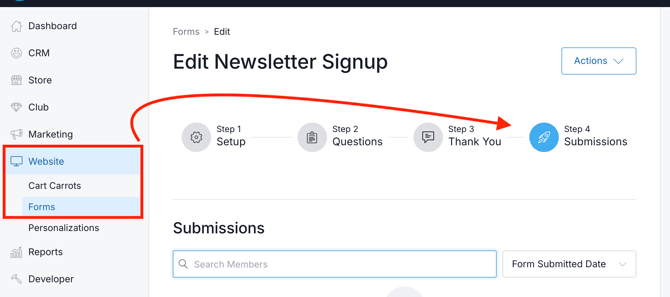
- Go to Website > Forms and click the Add Form button.

- Enter a Title. This Title is internal facing and will not be visible to website visitors.
- Enter an email address. Any time a visitor fills out this form, a copy of the completed form will be sent to this email address.
- When a respondant completes a form, you have the option to automatically add them to one of your Manual Tags. Learn all about Manual Tags here.

- Define the attributes you would like to collect on your form. By default, forms will always ask for a visitor's email address. If the email does not exist in your Commerce7 account, a new customer record will be created.

- Define which of the attributes should be Required fields.
- You can also capture custom customer attributes you have created. (Click here to learn about custom attributes.) It is important to note that the option to specify whether a custom attribute is required or not is not available. This status (required or not required) is determined at the individual customer attribute level in the developer section.
- Click Save Form.
- In Step 2, click Add a Question The answers to these questions will not be logged in the customer record, but will be logged in the form response itself.

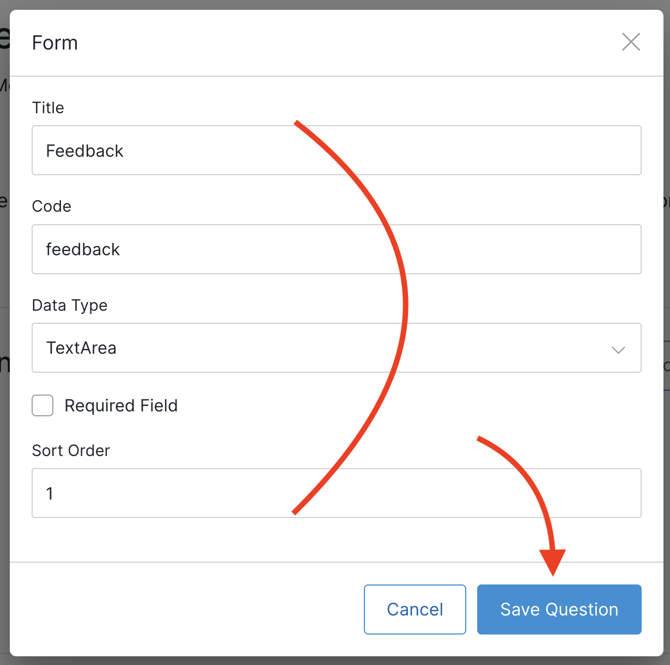
- This will open the Add Question popup modal.
- Give your question a Title: This Title will be customer facing.
- Select a Data Type that makes sense for your question.
Example: If you are asking a simple question like "Do you like wine?" it would be best to use a "yes/no" data type. However, for a more detailed question like "What is your experience with wine?" using a drop-down select with pre-filled answer options would be more suitable. - Define if your question will be Required or not: If the Required box is checked, visitors will be forced to answer the question before proceeding. If the Required box is not checked, visitors will be able to skip this question.
- Select a Sort Order. The sort order will determine the order in which questions will appear on the form. For example, the question with a sort order of "1", will be the first question on the form. A question with a sort order of "3", will be the third question on the form.
- Click Save Question when you are finished.
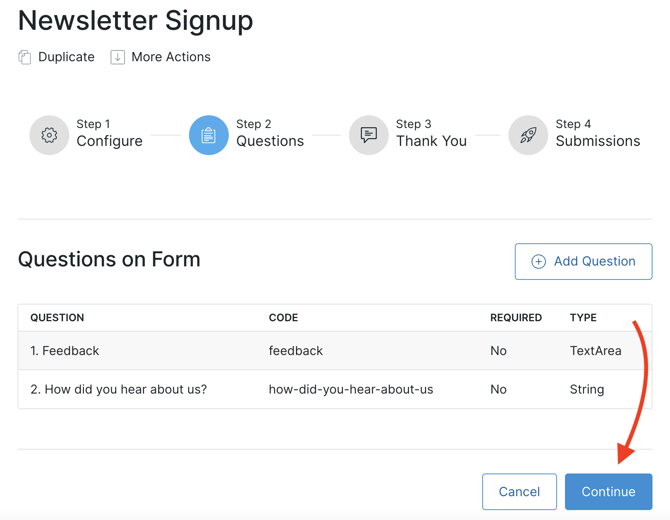
- You can create as many questions as you'd like. To create another, just click the Add a Question button again.

- When you have created all desired questions, click Continue to proceed to step 3.
- Step 3: Create a Thank you message. This will be displayed to a visitor after they complete and submit your form. The message you enter can be styled through the toolbar on this page, or through the CSS on the front end.

- Your form is now complete! Refer your designer to this page for instructions on placing your form on your website.
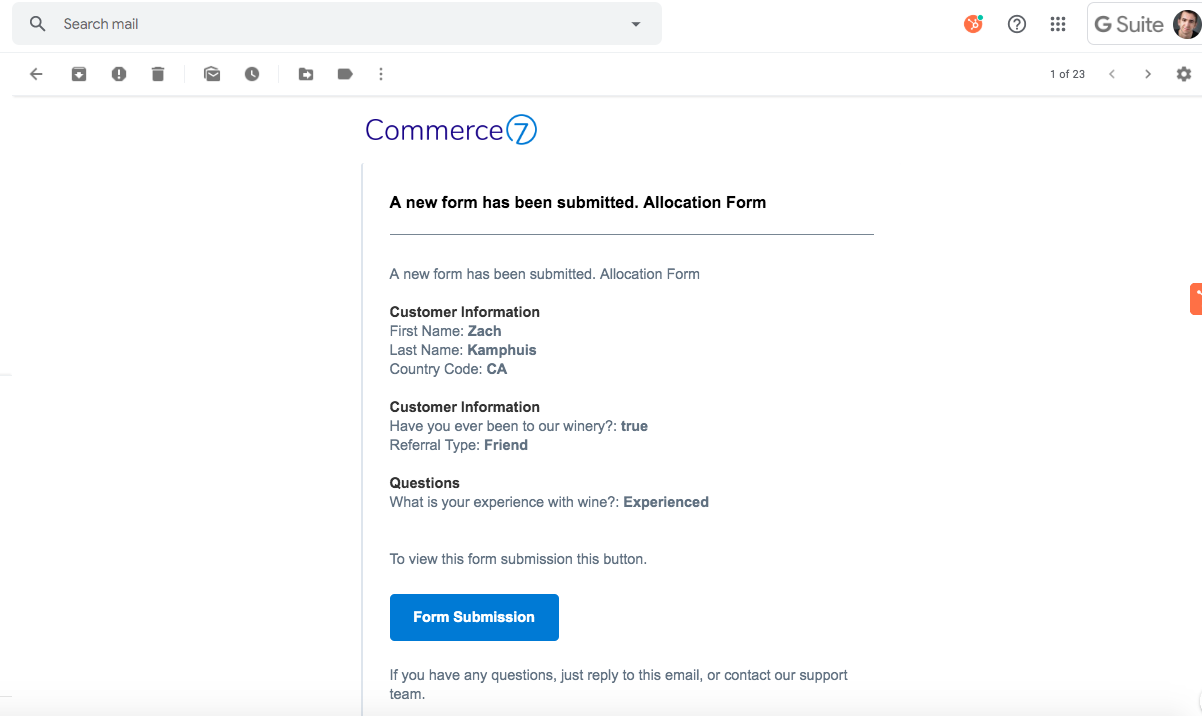
Form submissions
When a customer completes your form online, you will be emailed a copy of the form response.
Do Commerce7's forms have reCAPTCHA?
Yes! All public Commerce7 forms, as well as certain private ones, utilize reCAPTCHA v3.
This version operates silently in the background, so visitors are not prompted to complete any additional verification steps.