In this article
Assigning a Department to a Product
Difference between Departments and Collections
What is a Department?
Departments serve as categories that help organize your Products internally, mainly for accounting purposes and to be displayed in Sales Reports.
Moreover, Departments can be utilized in the Admin panel for tasks like setting up Coupons, Promotions, and Dynamic Collections. Examples of Departments commonly used are 'Wine' or 'Merchandise'. We've also seen Departments for 'Food', 'Clothing', etc.
It's important to note that each Product can only be assigned to one Department, and they won't be visible on the front end to Customers.
Need a more flexible grouping option?
For more flexible grouping options, consider using Collections instead. Collections can be displayed on your website and utilized in the POS for better organization. Learn more about Collections here.
Creating a Department
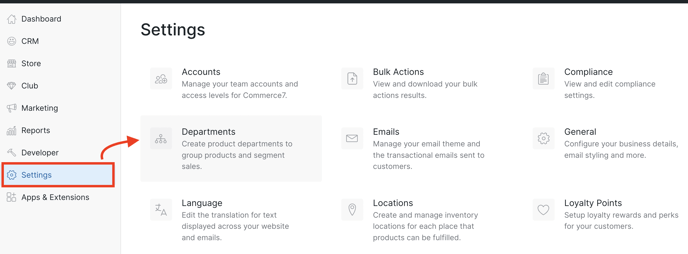
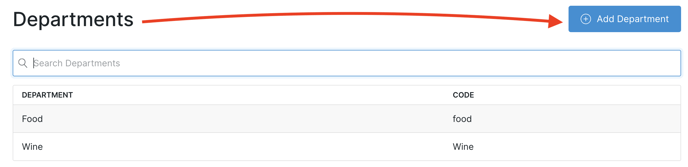
- Go to Settings > Departments.
- Click the Add Department button.
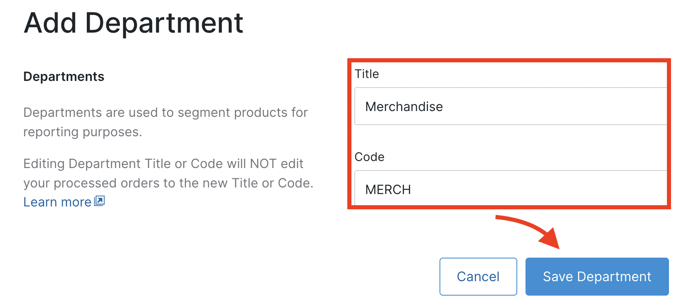
- Add a Title and Code and Save Department. (The code is only used by designers/developers for API calls and is not something that a Customer would ever see).
Assigning a Department to a Product
- Go to Store > Products > select a Product.
- Click on the Advanced tab.
- Select the Department that you want to apply and Save.

When creating a new Product, note that you cannot assign a Department to it right away. The Product must be saved first before you can access the Advanced tab to assign a Vendor.
NOTE: Product Bundles and Reservation Products cannot be assigned a Department.