In this Article
Additional Reservation Information - Notes, Tags, Meta Data etc. (VIDEO)
Attach Additional Guests to an Existing Reservation
Checking in a Guest
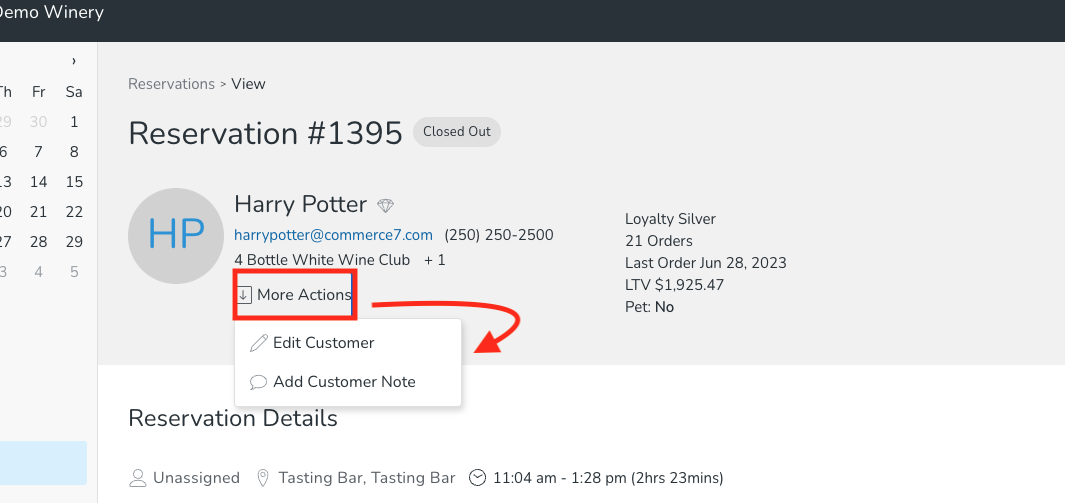
- At the top of the Reservation under the More Actions link, you'll see options to Edit Customer or Add Customer Note. You will also see an at-a-glance summary of Customer stats.
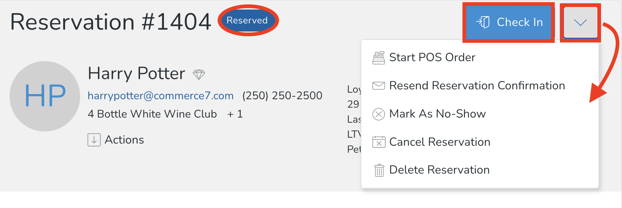
- In the top right, you can click the Check In button, or choose an item from the down-arrow:
- Start a POS Order
- Resend Reservation Confirmation to the Customer
- Mark the Customer as a No-Show
- Cancel the Reservation
- Delete the Reservation
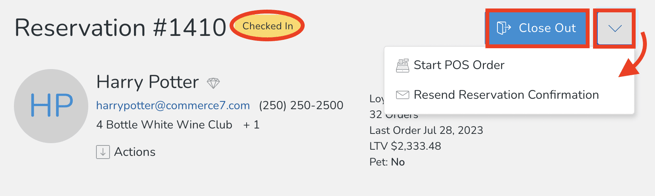
- If the Guest is already Checked In, then they will see the Close Out button and the following options displayed from the down-arrow:
- If the Guest is Closed Out then they will see only the following option displayed from the down-arrow:

Editing a Reservation
- In the Reservation Details section, you can assign a Host and/or edit the Table/Experience.
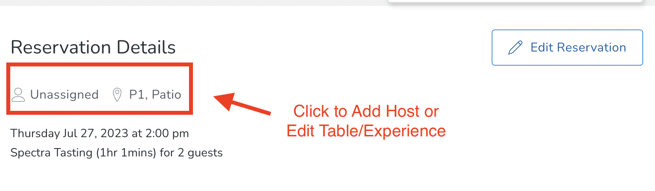
- Choose applicable Host / Table / Experience in the modal(s).

- Or you can click the Edit Reservation button.

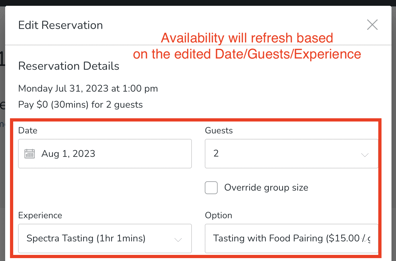
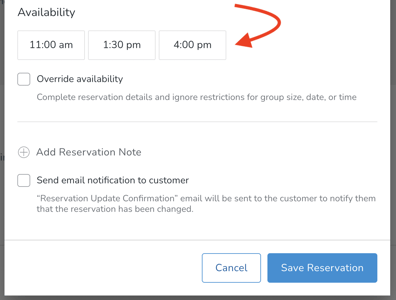
- Change the Date, Guest count and/or Experience. Availability times will refresh based on your choices. Note that you will have the ability to Override the Group Size if-needed.
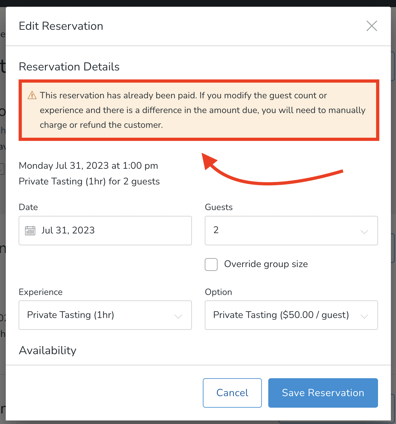
- If the Reservation has already been charged - and any changes made during the edit result in additional payment, a flag will appear to indicate this.
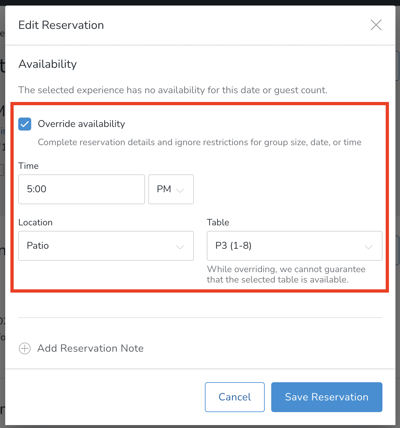
- If you would like to override the Reservation Availability, click the Override box and you will be able to enter whichever time/Experience/Guest count you'd like. When you are happy with the edits, click Save Reservation.
Editing the Payment
- If the Reservation has not been paid for, you can edit the price and payment details. Payment will be collected according to the Charge Type for the Experience listed (i.e. pay upon check in). If you'd rather collect payment now, click the Capture Payment button.

- Once it's paid, you will see an Order number appear, along with all totals. If you want to be taken to the Order, click the View Order button.

Additional Reservation Information (Notes, Tags, Meta Data, etc)
- On the right column of a Reservation screen, you'll be able to add Reservation Notes, Customer Notes, initiate a POS Order or add Tag(s).

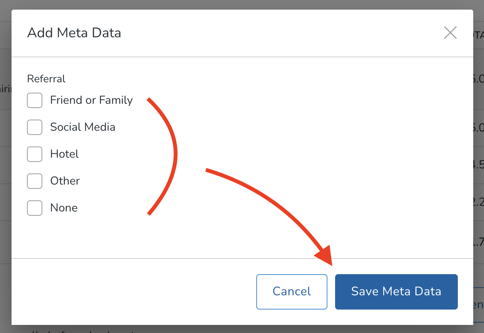
- You will also be able to add Meta Data (if you have created any). Click the Add button open the modal. Note that this section will only appear if Meta Data fields are created in Admin under Developer > Meta Data > Reservations. Learn more about creating Meta Data fields for Reservations here.

- Choose the applicable Meta Data and Save.
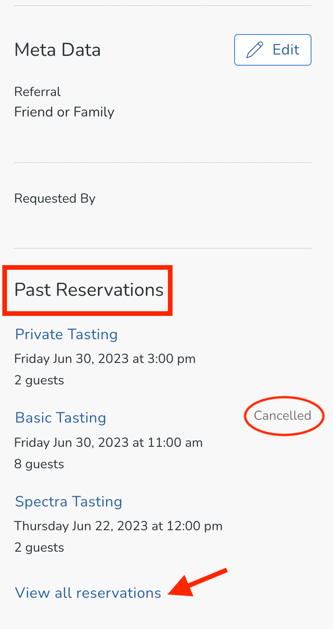
- Near the bottom of the column you will see the 3 most recent Reservations. Click on the View All Reservations link to see all Reservations for this Customer. Note that if a Reservation has been Cancelled or is a No-Show, you'll see that notation.
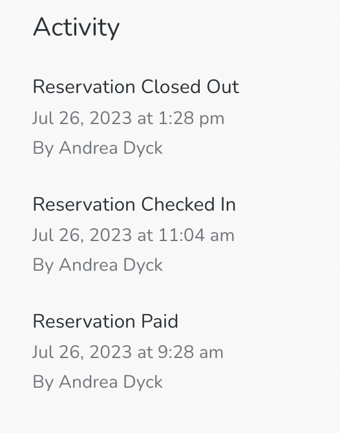
- Finally, at the very bottom, you will see all Activity that's taken place for this Reservation.
Attach Additional Guests to an Existing Reservation
If you'd like to add multiple guests to the same Reservation, you have the flexibility to do so. This helps you keep track of everyone in the party, not just the person who made the Reservation payment. Additionally, the Reservation will be visible on the contact record for any additional Customers.
- When editing a Reservation or viewing one from the Property Map, click on the Add Customer link just below the main Customer's name. (While searching for a Customer to attach, if no record exists, they’ll have the option to add a new customer, just like you can from a Cart or from the POS).

-
Here's what it will look like once the additional Customer(s) are added to the Reservation:

Initiating a POS Order from a Reservation with multiple Customers attached
When initiating a POS Order from a Reservation, you have the ability to choose which Customer it should be tied to. The POS Order will reflect any applicable discounts for that individual.

Complete the POS Order as normal. The POS Order will be reflected on the applicable Customer's record.