In Commerce7, setting up Custom Fields is a way to collect data that is relevant to your business. After creating order Custom Fields, they will appear on orders and will be included in the order export.
Note that Order Custom Fields are available to add to Orders via the Admin Panel and POS. Your Customers will not see Custom Fields choices for Web Orders.
- To create an attribute for an Order, navigate to Settings > Custom Fields.
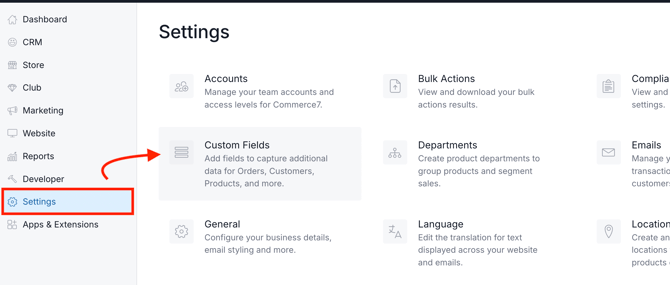
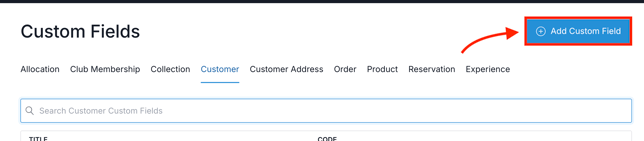
- Click Add Custom Field.
- In the list, choose Order.

- Select a Title for your attribute.
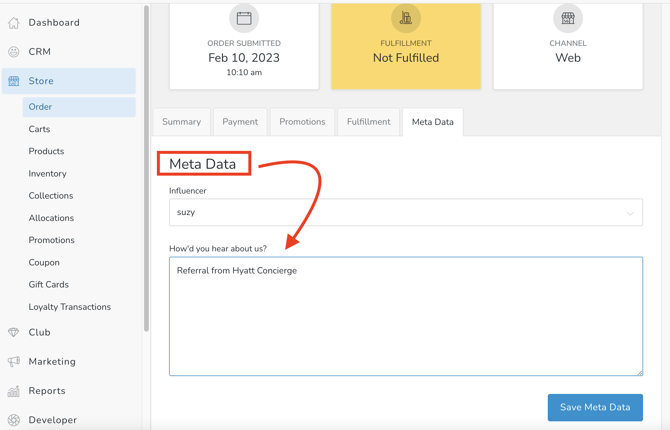
For an example, you could create an attribute for logging order referral type on Orders: "How'd you hear about us". - Code is just a reference point for doing API calls. You do not need to change this, but you can if you'd like.
- Next select your Data Type. There are 11 different data types available.
Learn more about the Data Types here. - Decide whether or not you want your attribute to be a Required field. Learn about how this field works here.
- Finally you can set the Sort Order. The sort order determines the display order your Order attributes will appear in.
- Click Save Order Custom Field when you're finished building your attribute.

How does the Required Field option work?
- There is no way to require Custom Fields for an Order to be processed. The Order will process regardless of whether you have filled out the Custom Fields or not.
- The Required Field option is only enforced when there are multiple Order Custom Fields. For instance, let's say you have both a 'How'd you Hear about us?' (that IS required) and a 'What's your favorite varietal' (that is NOT required).
- If you fill out the (not required) varietal question, you will be forced to answer the (required) 'How'd you hear about us' question prior to saving that screen.
- You are allowed to not add any Custom Fields at all - and your Order will still process.
Testing your Custom Fields(s)
Test in Admin
Log into any Order and click on the Custom Fields tab.
Choose/enter the applicable Custom Fields and Save.
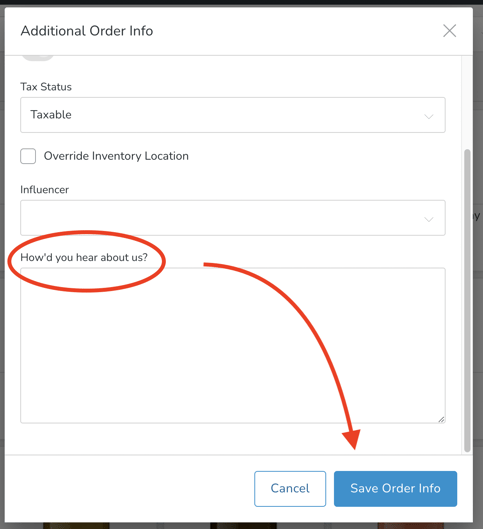
Test in POS
To access Order Custom Fields during a POS order, select Additional Order Info in the dropdown list on the right.
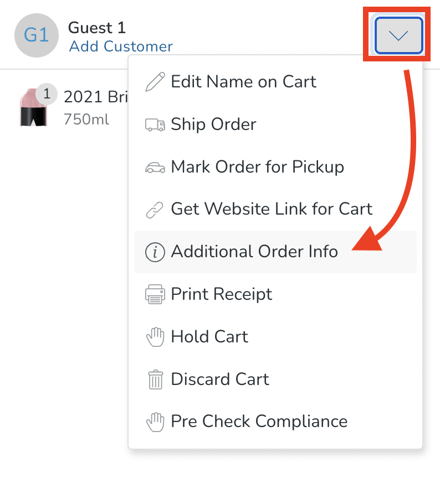
Choose/enter the applicable Custom Fields and Save.
Before You Save, Choose Your Option Titles Wisely!
If you have chosen a 'text' Data Type such as 'Radio', 'Checkbox', or 'Select', make sure to carefully select your option title. Once saved, if you later edit the title, you will only be able to filter using the new title.
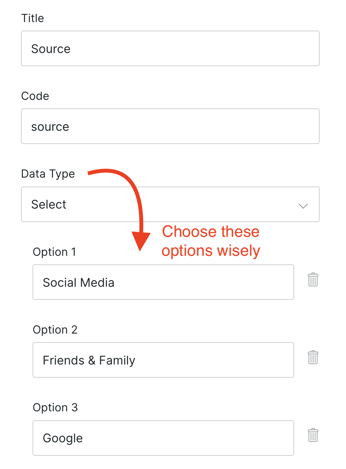
Example:
- You have Order Custom Field for "Source" and your options are: Social, Friends & Family, and Google.
- You select the value of "Social" on Order #1012.
- You change your Order Custom Field Title to rename "Social" to "Social Media".
- Order #1012 that has "Social" selected will not have "Social Media" selected. (This is because the backend doesn't know that "Social" and "Social Media" are the same thing. Since the text doesn't match, it thinks that it's a different value).
- If you filter by the Order Custom Field of "Social Media", the Order with "Social" selected will not be included in the results. (Note that unfiltered Order Exports will contain both).
FAQ
- Oh no! I edited my Option Title after I'd already begun using the old Title. How can I report on Orders containing both the old and new option titles? Unfiltered Order Exports contain both. You can download and sort on the applicable Custom Fields column.
- Can I re-order the Options after the fact? Yes! As long as the text matches, there are no issues with changing the display order.