- Creating a Traditional Club
- Adding a Customer to a Club in Admin
- Signup and Membership Management - Online Customer View (VIDEO)
- Creating and Processing a Club Package
Creating a Traditional Club
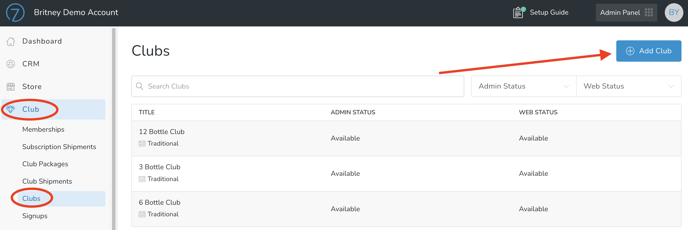
- In Admin, go to Club > Clubs
- Click Add Club
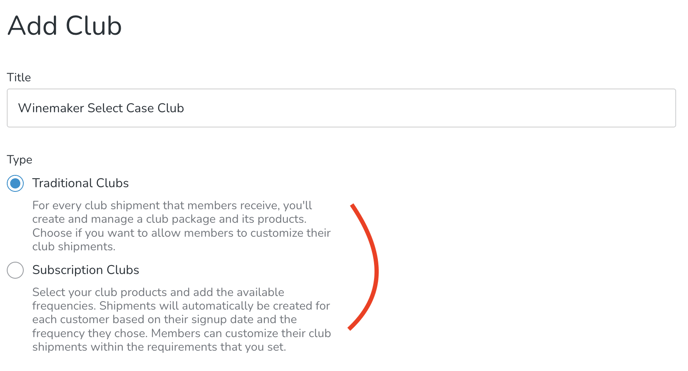
- Enter a Title for your Club (this is customer-facing)
- Choose a Club Type (In this case, choose "Traditional")
- Enter Content that you'd like potential Signups to see. This usually includes frequency of shipments and any perks they receive for joining.
- Optionally enter any Signup Email Instructions.
Use this field to communicate information specific to this club. Contented added here will be included in the Club Signup Confirmation email.
For instance: You could list club benefits or upcoming shipment dates.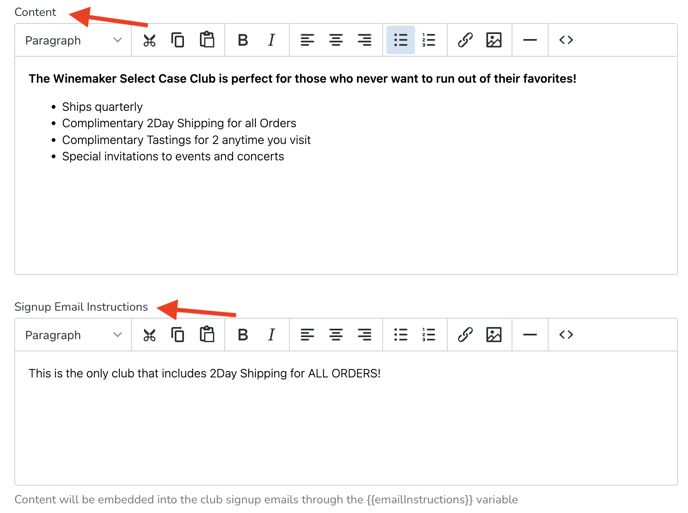
- Optionally edit the SEO information.
This link is what your customers will go to when signing up for the club. The Meta Title and Meta Description information is what is displayed for search engines.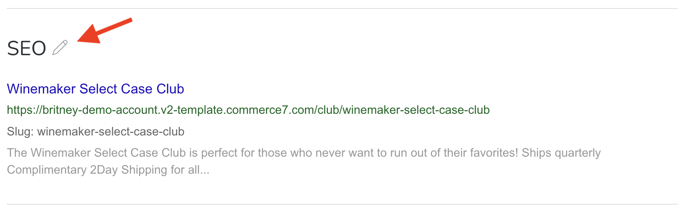
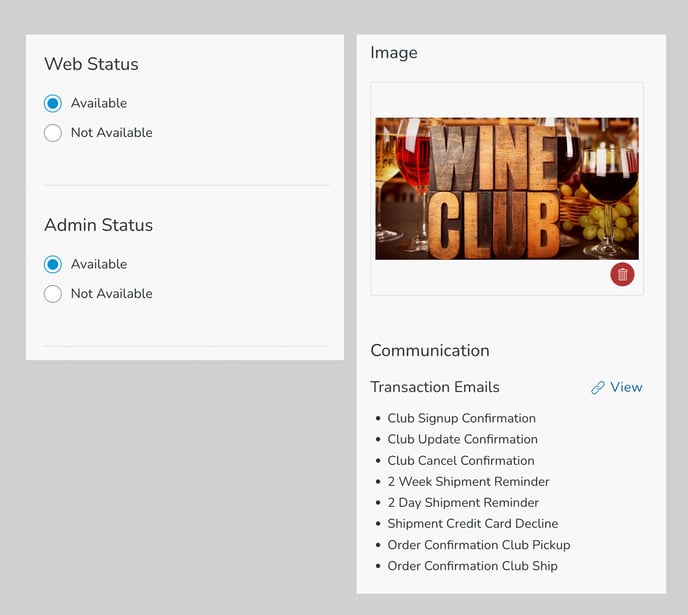
- Define Web Status and/or Admin Status. 'Available' means that visitors will be able to join the Club online (Web), or that Admins will be able to add Customers to the Club in Admin.
- Add an Image. This image will display along with the Signup form on your website.
- Communication/Transaction Emails. These are the automatic emails that are sent to the Club member. You can Edit these by clicking on the 'View' link. Note that you should Save the Club first, THEN go View (otherwise, you will lose the Club you just created).
- Save the Club

Adding a Customer to a Club in Admin
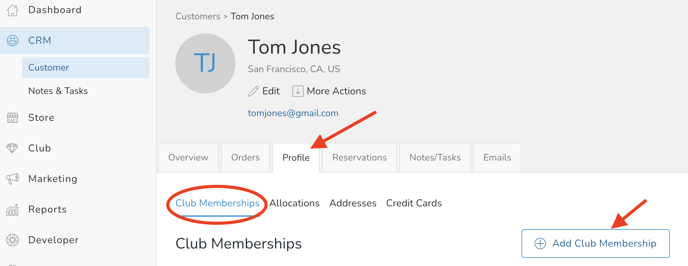
- Navigate to the Customer you'd like to add to a Club.
- Click on the Profile tab in their Customer Record.
- Under Club Memberships, click Add Club Membership
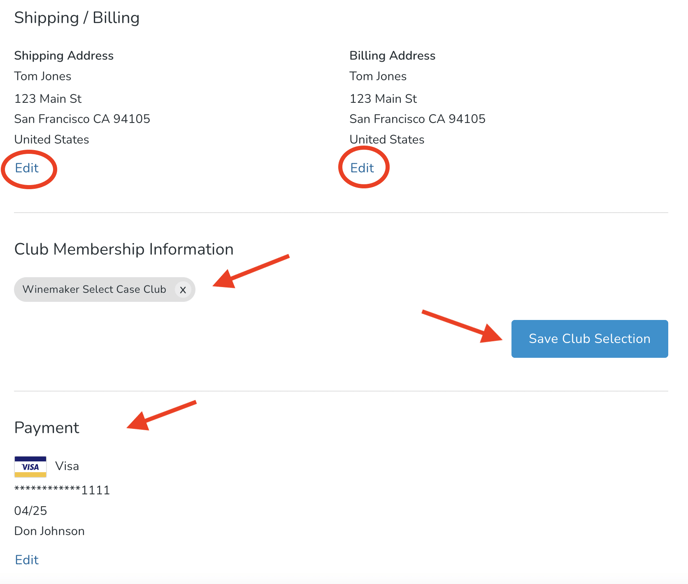
- Enter/edit the Billing/Shipping Address(es) as needed.
- Choose the applicable Club.
- Enter/edit a Credit Card for Payment.
- Save the Club.
Customer View (Signup + Membership Management)
Here's what the Customer sees:
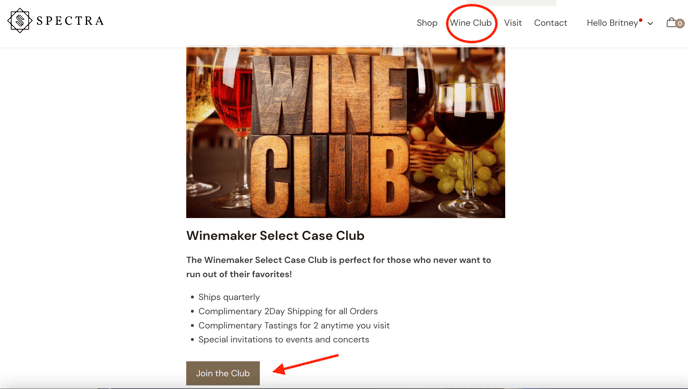
- Customer clicks on your Clubs page, and chooses the Club they'd like to join.
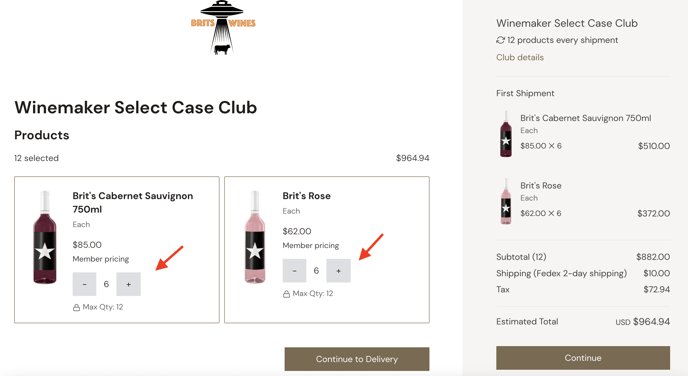
- If there IS a current Club Package created, then this is what they'll see upon clicking the Signup button. They will immediately be able to view their upcoming Shipment and (if it's 'Member Can Customize'), make edits to their item quantities.
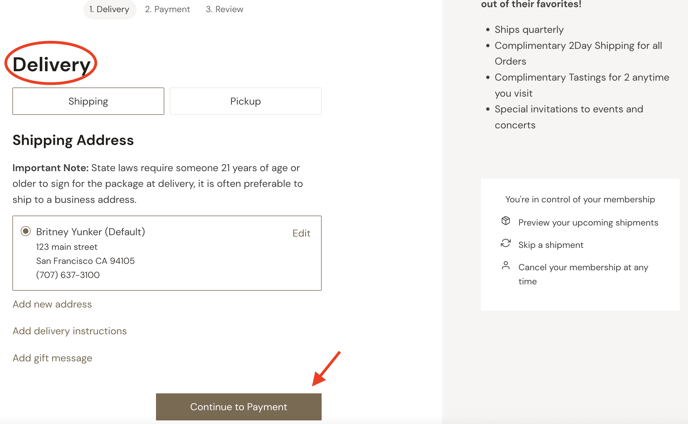
- Once the wines look good, they can click on the Continue to Delivery button.
- Once deliveryt information is correct, they can click on the Continue to Payment button:
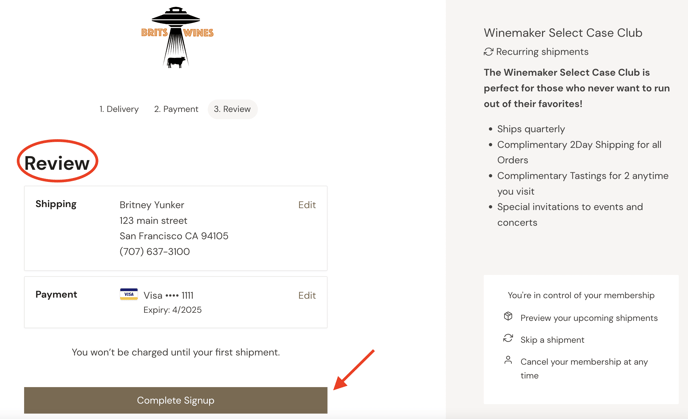
- And finally, they can navigate to the 'Review' Page and click the Complete Signup Button.
- Can a Member sign up for more than one (multiple) Clubs?
Yes. Members can sign up for more than one Club.
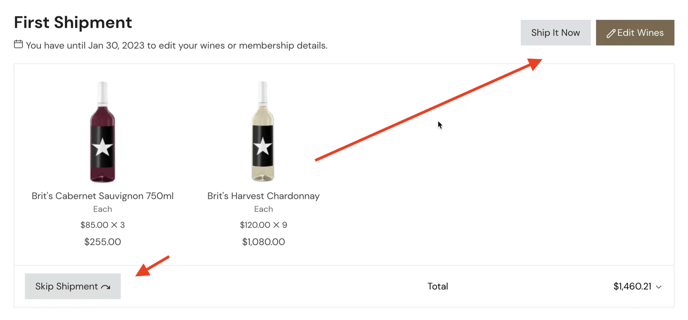
Online Membership Management
At any time, the Member can log into your site to manage their Membership. They'll be able to:
Ship it Now: This will charge your Member's card immediately and ship right away.
Edit Wines: Your Members will able to edit their wines up to the process date.
Skip Shipment: Your Members will be able to skip this shipment altogether.
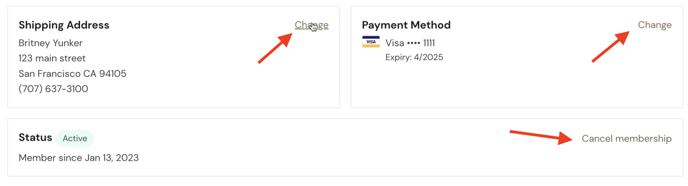
Your Member can click on the Account link if they need to edit their Shipping or Payment information.
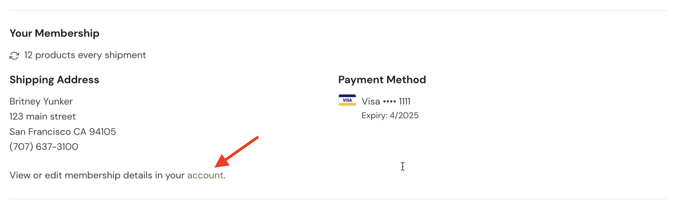
From there, they can click the Edit link to change the Shipping or Payment Method. They can also cancel their Membership from this screen.