You likely prepare food and drinks in different areas of your winery - and each area usually has its own kitchen ticket printer. Our Kitchen Ticket Locations feature allows you to create specific printer locations for each of those areas.
- Each Kitchen Ticket Location will have a printer and items assigned to it.
- In the POS, when items are sent to the kitchen, they will automatically be sent to the various Locations that you create.
- Example: Burgers are sent to the Kitchen printer, while glasses of wine are sent to the Bar printer.
The Kitchen Ticket Locations feature is not available for C7 Lite users.
If you would like to upgrade to the full version of Commerce7, please contact Support.
In this Article
Creating Kitchen Ticket Locations
Defining the physical Printers for each Kitchen Ticket Location
Toggling the Kitchen Ticket Feature 'On'
Creating Kitchen Ticket Locations
Creating Kitchen Ticket Locations
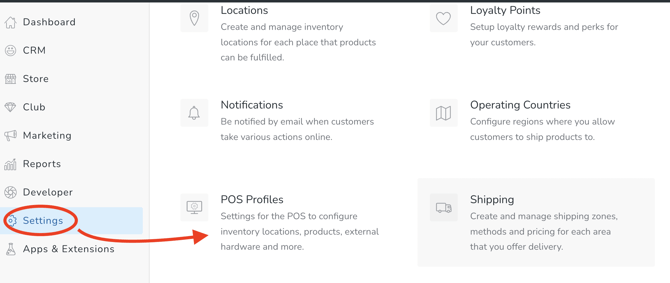
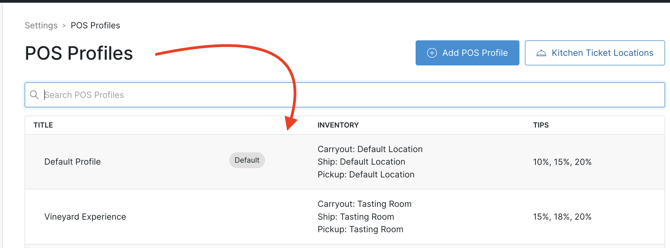
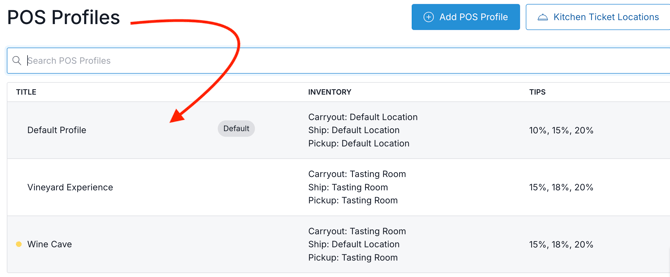
- Go to Settings > POS Profiles
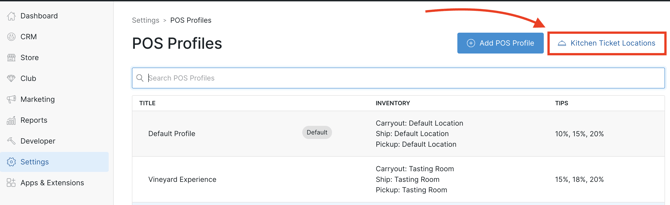
- Click on the Kitchen Ticket Locations button.
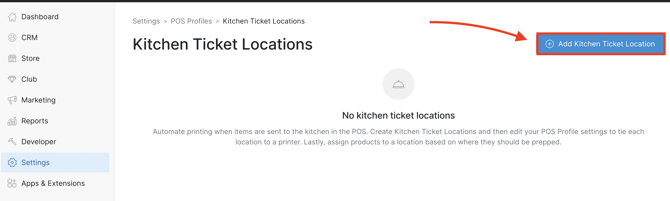
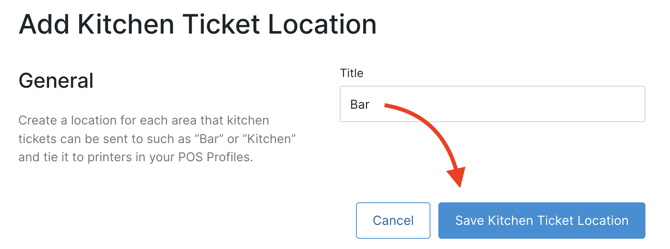
- Click the Add Kitchen Ticket Location button.
- Enter a Title and Save.
- Click into the Location.

- Search for and Add any applicable Products. Example: this is for the Bar Location, so all drinks/glasses of wine would be added.
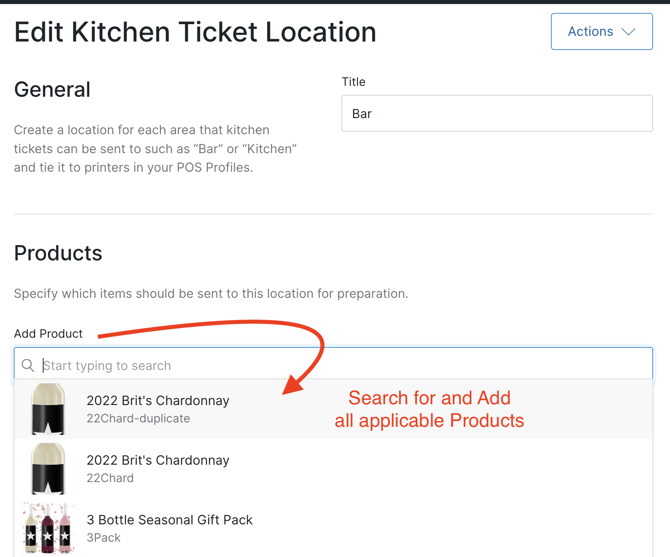
- Once they are all added, click the Save button.

'Requires Prep' Toggle on the Product
'Requires Prep' Toggle on the Product
Each Product has a 'Requires Prep' toggle can can be configured 'on' or 'off'.
- For items that don’t require prep (example - a bottle of wine): Toggle the setting to 'Off'. This will remove them from the 'Sent items to kitchen' modal in the POS. This keeps it clean by displaying items that actually need sending.
- For items that do require prep (example - a burger): Toggle the setting to 'On'. This will ensure that it displays in the 'Sent items to kitchen' modal in the POS.
Here's where to find it:
- Click into the Product and go to the Advanced tab.
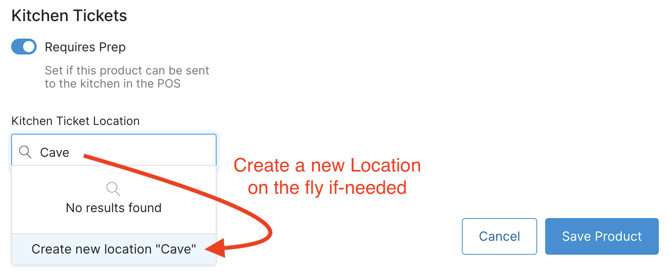
- Toggle the Required Prep button to 'on' (for those items that require it).
- Choose the applicable Location and Save.

- You also have the option to create a new Location on the fly if-needed.
Defining the physical Printers for each Kitchen Ticket Location
Once you have configured the Locations and Products, the next step is to map those Locations to the physical printer locations at your property.
This setup is configured on a per POS Profile basis, allowing for flexibility depending on your property's layout and needs.
|
Example 1: POS Profile A -
Products with a 'Bar' kitchen ticket location will be sent to the Bar printer - and Products with a 'Kitchen' kitchen ticket location will be sent to the Kitchen printer. |
Example 2: POS Profile B -
All products (both 'Bar' and 'Kitchen' kitchen location Products) will be sent to the one printer. |
For our purposes here, we will be configuring for a winery location that has two printers (example 1 above):
- Go to Settings > POS Profiles.
- Choose the applicable POS Profile.
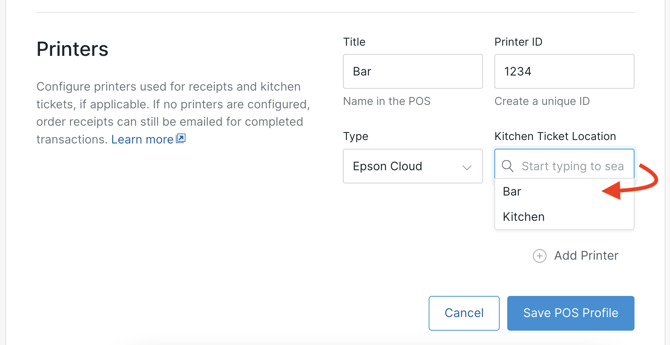
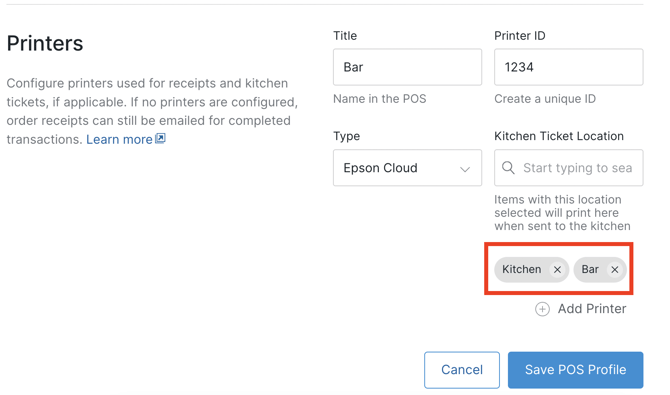
- Scroll to the Printers section at the bottom of the page. Locate the first applicable printer Title/name.
- Choose the Kitchen Ticket Location for this specific printer from the drop down.
- To define additional Printers/Kitchen Ticket Locations, click the Add Printer link.
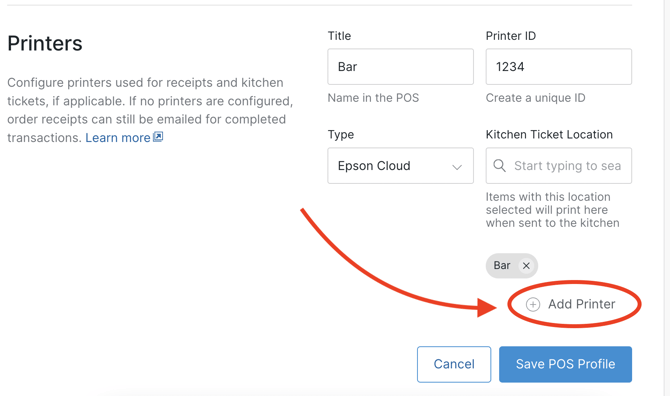
- Enter the printer details and define the Kitchen Ticket Location.
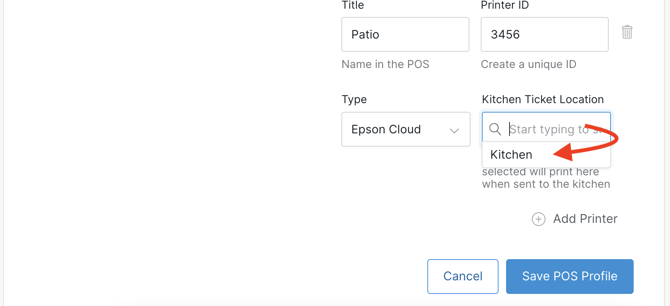
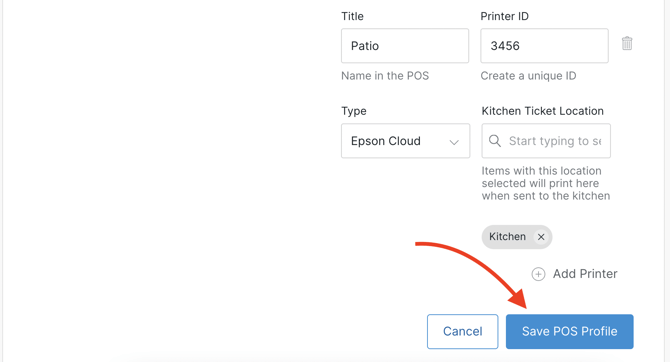
- Continue to add Printers if-needed.
- When complete, click the Save POS Profile button.
Just One Printer?
If you are configuring for a winery location that just has ONE printer, you would need to add BOTH Kitchen Ticket Locations to the Printer configuration:
Do you need to define a Kitchen Ticket Location for every printer?
No. If you have a printer located somewhere where there will never need kitchen/bar prep (say, in the gift shop), you can leave the Kitchen Ticket Location field blank.
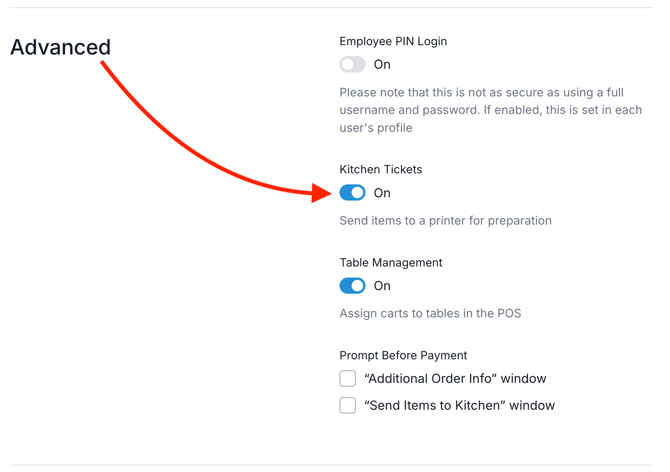
Final Step: Toggle the Kitchen Tickets Feature 'On'
There's one last step, and that is to turn Kitchen Tickets 'On' in the POS Profile.
- Click into the applicable POS Profile.
- Scroll down to the Advanced section.
- Toggle Kitchen Tickets 'On' and Save.
Workflow in the POS
Workflow in the POS
- Add items to the Cart in the POS.

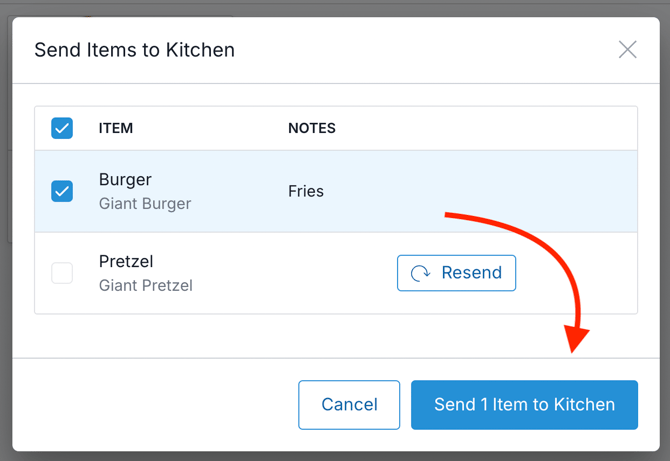
- In the dropdown, choose the Send Items to Kitchen option.

- Choose the items you want to send.
- Click the Send Items to Kitchen button. Notice that you don't see the bottle of wine in this list. That's because wine does not need any prep, therefore it does not display in this list. (The 'Requires Prep' button is toggled 'off' on the wine Product).

- The pretzel has now been automatically sent to the correct printer location (in the outdoor Patio Kitchen).
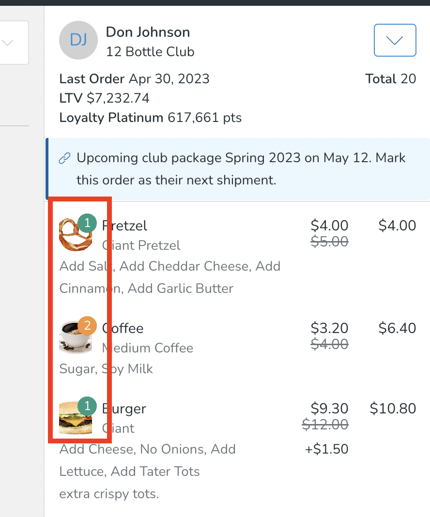
- You will see color coding on the Cart to indicate send status.
- Grey: Item does not require preparation.
- Blue: Item requires prep and has not been sent to the kitchen.
- Green: Item, and all quantities, have been sent to the kitchen.
- Orange: Item, but not all quantities, have been sent to the kitchen.
- When it's time to send the Burger for prep, it will be sent to the correct (main indoor kitchen) printer location.