Note the following network requirements:
- Allow outbound https port 443 traffic to tripos.vantiv.com
- Allow TCP/IP traffic to port 9001 of device.tripos.vantiv.com
- Minimum Internet Speed recommendation of 5Mbps
*Most standard consumer or business firewalls permit all outbound traffic as a default. If you have a managed firewall or enterprise firewall you need to ensure the ports above are enabled for for outbound traffic.
Setting Up Your Device
The Ingenico Link 2500 Wireless terminal only works with Commerce7 over a wifi connection, and not Bluetooth.
On the Device
- Turn on the device (Regardless of connection, it will display the "TriPOS" screen.)
- Once the TriPOS screen displays, press 0 0 0 1 on the terminal to access the settings.
- On the next screen, use F2 and F3 to navigate to Wifi Parameters, and click the green button to select one.
- Now navigate to Scan Networks and select
- A list of wireless networks will appear. Navigate to your wireless network with F2 and F3 and use the green button to select one.
- Enter the wireless password by using the on screen keyboard, entering letters the same way as an old school keyboard. (Alternatively you can use the F2 and F3 to use the onscreen keyboard.) Note: The password is case sensitive.
- Once the password is confirmed, the screen will show "New Profile OK", and then will navigate back to the TriPOS screen.
- There should now be a green wifi symbol in the top left corner.
- An activation code should now appear on the screen. Write down / save this code for future setup steps.
Note: If it doesn't appear, press and hold the yellow and # button. This will reboot the device and display the code. (Unplug the device for this step if its plugged in.)
In Commerce7 & Gateway
- In Commerce7 go to Settings > POS Profiles
- Click Activate Devices (this will take you to Merchant Track > Terminals > Activate)
- Enter the Activation code and click Activate
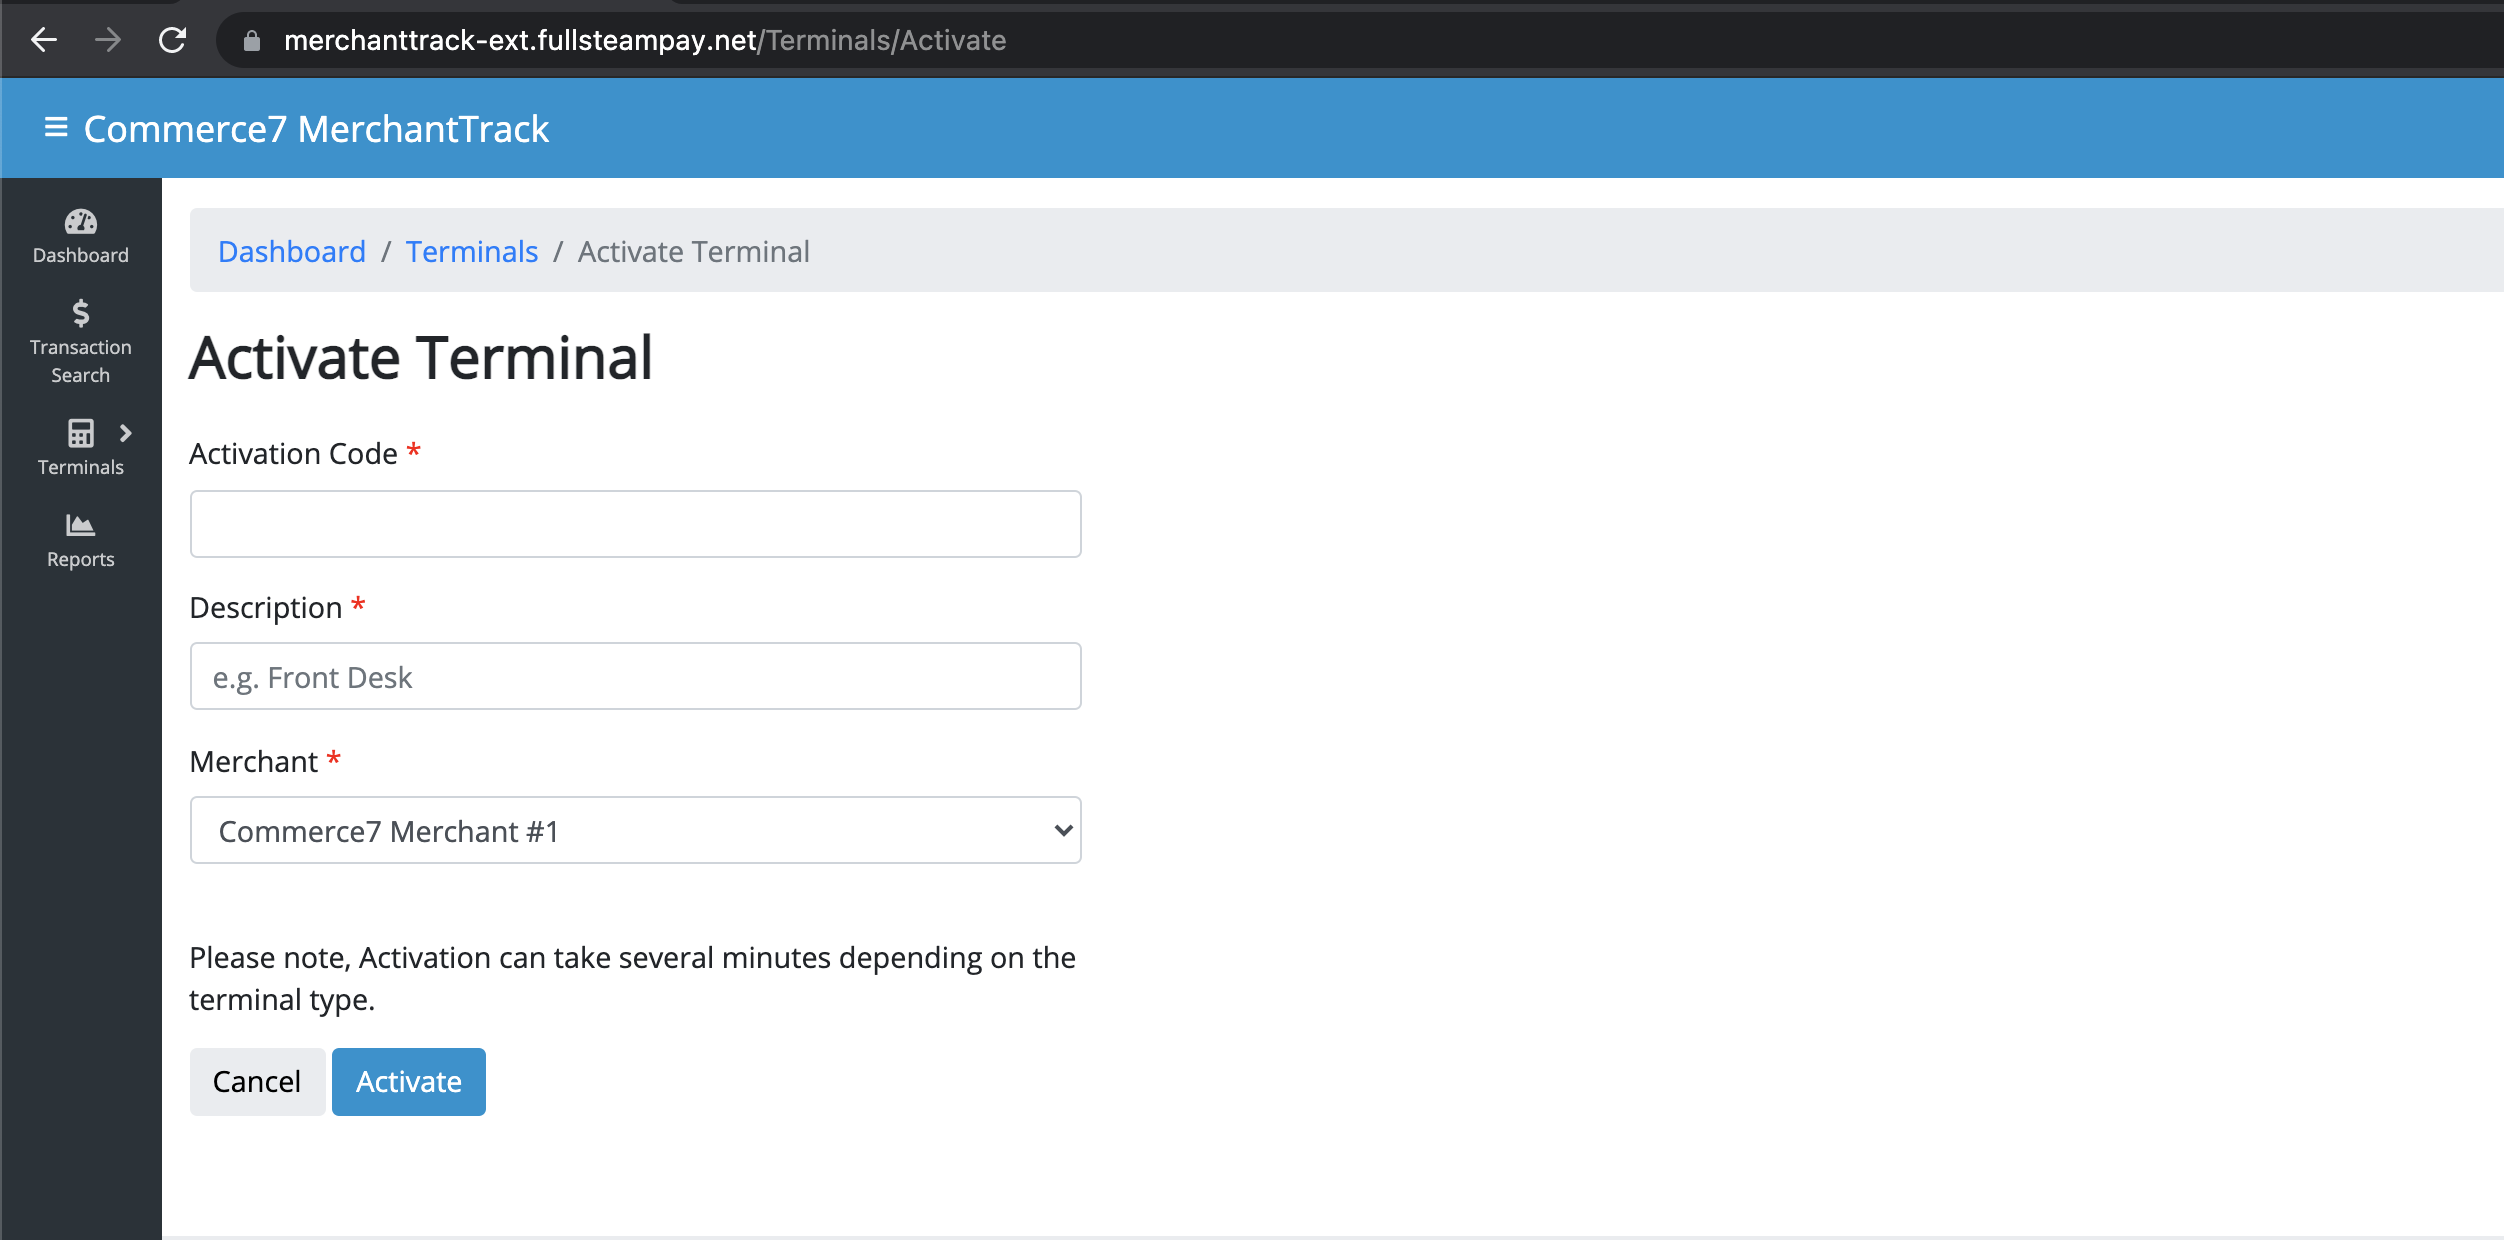
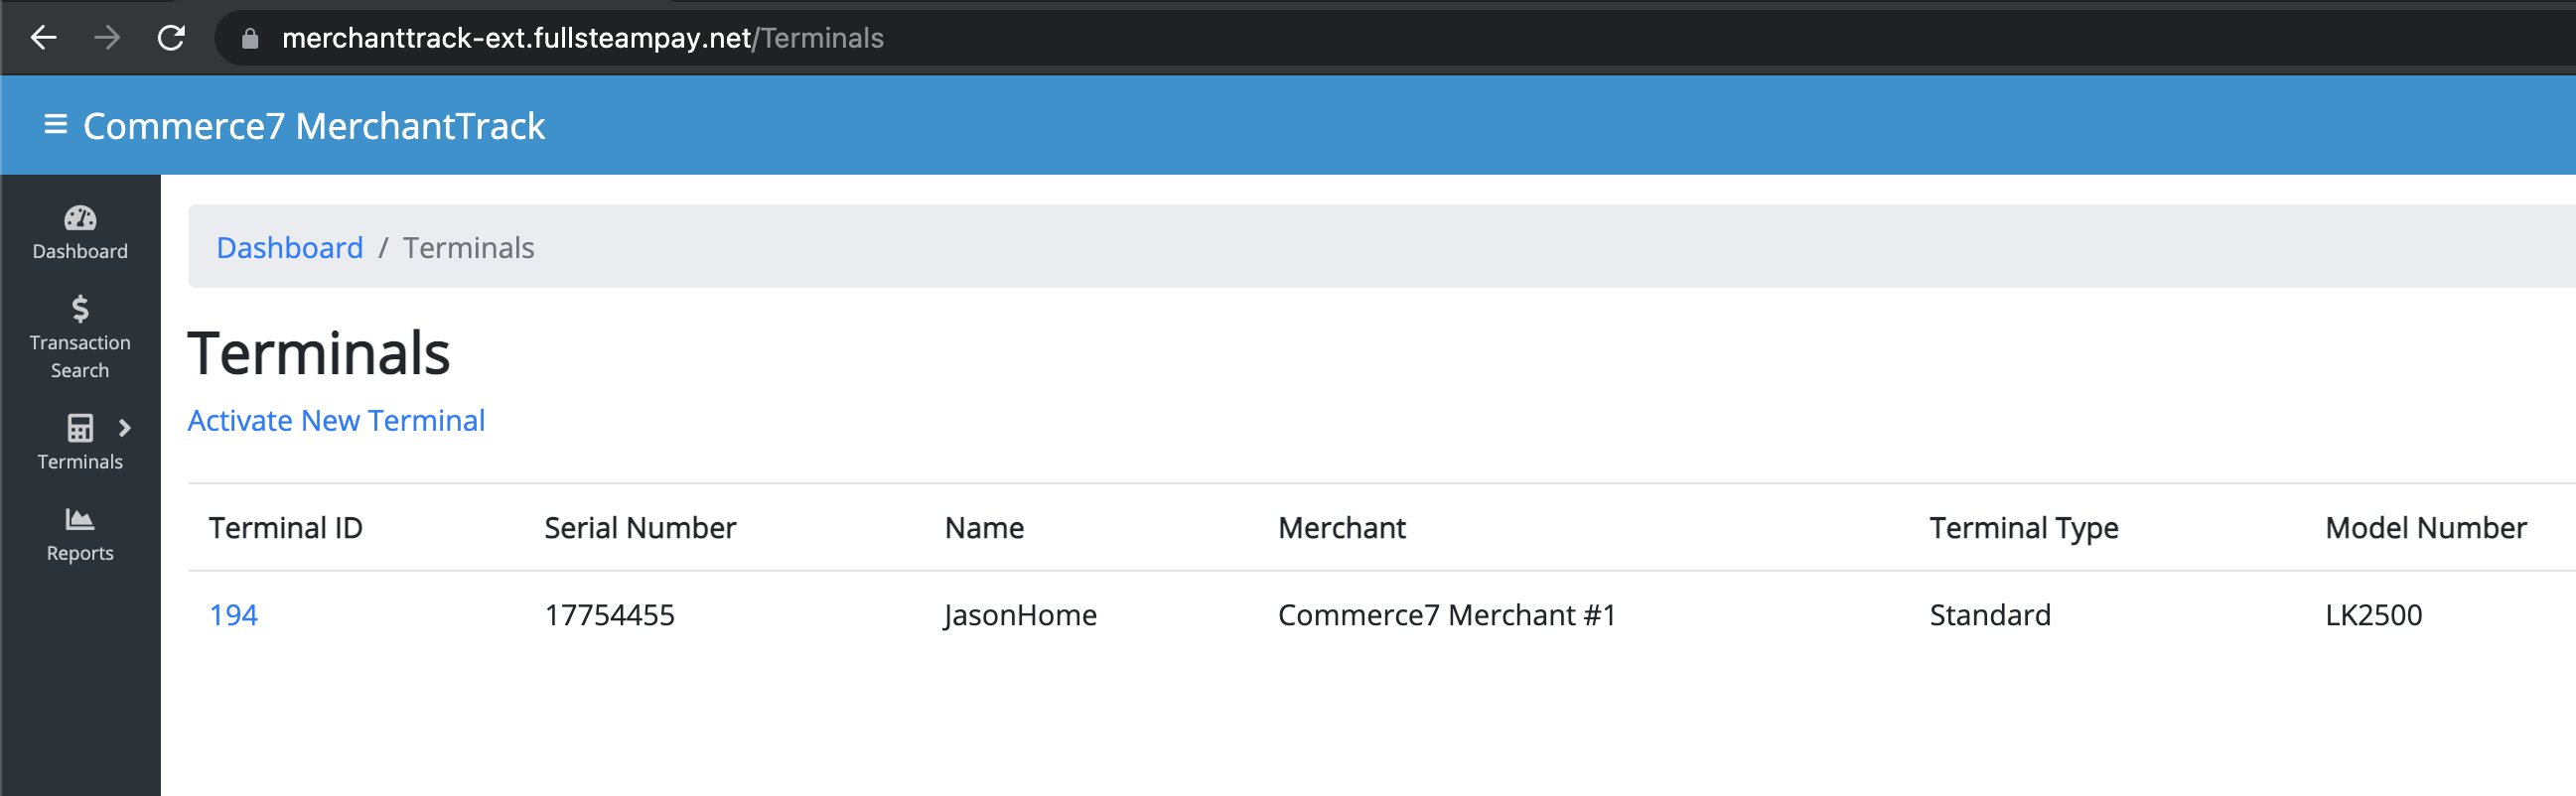
- Then you will see the Terminal ID. Write this down as you'll enter it into Commerce7.
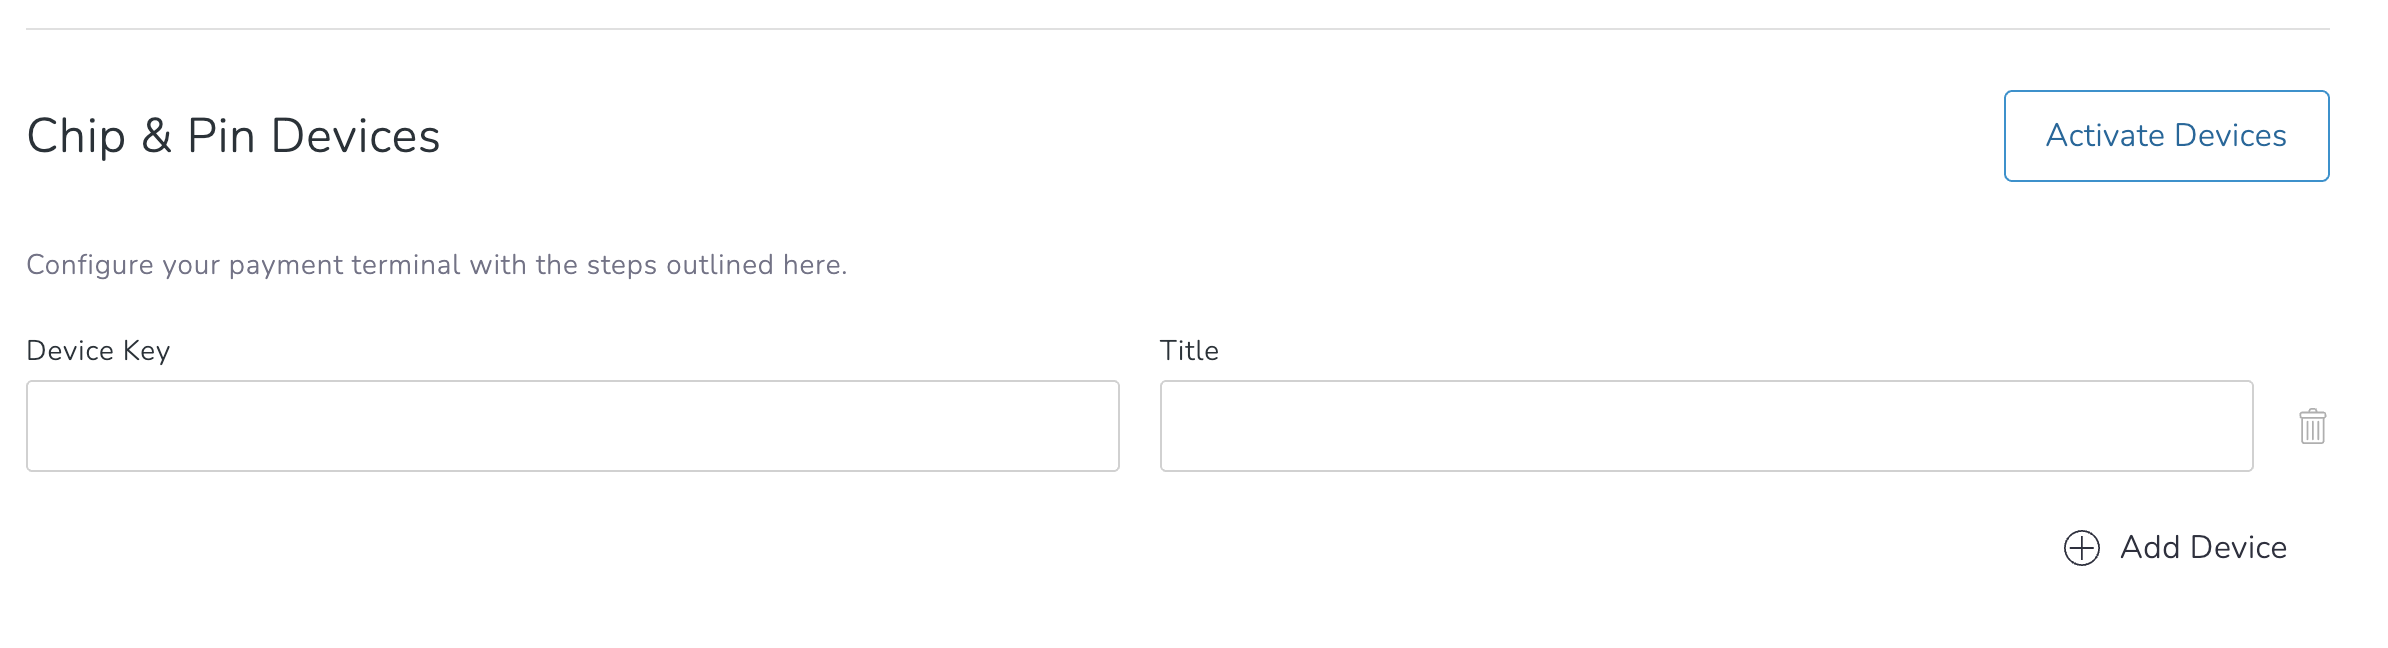
- Click back in your browser to get back to Commerce7, or open up Commerce7 and go to Settings > POS Profiles > select your profile and scroll down to Chip and Pin Devices
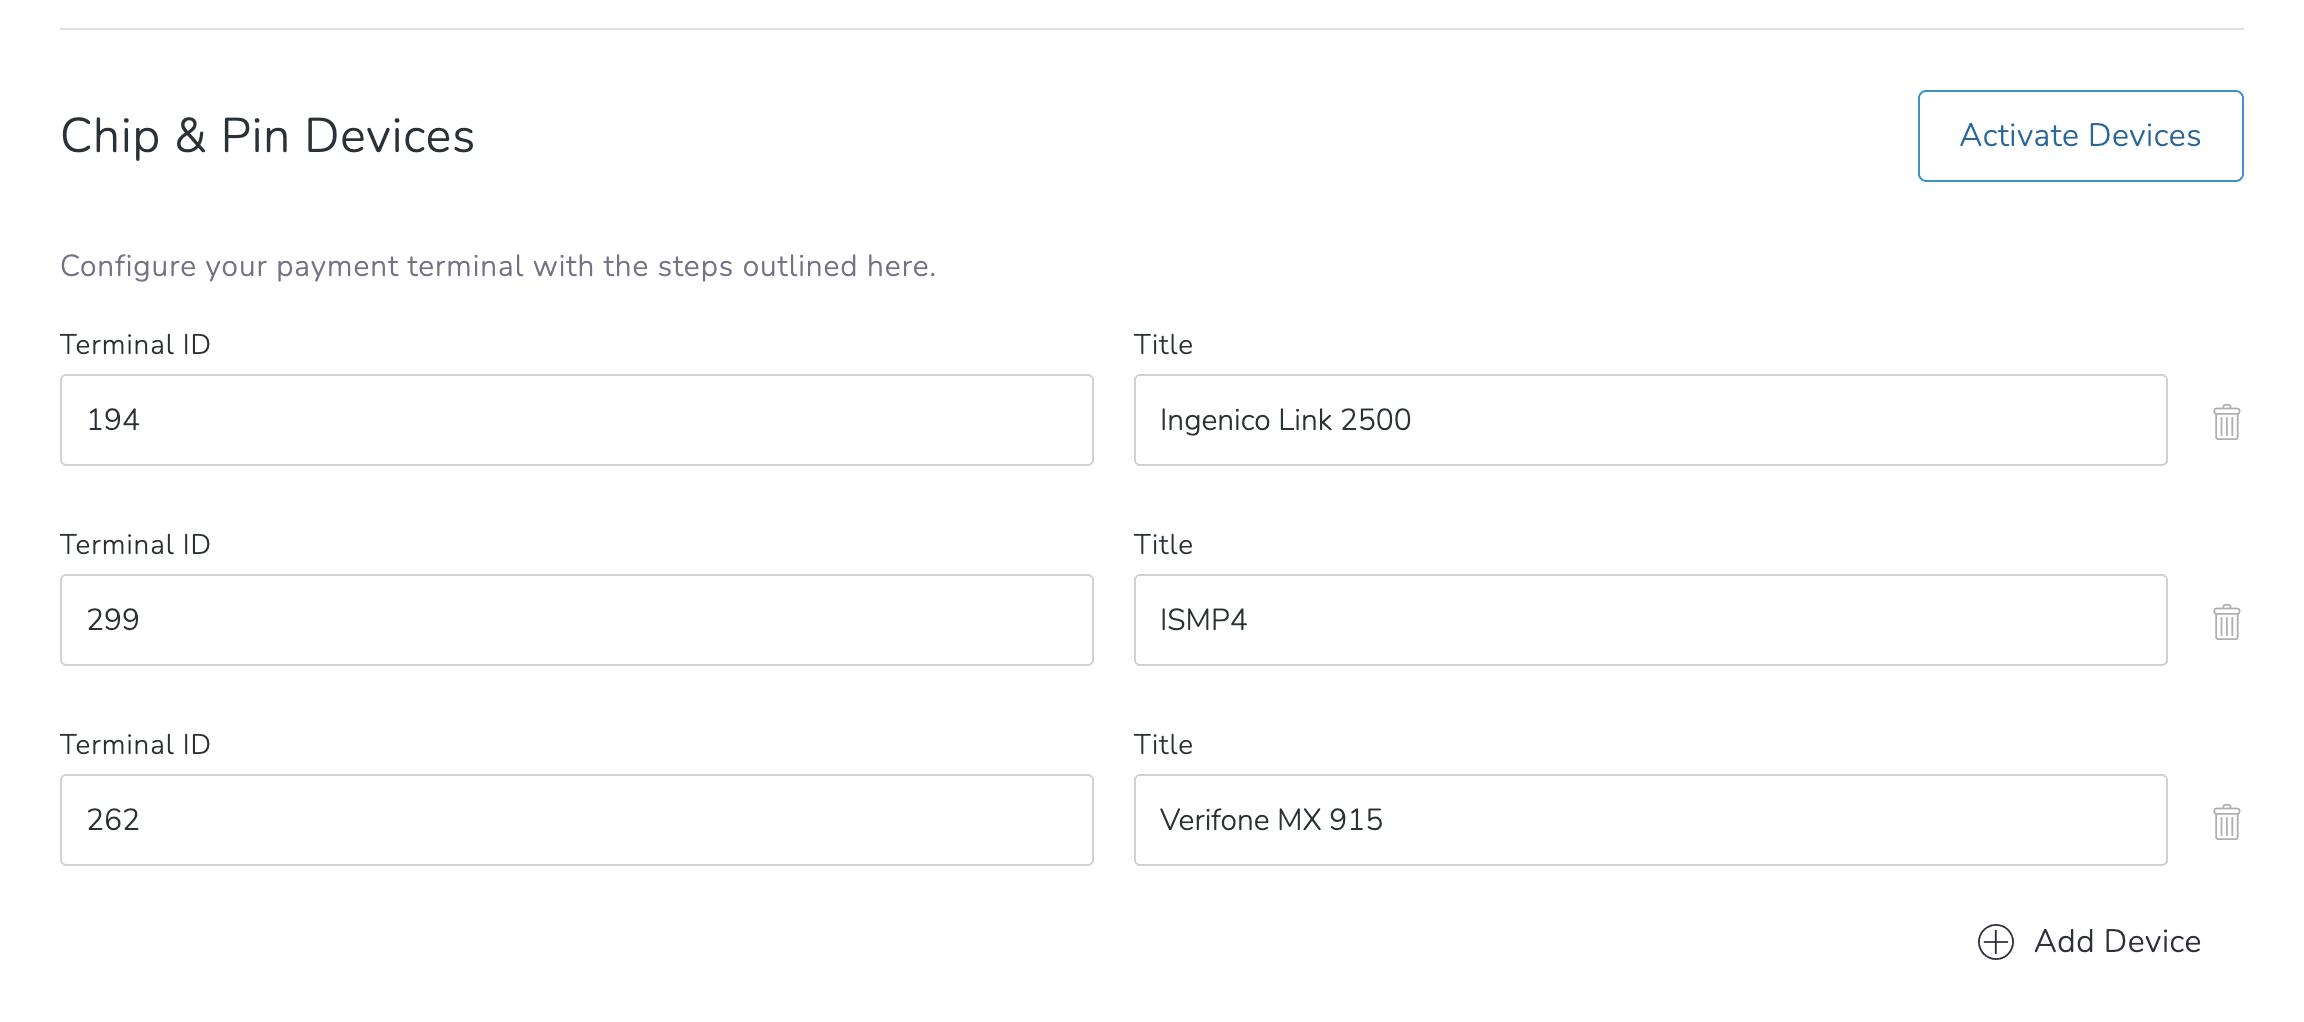
- Enter the Terminal ID(s) and add a Title. This is the name given to your display and how it will appear in the POS when selecting the terminal.
- If you have more than 1 terminal click Add Device to add additional terminals.
Removing a Terminal from your Network
Note: The terminal will need to be out of range of the network in order to remove the network.
- Once out of range, select the settings menu by entering 0-0-0-1.
- Navigate to Wifi Parameters using F2 and F3 and select it using the green button.
- Navigate to My Networks using F2 and F3 and select it using the green button.
- Navigate to Delete All and select it.
- The system will prompt you with a message saying "Remove Profile OK", which indicates that the networks have been removed from the terminal.
To test the network connection:
- Enter the 0-0-0-1 or 2-6-3-4 codes on the TriPOS screen
- If the terminal does not respond, this would mean the terminal is connected to the network.
- If the terminal opens a menu, this would mean that the terminal is not connected to the network.
On the password screen the function keys will control the on screen keyboard as follows:
(F1) - Scrolls the selection to the left
- (F1) - Scrolls the selection to the left
- (F2) - Scrolls the selection up
- (F3) - Scrolls the selection down
- (F4) scrolls the Selection to the Right
Completing Payment with the Ingenico Link 2500
Once the device is set up, when you're completing an order in the POS, if you click Quick Pay or Pay you should see EMV as a tender option.
Click EMV to send the transaction to the Ingenico Link 2500 terminal to complete the transaction.
If you have more than one device, you'll be able to select which one.
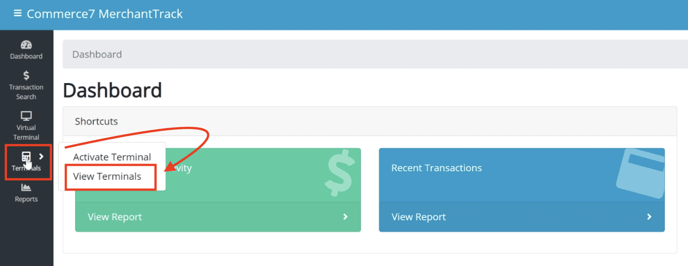
Disconnecting Merchant Track (for troubleshooting purposes)
Sometimes (as a last resort) we will recommend that you remove and re-add your device to your Merchant Track account and POS Profile. Here's how:
-
- Access your Merchant Track Dashboard
- Go to Terminals > View Terminals.
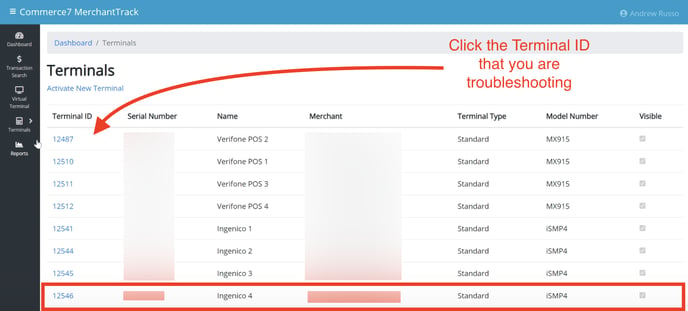
- Click the Terminal ID that you are troubleshooting.
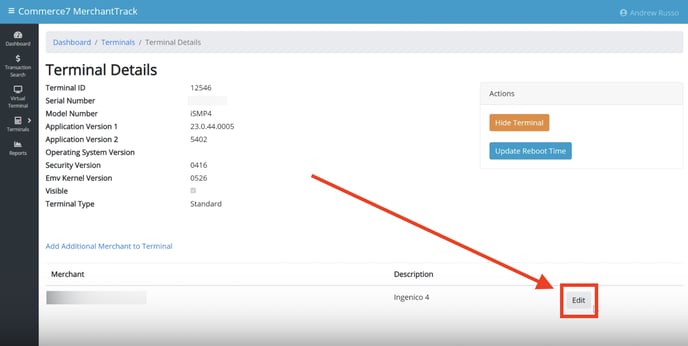
- Click Edit in the bottom right.
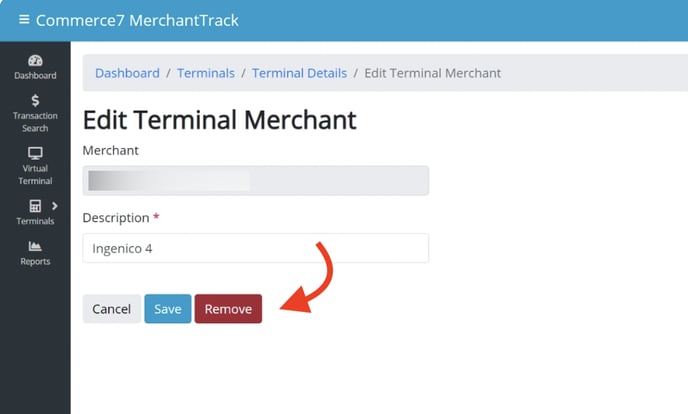
- Click the Remove button.
- Now that it's removed, begin the device setup process from the top here.