Equip your Tasting Room Staff with valuable customer data and information to elevate and personalize the tasting room experience.
Examples:
- Is the Customer a Club Member? Set up a Smart POS Notice that reminds Staff to mention the Club-exclusive Winemaker dinner coming up.
- Is this the Customer's fourth order, indicating they may be ready to join your club? Set up a Smart POS Notice that encourages Staff to discuss joining the Club.
- Is it the Customer's birthday month? Set up a Smart POS Notice reminding Staff to wish the Customer a happy birthday, and to inform them that they receive a 20% off birthday discount.
Empower your staff to engage visitors effectively, drive sales, and foster memorable experiences.
Setting up Smart POS Notifications
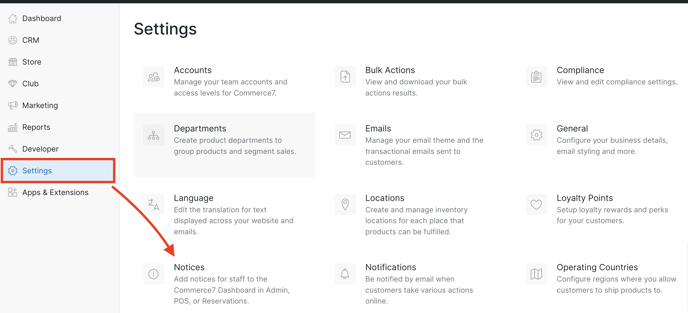
- Go to Settings > Notices.
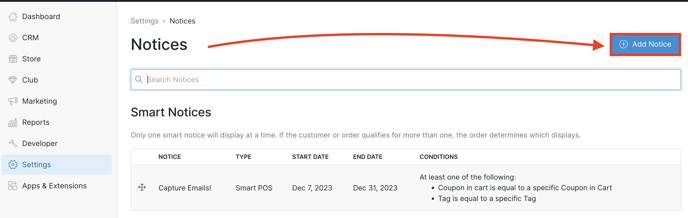
- Click Add Notice.
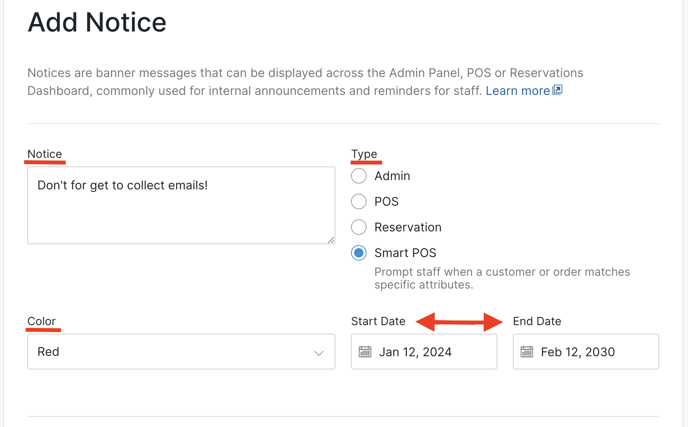
- Fill out the form:
- Notice: Enter the message that you'd like to display to your staff.
- Type: Select 'Smart POS'.
- Color: This will be the background color for the notice. We recommend selecting a color based on how important the message is. Example: an important alert might be red, whereas a helpful tip may be blue.
- Start / End Date: Define a date range for how long you want the notice to display. (If you'd like the notice for display for a long period of time, you can simply set the End Date for a time far in the future).
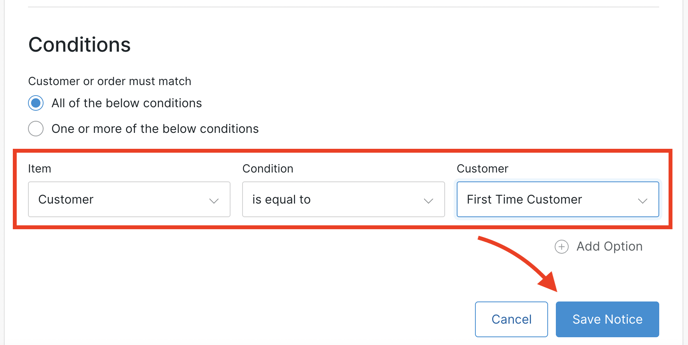
- Scroll down to the Conditions section: These are conditions that the customer or order must meet for the notice to be displayed.
- Customer or Orders must match: Select if you want ALL Conditions to be met, or ONE OR MORE of the Conditions to be met.
- Available Conditions:
-
-
- Cart Item Count (Based on how many items is in the order)
- Cart Sub Total (Based on the cart/order's current subtotal value)
- Customer (Type of customer that's is/isn't shopping; first time, repeat, anonymous, club member, etc.)
- Customer Order Count (Number of past orders)
- Customer Birthday
- Customer LTV (Lifetime value)
- Customer Last Order Date
- Club Membership (If the customer is in/not a specific club)
- Coupon in Cart (If a coupon is applied in the cart)
- Promotion in Cart (If a promotion is applied to the cart)
- Sku in Cart (If a specific product SKU is in the cart)
- Tag (Customer Tags only)
-
- Once you've set up your Condition(s), click the Save Notice button.
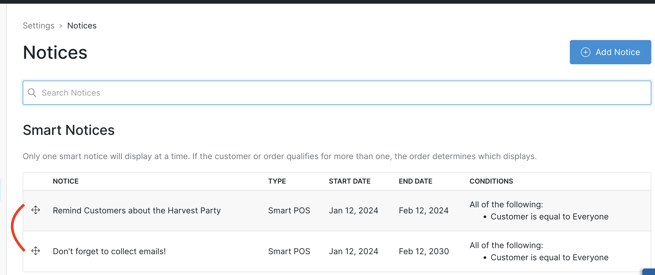
- Your Notice(s) will appear in your Smart Notices section. Here, you can drag and drop to rank your Notices. If a customer or order matches the criteria for multiple smart notices, only the Notice with the highest priority will display.
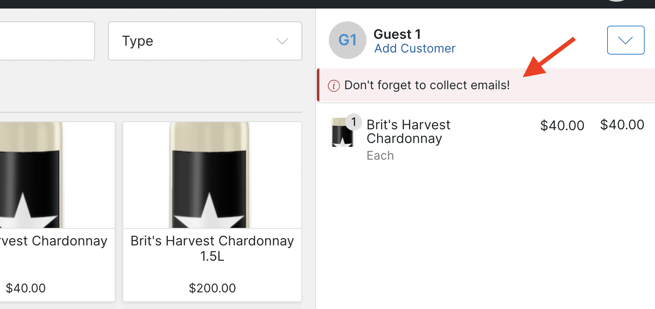
- Here's how it will look to your POS staff: