In this article:
- What's in the Box?
- Configuring wifi
- Removing a network profile
- Activating your terminal for Commerce
Note the following network requirements:
- Allow outbound https port 443 traffic to tripos.vantiv.com
- Allow TCP/IP traffic to port 9001 of device.tripos.vantiv.com
- Minimum Internet Speed recommendation of 5Mbps
** Most standard consumer or business firewalls permit all outbound traffic as a default. If you have a managed firewall or enterprise firewall you need to ensure the ports above are enabled for outbound traffic.
What's in the Box?
- iSMP4 device
- USBC Cord
- Where is the Serial Number?
- As the unit is booting up it will come up in the following screen:
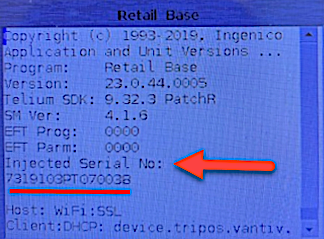
- As the unit is booting up it will come up in the following screen:
Configuring wifi
Using this method will allow an advanced Wi-Fi profile configuration.
- Turn on or Reboot the terminal.
- Turn on with right side top button press for 2 seconds.
- Reboot press and hold the # key and yellow key simultaneously until chirp
- If terminal is plugged in to power it will restart
- If terminal is not plugged into power it will shut off, turn it back on by pressing the right side top button for 2 seconds. - As soon as the splash screen showing the copyright and version information is displayed.
Press the numbers on the keypad 2634 + Enter (Green Key) and you will hear a single beep. - Press the F (Function button) to get to the Menu.
- Note: If you missed entering the code above while the copyright info is displayed you will need to start at step 1 again. - Press 0 – Telium Manager
- Press 3 – Initialization
- Press 2 – Hardware
- Press 5 – Wi-Fi
- Press 2 – Scan network
- Once scanning is complete, Select the desired network
- Use keys, F2 (down)/F3 (up) to navigate and then hit Enter (Green key). - Select Home Security - unless using very specific Network encryption
- Enter Wi-Fi password by pushing the Number/Letter PinPad buttons until it has the correct password, then Enter (green button).
- For Priority, Enter the number 20 using the key pad and then hit Enter (green key).
- The device will display "New Profile Ok" and will return the Wi-Fi Menu
- Wifi is now configured successfully, assuming the password is correct - Next, power off/reboot the terminal.
- Press and hold the # key and yellow key simultaneously until chirp
- If terminal is plugged in to power it will restart
- If terminal is not plugged into power it will shut off, turn it back on by pressing the right side top button for 2 seconds. - Wait for up to three minutes for the terminal to complete additional configuration. An Activation Code will then be presented on the screen of the terminal.
Note: If no Activation Code has been shown after a few minutes, reboot device by Simultaneously press the yellow key and # key. Turn device back on with top right side button, press for 2 seconds.
Removing a network profile (Wifi Access Point)
1. Once you get to the Wi-Fi (On) Menu Step 7 above in configuring the long method. You will have to select Advanced options.
2. On the Next screen we will have to select "My Networks".
3. On the next screen we will select "Delete All".
4. Once "Delete all" is selected you will get kicked back to the advanced options screen, Tap the yellow Key once where you should see the option "Scan Network" again, from there you will connect the terminal to the network as normal.
Activating the terminal
- In Commerce7 under Settings > POS Profiles, select a profile
- Scroll down to Chip & Pin Devices and click Configure Device
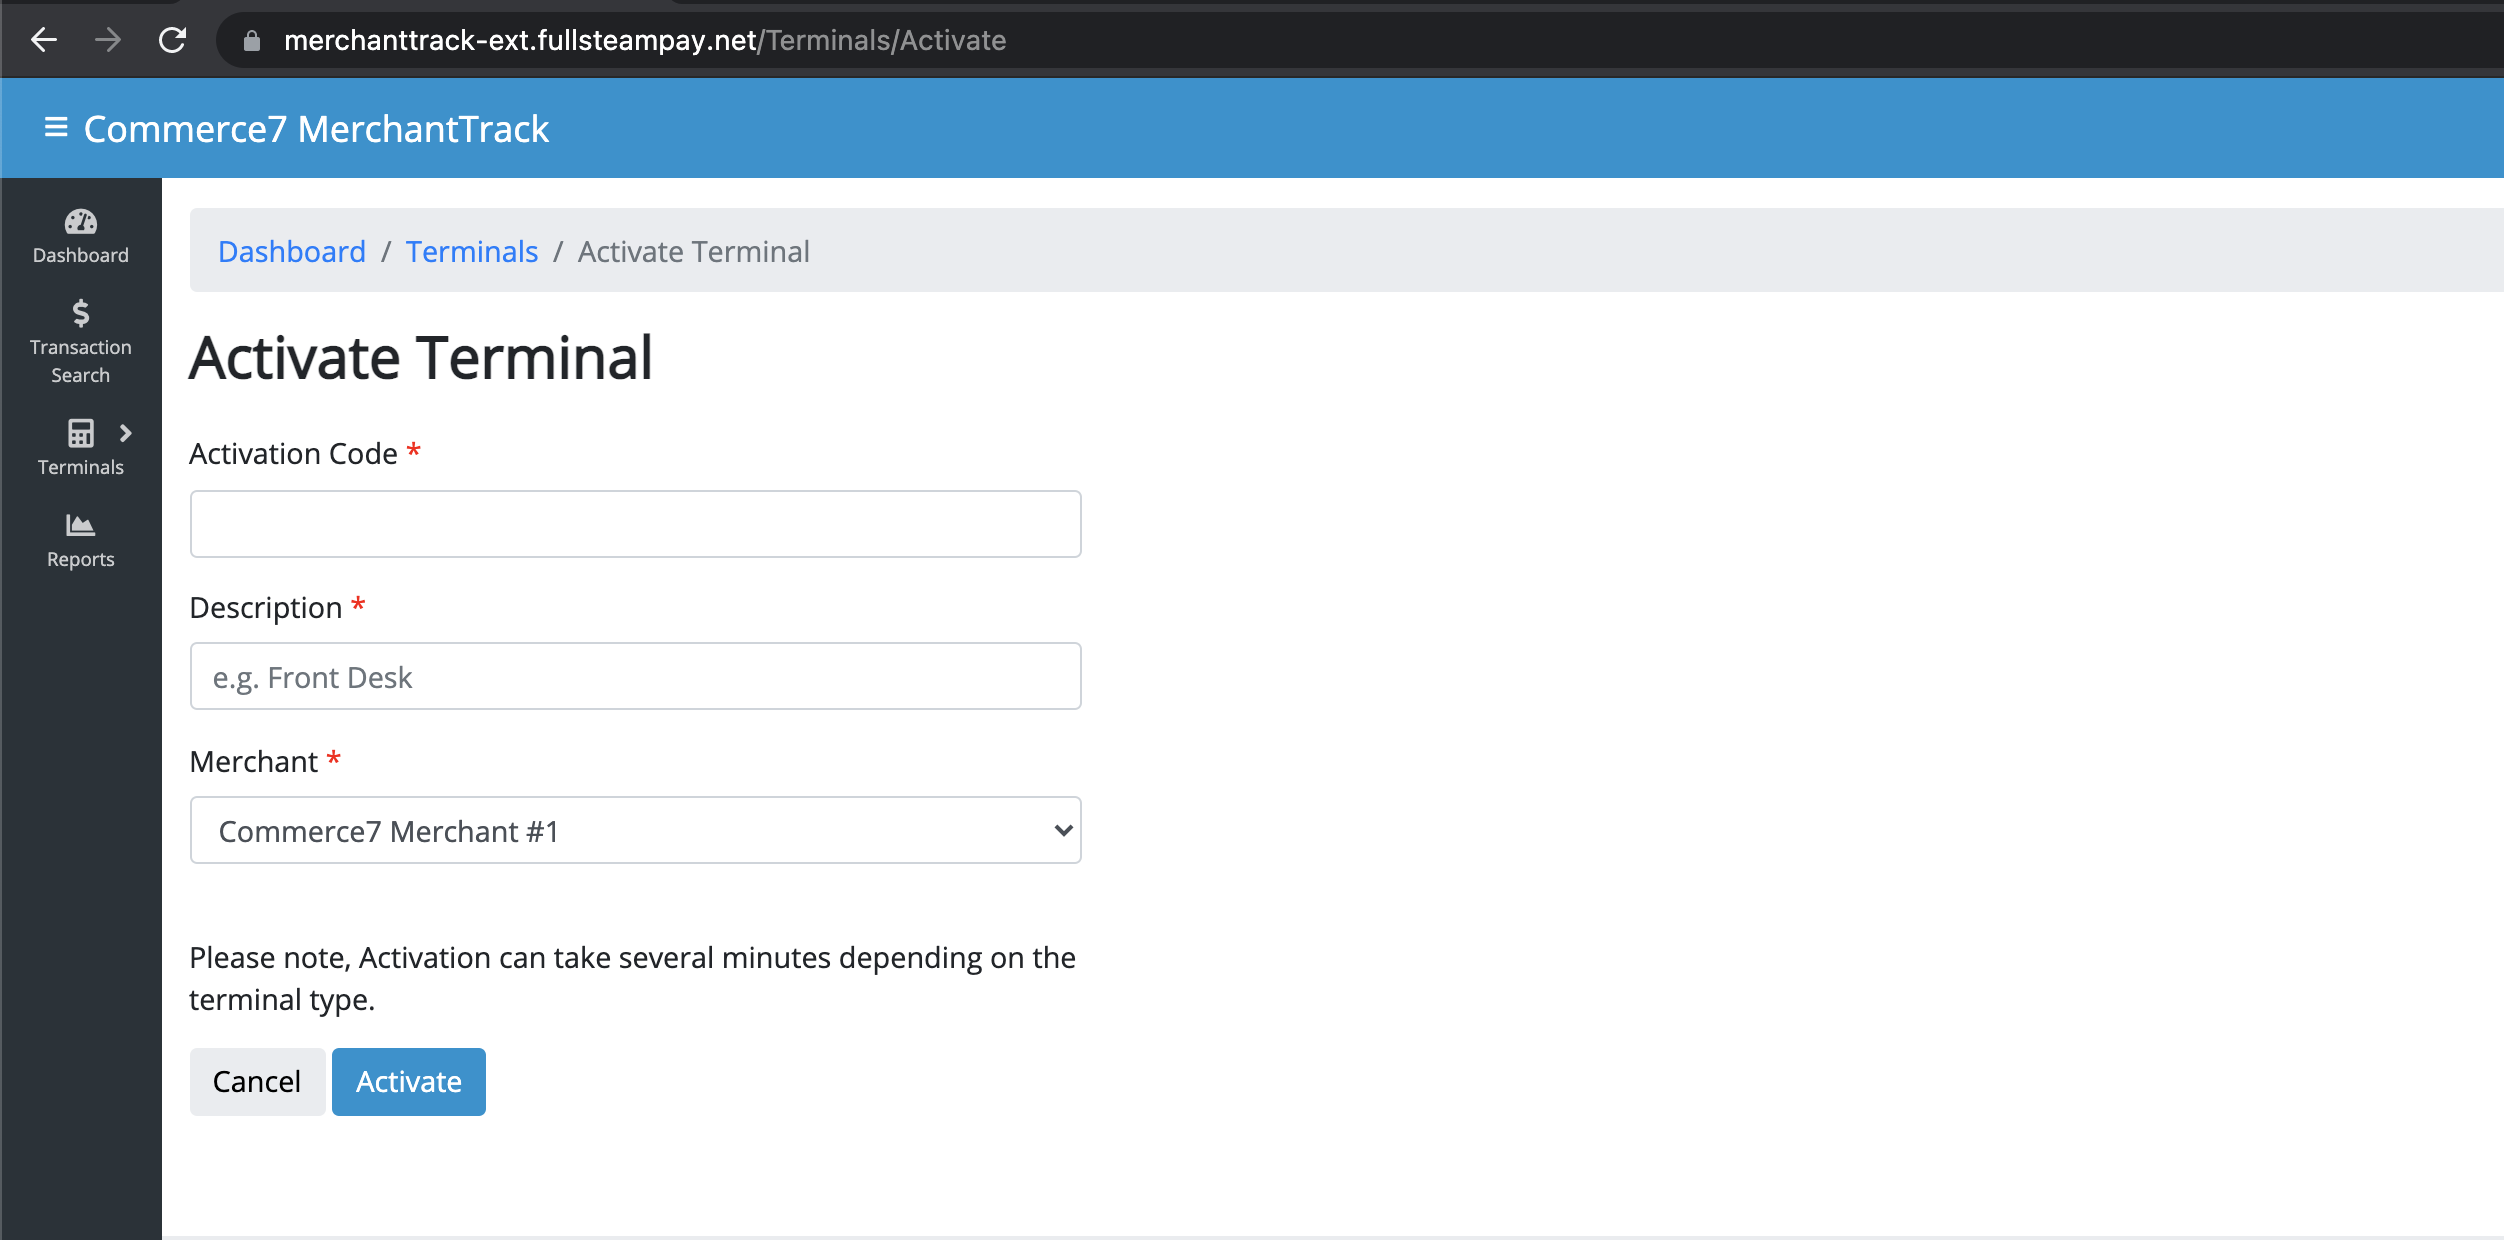
- Clicking the button will take you to Merchant Track > Terminals > Activate. Enter the activation code that you received from the device wifi configuration above and click Activate.
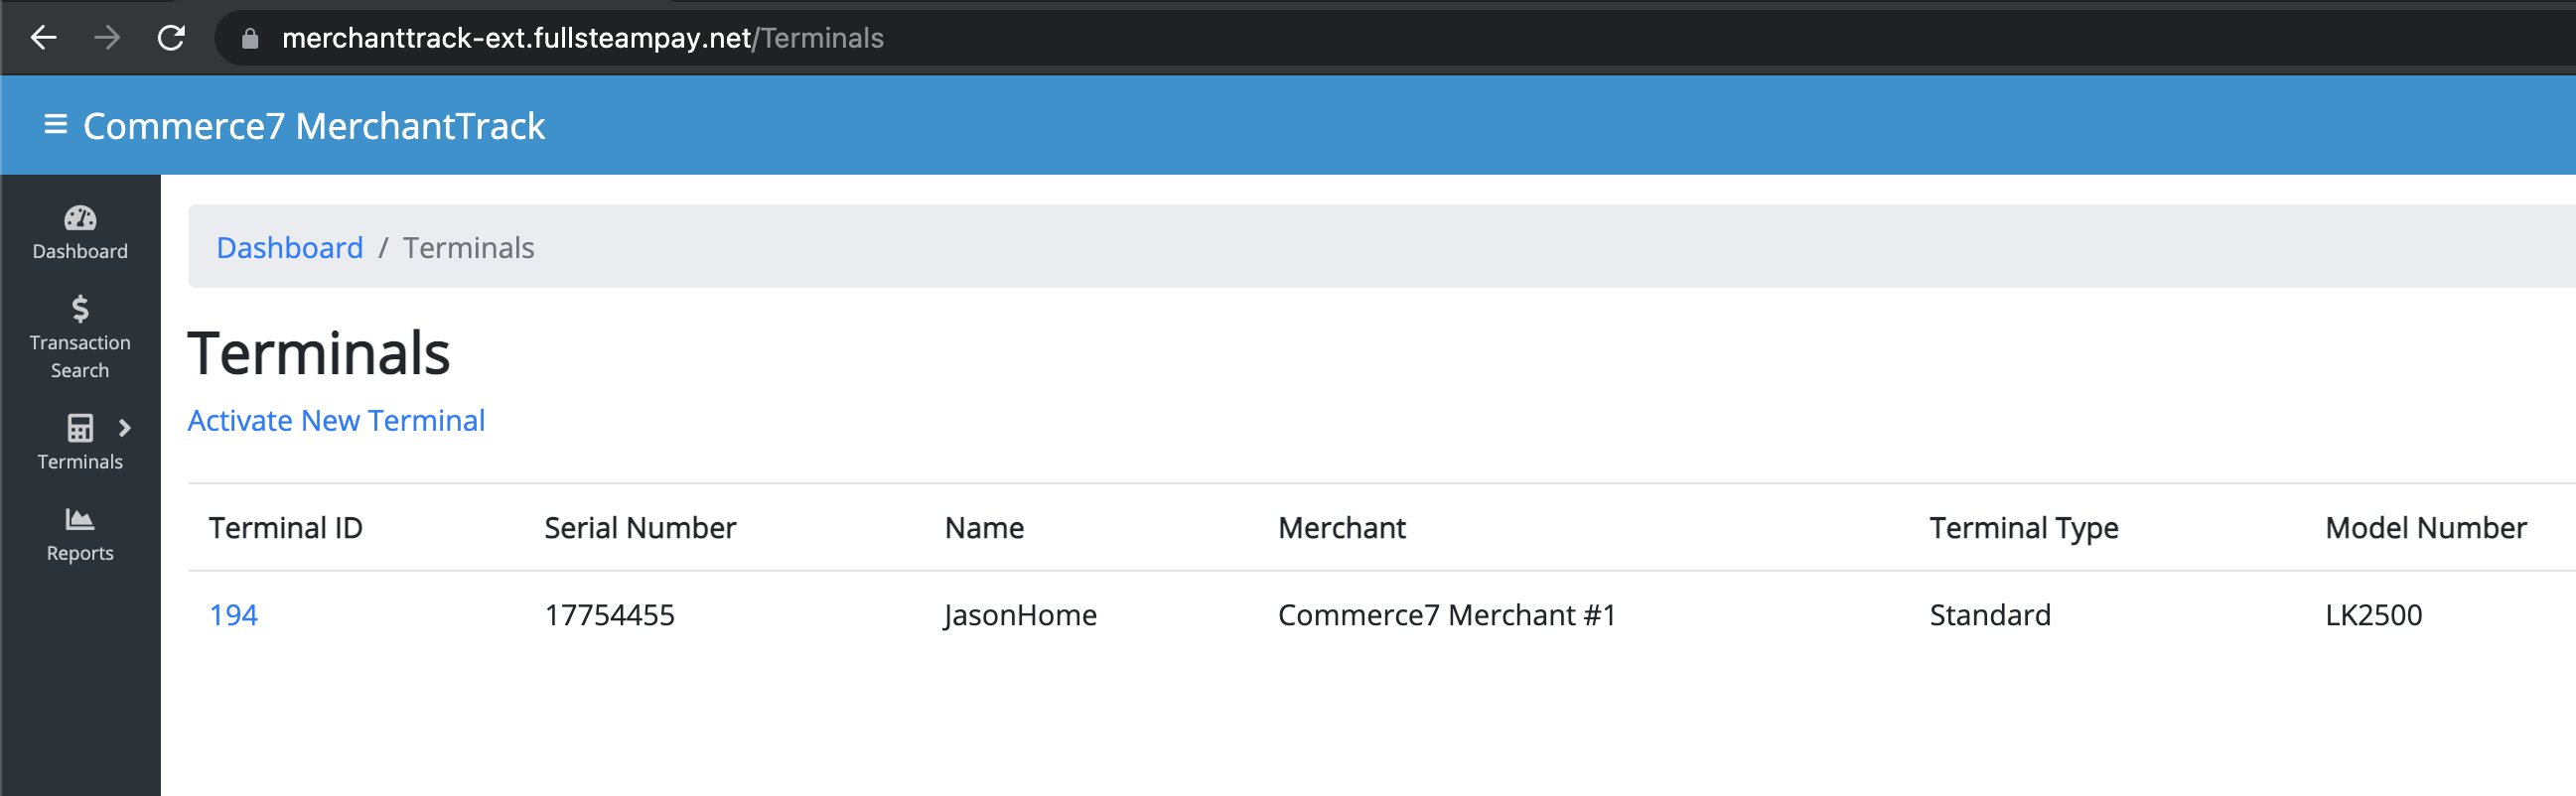
- Copy the Terminal ID as you will need to enter this into Commerce7.
- Go back to your Commerce7 POS Profile (click back in your browser)
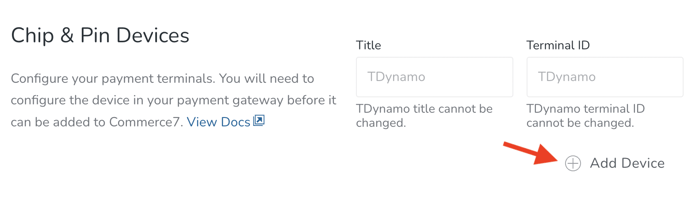
- Under Chip & Pin Devices, Select Add Device.
- Enter the Terminal ID(s). The Title is the name that is displayed in the POS when selecting the terminal.
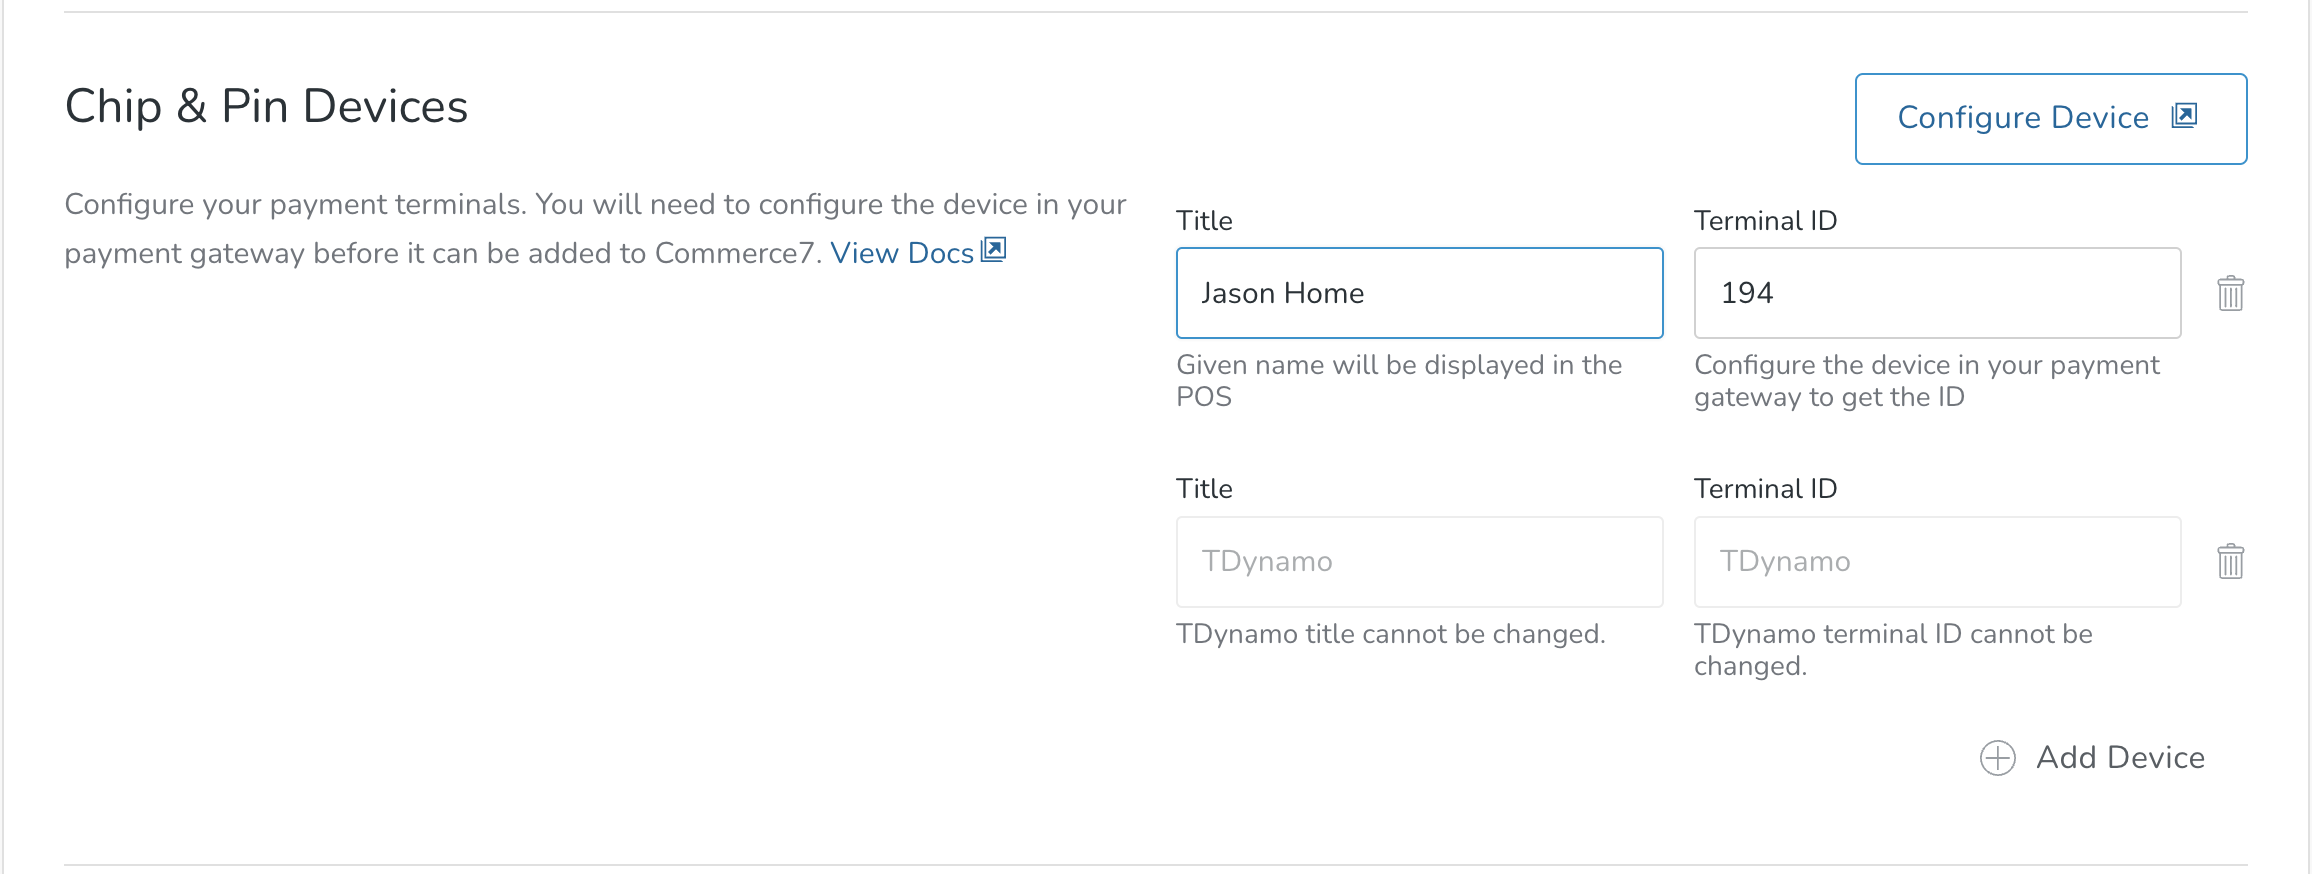
- If you have more than one terminal to enter, click the Add Device button again to enter additional Terminal IDs.
- Wait a few minutes for your device to complete configuration. When it goes to the "TriPOS" screen it's ready to accept payments.
Sending transactions to the Ingenico iSMP4
Once you have the Ingenico iSMP4 setup, when you select charge order on the on the POS you should see Process with Fullsteam Payments as a tender option.
Select Process with Fullsteam Payments to send the transaction to the terminal to complete the transaction.
Currently, if you are integrated with both Fullsteam Payments and Stripe you will see the option to Process with Stripe but this will not send the transaction to the terminal. Process with Fullsteam Payments has to be selected to send the transaction to the terminal.
Extra tips/notes:
- The keypad uses multi-tap entry, for example, pressing the 2 key repeatedly will go through the number 2 and the letters a, b and c in both lower and upper case. To enter a symbol, press the # key. To erase something typed, press the yellow key.
- When needing to go back a previous screen, Press red key to go back.
- To delete a Wi-Fi profile: press green key on highlighted Wi-Fi connection, press delete on next screen.
- If the device is plugged in, it will turn on automatically.
- Being stuck on a blue screen can be resolved by restarting the device.
Contactless not working:
- If contactless is not responding/working
- Remove the terminal within merchant track (This will take the terminal offline)
- Once a new activation code populates on the terminals screen re-Activate the terminal in Merchant track
- You may need to re-register your terminal in Commerce7.
- Once that is complete the terminal should now accept contactless payments.
Disconnecting Merchant Track (for troubleshooting purposes)
Sometimes (as a last resort) we will recommend that you remove and re-add your device to your Merchant Track account and POS Profile. Here's how:
-
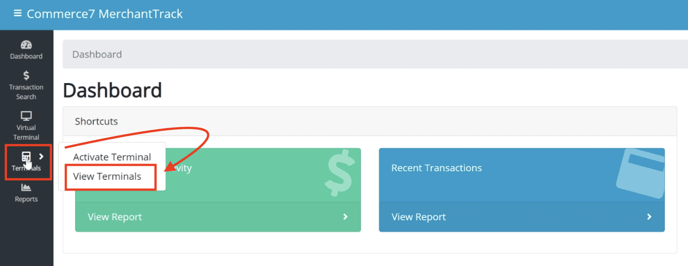
- Access your Merchant Track Dashboard
- Go to Terminals > View Terminals.
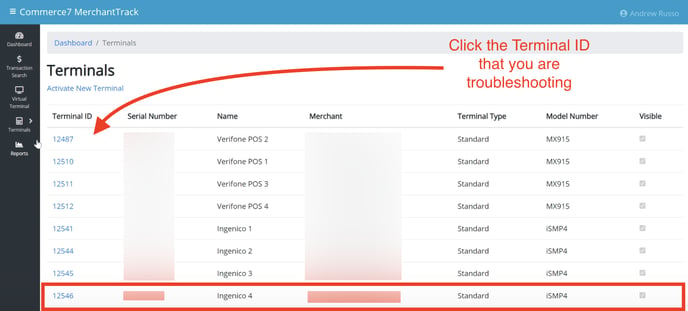
- Click the Terminal ID that you are troubleshooting.
- Click Edit in the bottom right.
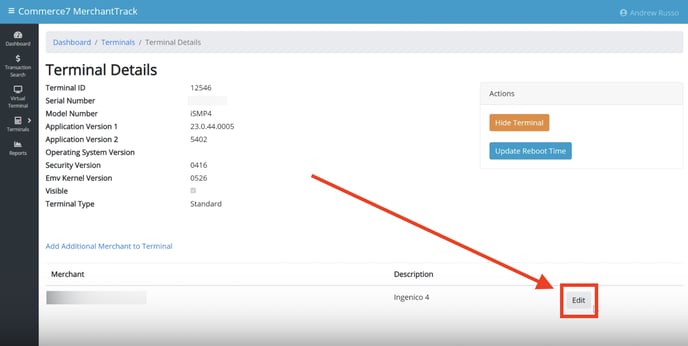
- Click the Remove button.
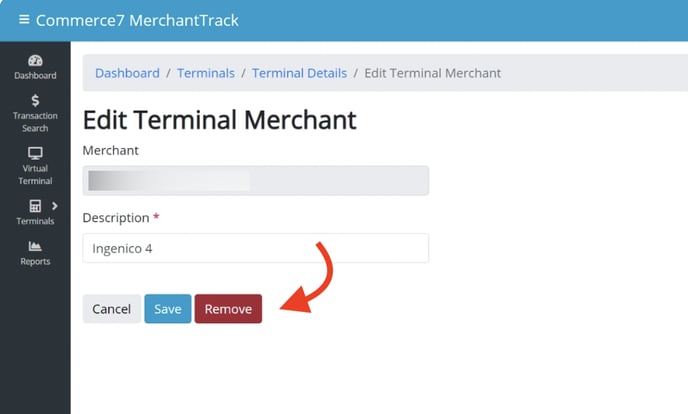
- Now that it's removed, begin the device setup process from the top here.