Define blanket Blackout Dates (like for national holidays) - or block Reservation times for specific Experiences (like for special events). Here's how!
Defining Blanket Blackout Dates (Example: Christmas Day)
Defining Blocked Reservation Times for Specific Experiences (Example: for a Wedding)
Defining Blackout Dates for a Specific Location (Applies to all Experiences using Location)
Cancelling Blocked Reservation Times for Specific Experiences
Defining Blanket Blackout Dates (Example: Christmas Day)
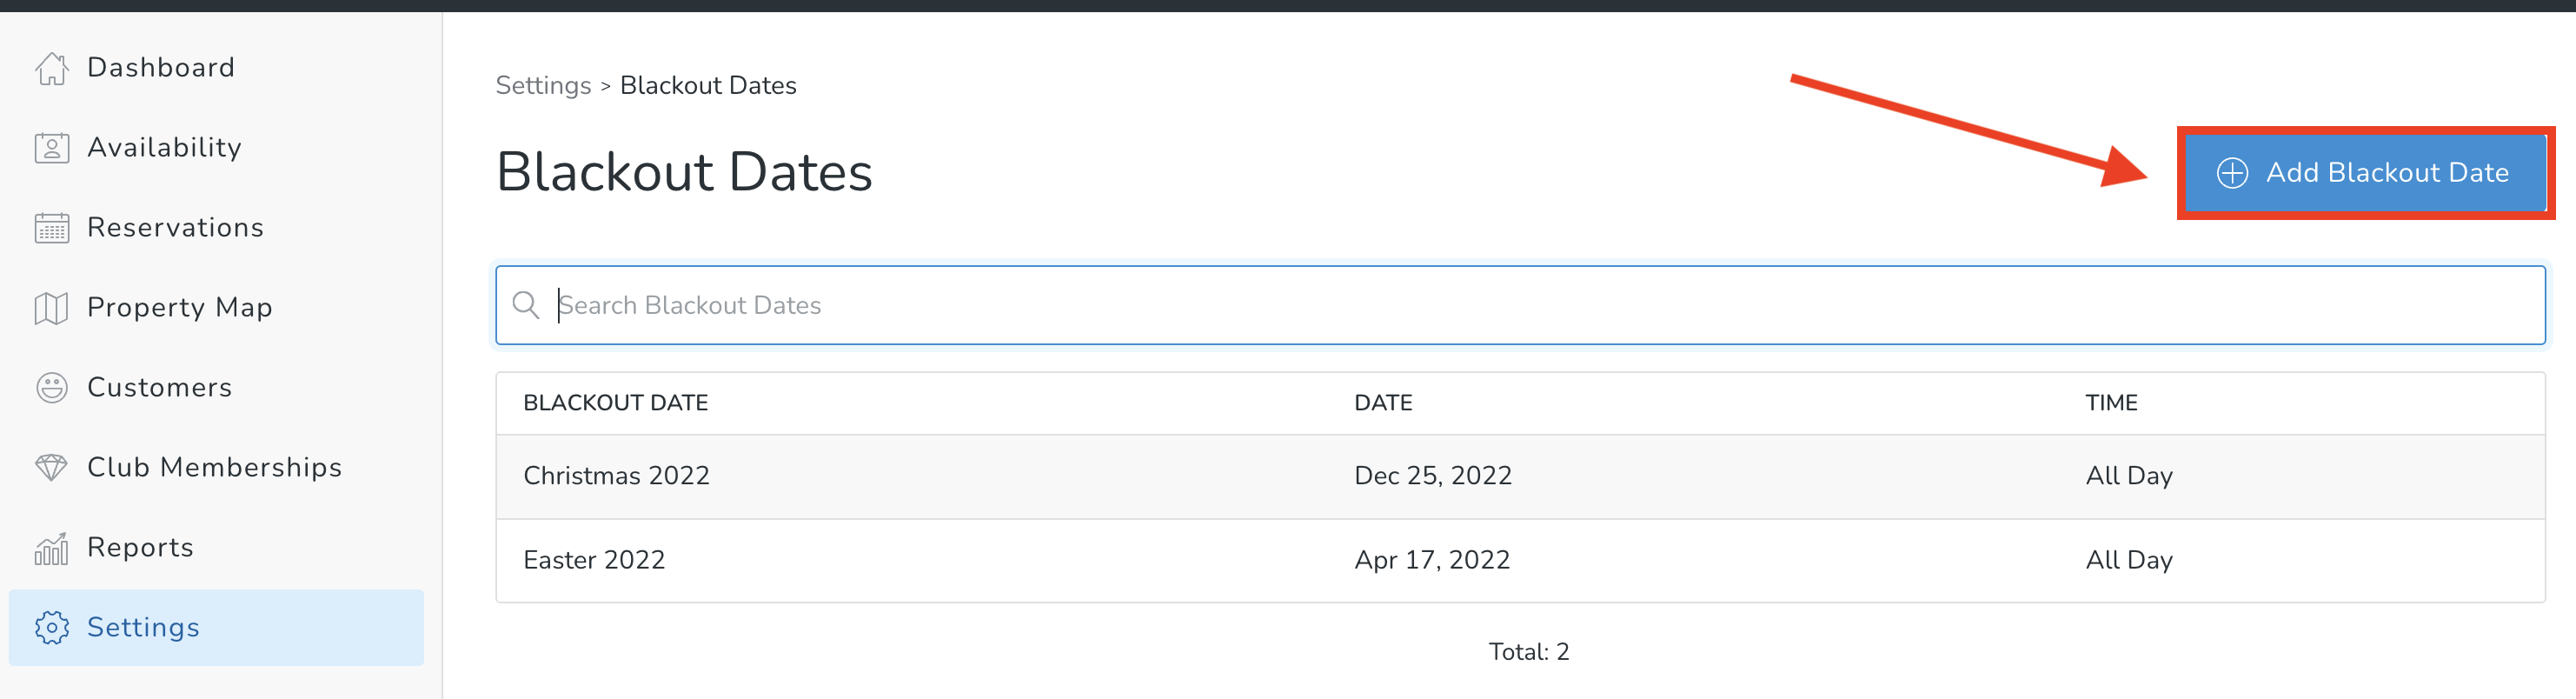
In the Reservations panel, go to Settings > Blackout Dates.

Click the Add Blackout Date button.
Add a Title and Date. Click the All Day checkbox if it's blacked out the entire day.
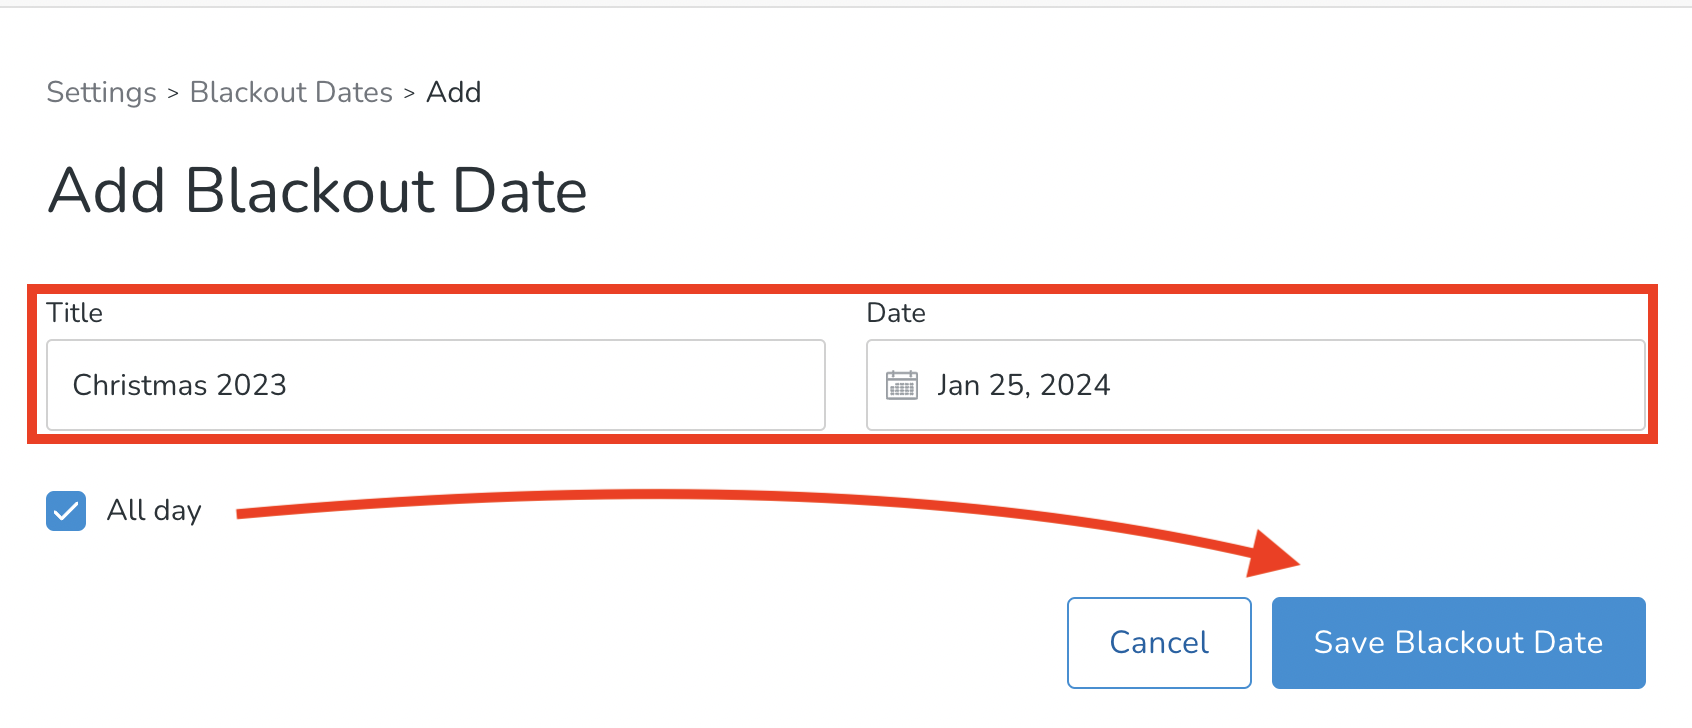
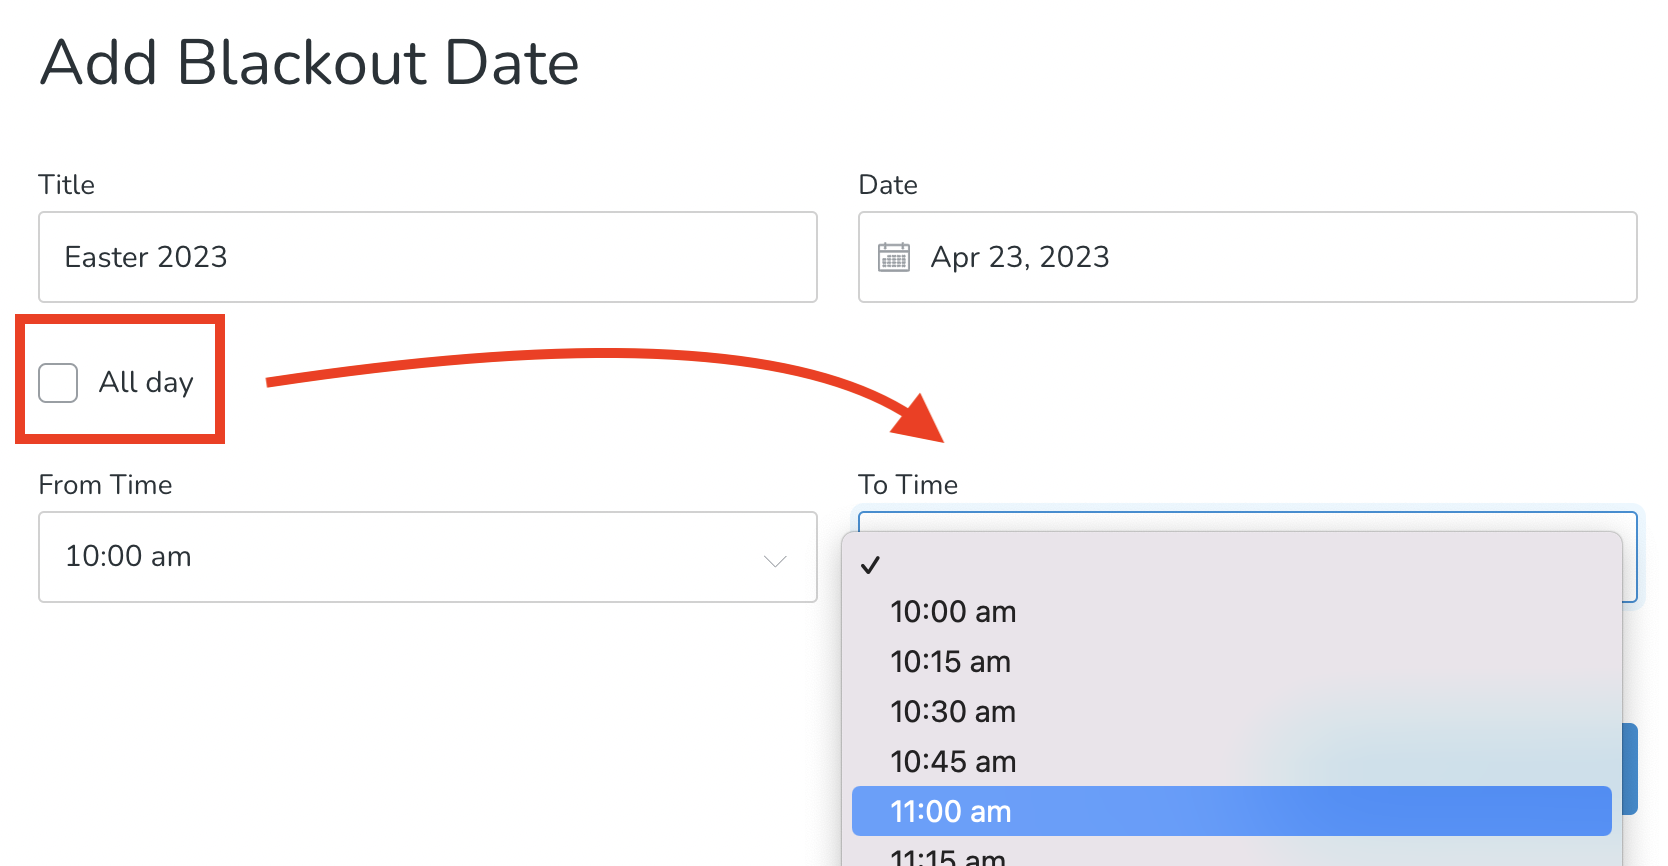
Uncheck the All Day checkbox, if you'd like to define specific blackout times for that day.
Blackout dates will appear on the Reservations > Availability tab (if you've chosen a blacked out date from the date picker).

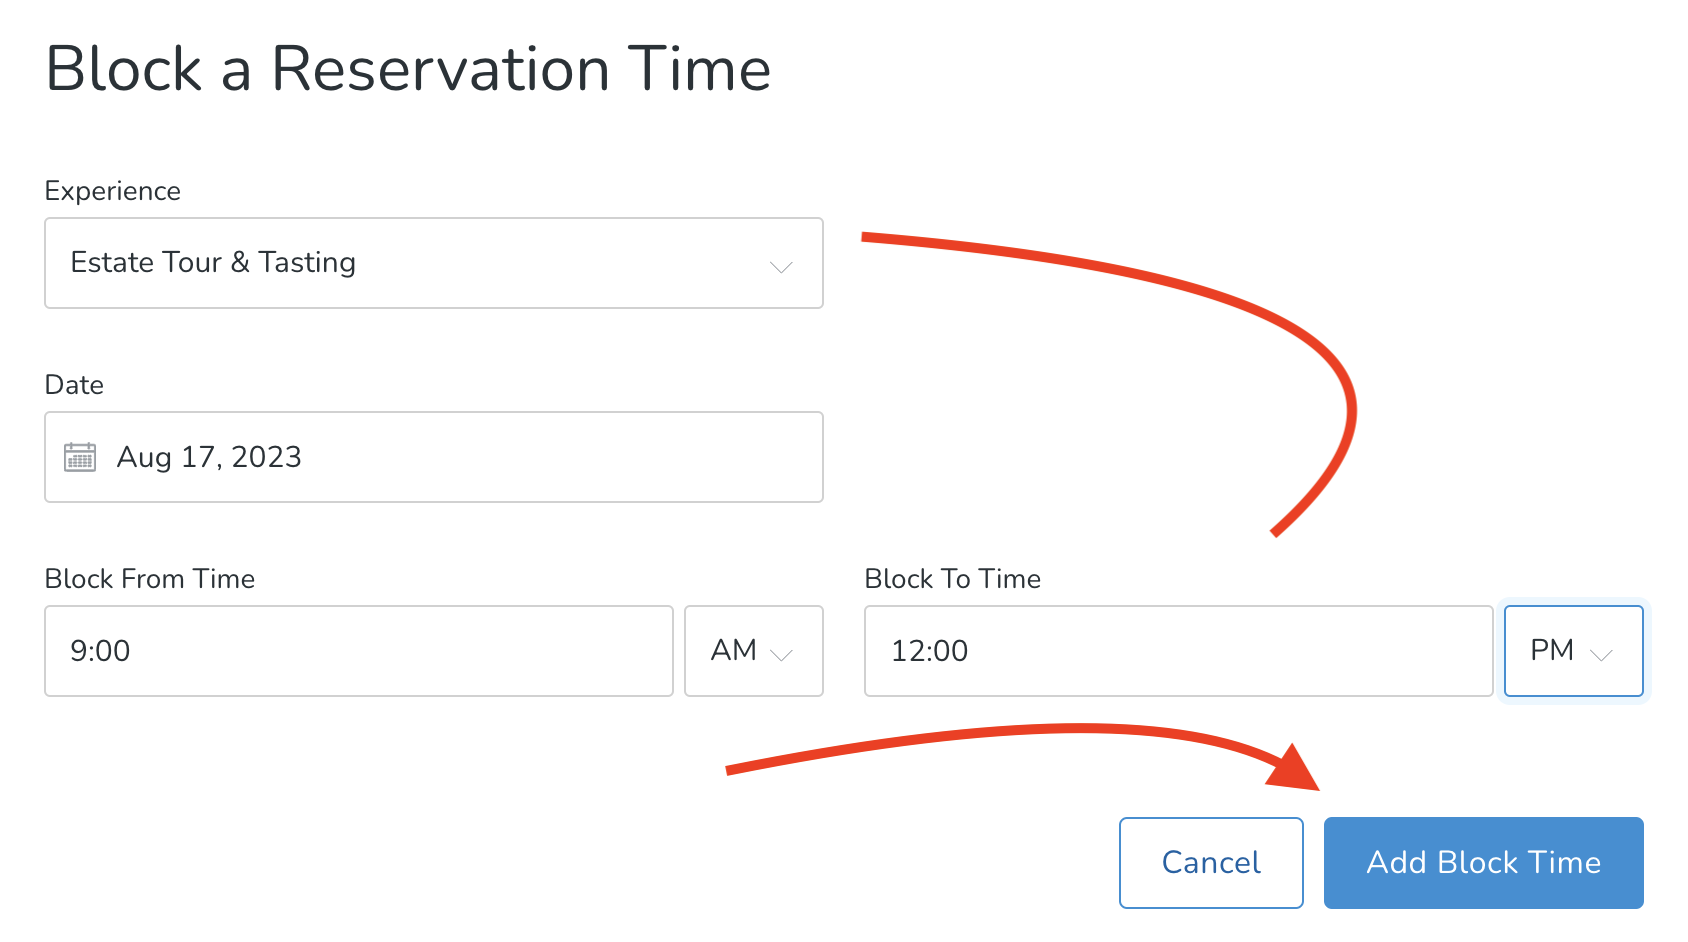
Blocking Specific Experience Reservation Times (Example: for a Wedding)
You can block Experiences for Specific times from the Reservations > Availability screen.

Choose Experience, date and times for to block. Click Add Block Time button. This time will now not be available to book.
Defining a Blackout Date for a Specific Location (across all Experiences)
In the Reservations panel, go to Settings > Locations.

Choose the Blackout Date Tab and then click the Add Blackout Date button.

Add start and end dates. Click the Save Blackout Date box.

Cancelling a Blocked Experience Reservation Time
If you need to cancel a Blocked Experience, here's what you do:
- Go to Settings > Experiences.

- Choose the applicable Experience.

- Choose the Blackout Dates tab and click the Delete button for the applicable date.

What happens to existing reservations that were booked during the (newly defined) blackout dates?
- When you apply blackout dates to reservations, any existing bookings made for those dates will remain intact.
- Customers will not be able to book new reservations during the blackout period from your website.
- In the administrative interface, your staff will still have the ability to process reservations for blackout dates by using the override feature.