Commerce7's Allocations feature provides an effective solution for managing highly sought-after wines with limited availability. Whether it's a unique vintage or a specific type of wine in short supply, setting limits on purchase quantities can enhance the Customer experience.
The Allocations feature is not available for C7 Lite users.
If you would like to upgrade to the full version of Commerce7, please contact Support.
In this article:
- Managing an Allocation
- Granting Individual Wishes
- Bulk Granting Wishes
- Bulk Creating Orders
- Granting Wishes by Product
- Making Allocated Products Public Again
- Help! I don't see the Allocations Link on the Front End
- Changing the Display or Sort Order of Allocated Products
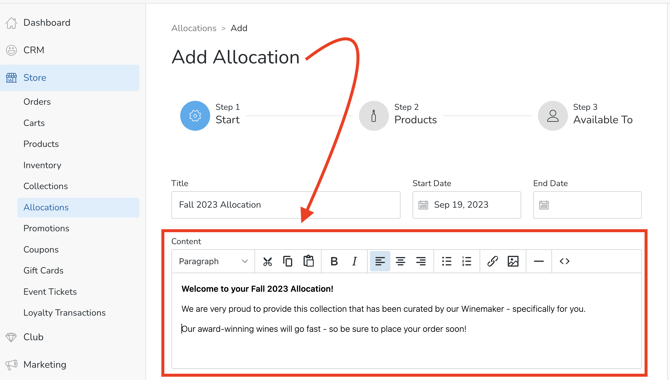
Creating an Allocation: Step 1 - Configuration
- Go to Store > Allocations.
- Click the Add Allocation button.
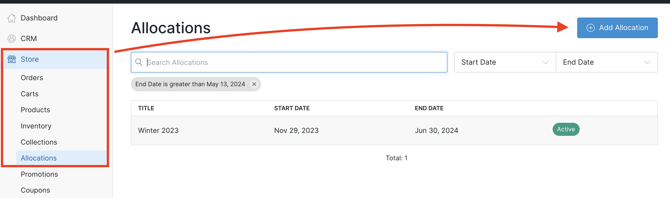
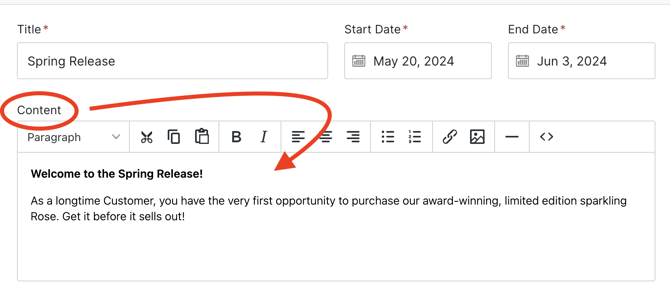
- Enter a Title (this title is Customer-facing).
- Enter Start and End Dates for the Allocation. During this specific date range, eligible Customers can access and make purchases from the Allocation.

- Content Field (optional): Any text you place in the 'Content' field will appear directly below the Allocation Title on the Allocations page for eligible logged-in Customers. However, it is not enabled by default. Learn how to enable it here.
- Select a Wish Type: Customers eligible for the Allocation can buy a specific amount of each Product, with the added option to "wish" for additional quantities online.
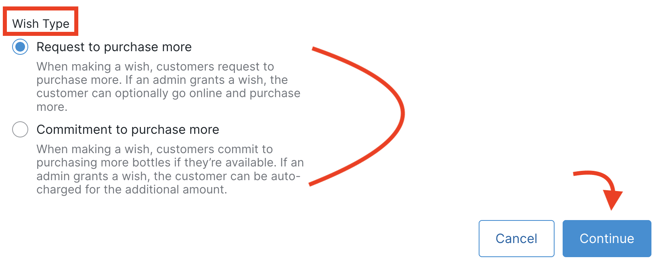
There are two types of Wishes: 'Request to purchase more' and 'Commitment to purchase more'. You will select the type based on how you want to manage granted wishes:
- Wish Type 1: Request to Purchase More
- When making a wish, Customers request to purchase more. If an admin grants a wish, the Customer can optionally go online and purchase more.
- With this method, admins will have the option to send an email to the Customer, notifying them their wish has been granted.
- Example of Customer view when placing a wish:

- Wish Type 2: Commitment to Purchase More
- When making a wish, Customers commit to purchasing more bottles if they’re available. If an admin grants a wish, the customer can be auto-charged for the additional amount.
- (Admins cannot notify customers of the granted wish as they will receive an order confirmation once the additional bottles have been charged.)
- Example of Customer view when placing a wish:

- Wish Type 1: Request to Purchase More
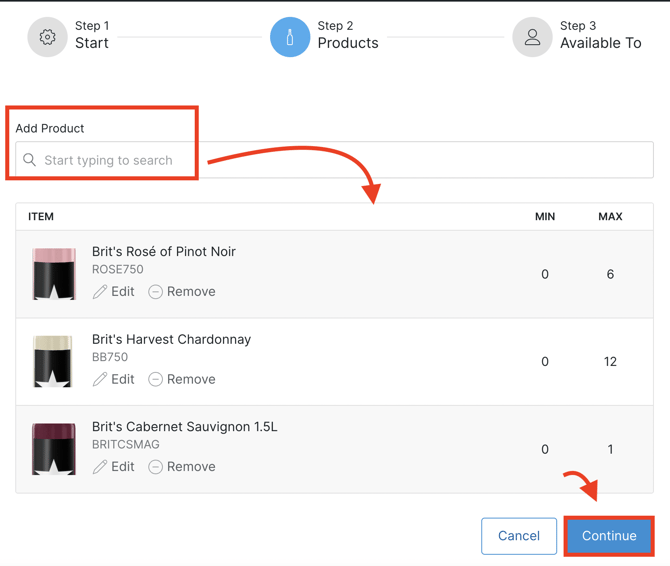
Creating an Allocation: Step 2 - Adding Products
- Select the Products you wish to add to the allocation.
- Specify the Min and Max quantities available for purchase.
-
NOTE: Do you have Products that are 'Wish only'?
If you prefer Customers to only make wishes for Products without the option to purchase, simply set both the Min & Max quantities to "0". This way, Customers will need to make a wish for any wine they want within the Allocation.
-
- Click the Continue button.
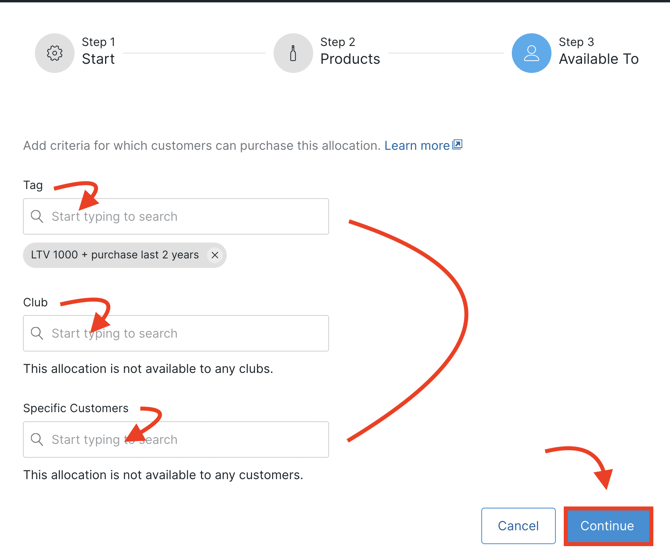
Creating an Allocation: Step 3 - Defining the Customers
- Select eligible Customers: You can specify eligible Customers by Tag, Club, or Specific Customers depending on your preference. (In the example below, we've chosen a Customer Tag called, 'LTV 1000 + Purchase last 2 years').
- Click the Continue button.
- View the Summary. If all looks good, then click the Save Allocation button.


Allocation members will now be able to see the offering on your front end site, but they will not be able to purchase until the specified date for the Allocation.
The Products included in the Allocation behave similarly to standard Products as they are organized within designated 'Collections'.
This means that on your website, Customers can view the quantity allocated to them, make purchases within their Allocation, and place wishes for extra bottles according to the charging method you prefer.
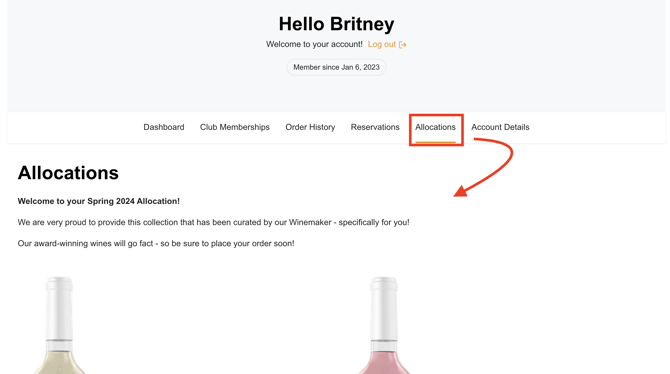
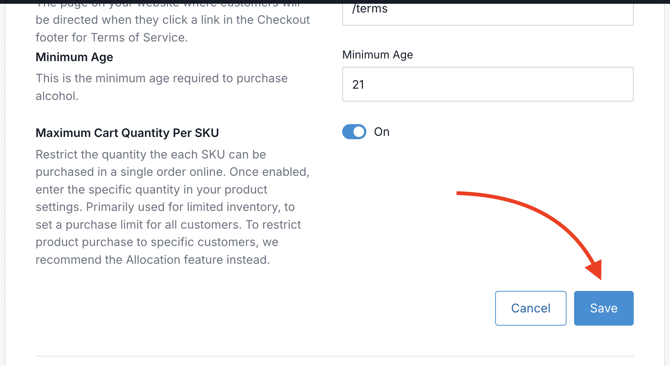
Enabling the 'Content' Field
Customize a specific message that will appear at the top of the Allocation page directly under the Allocations header. Eligible logged-in Customers will be presented with it.
Note: If you are not familiar with Product Templates, we'd recommend engaging with your designer/developer to assist with this. Additional developer doc is available here.
Here's how:
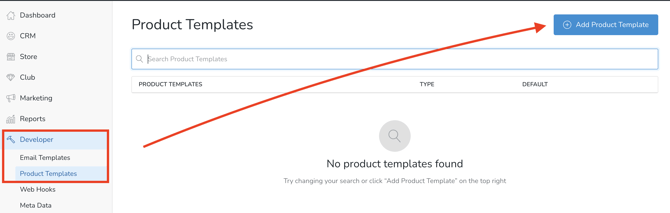
- Go to the Developer tab > Product Templates. Click the Add Product Template button.
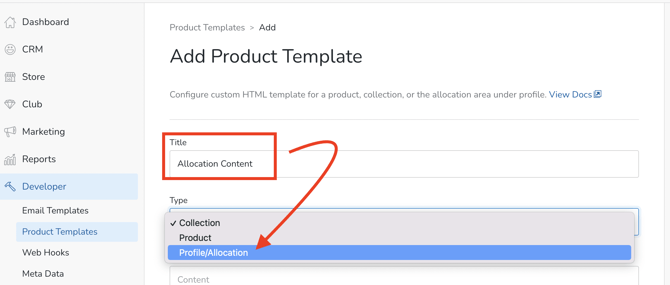
- Name the Template (not Customer-facing) - and choose Profile/Allocation in the drop-down.
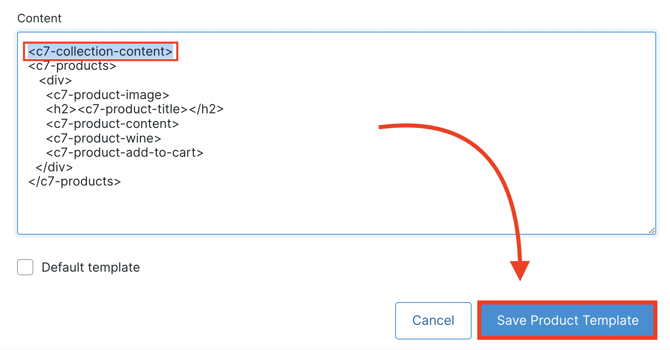
- Within the Content area, add the tag <c7-collection-content> along with any other applicable collection tag or data. Save.
- Now head into the Allocation. In the Content field, Enter the text that you'd like your eligible logged-in Customer to see.
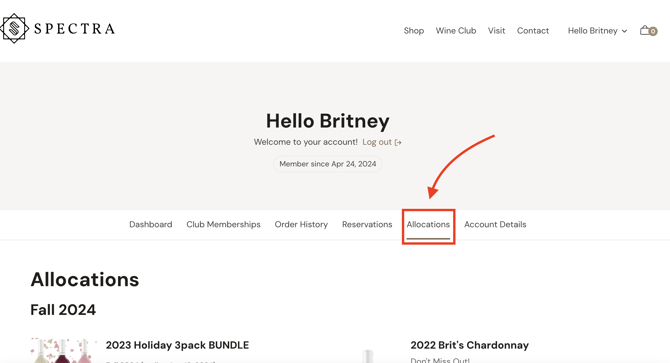
- Log in as an eligible Customer and navigate to the Allocations page. This is what it would look like to your Customer.
Managing an Allocation
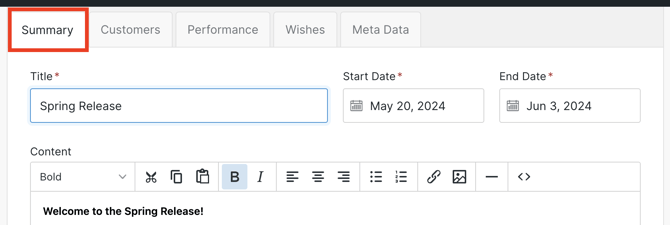
As you navigate through the Allocations feature, you will see tabs titled, Summary, Customers, Performance, Wishes, & Custom Fields.
- Summary: This page is a summary of your Allocation configuration.
- Customers: Here you will find a list of all Customers eligible for the Allocation. Click into the Customer to manage their wishes, see their allocation orders, or customize their allocation maximums.

- Performance: For every Product included in your Allocation, you have visibility of the quantity purchased, requested, and granted through wishes. Additionally, you can preview the current inventory counts available for sale.
- You will also see a list of Allocation Orders - plus the ability to filter and export the Orders to CSV.

- You will also see a list of Allocation Orders - plus the ability to filter and export the Orders to CSV.
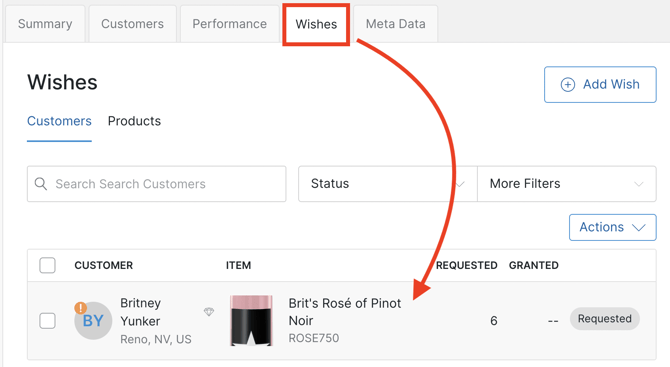
- Wishes: Displays all wishes made by customers on your website. Here you can grant wishes or add wishes on a customer's behalf.
- You will see two sub tabs here for Customers & Products.
- In the Customers tab, you will see a list of all customers who have made wishes.

- In the Products tab, you will see the same wishes but they will be listed individually based on the product that's being requested.
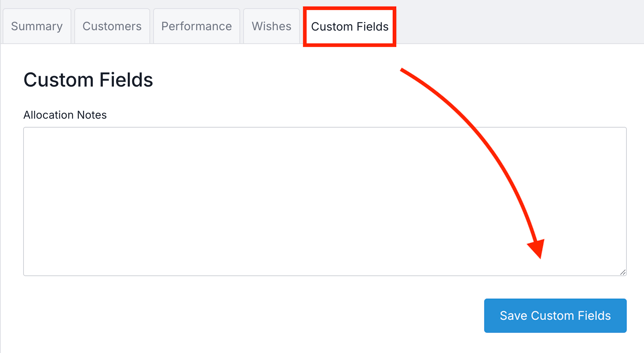
- Meta Data: If you have Meta Data set up for Allocations, you will see it in this tab. Once entered, click the Save Custom Fields button.
Granting Wishes to Individuals
- To grant an individual wish, search for the Customer in the Customer tab of your Allocation or select the specific wish from the Wishes tab.
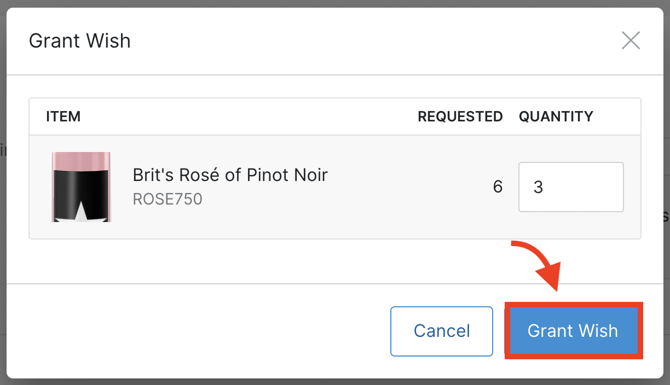
- Once the individual wish is selected, this will open their individual wish summary page. Here you will select Grant Wish.

- Specify the quantity you wish to allocate to the customer.
- If the wish type is Request to Purchase More, you can choose to notify the customer by using the check box in the pop up window.

- If the box is selected, your customer will receive an email letting them know their wish has been granted. The customer now has the option to go online and purchase more.

- Click Create Order for Grants.

- If your Wish Type is set to Commitment to purchase more, specify the quantity and click the Grant Wish button.
- This will open a cart auto-populated with the granted products.
- If the customer happened to place a wish before purchasing the entire amount that they were allotted, the new order will also populate with any extra quantities available to them. (For example: If the customer was granted 8 additional bottles, but they only purchased 4 of the 6 that they were originally allocated, 10 would be added to the new order by default.)
- If the box is selected, your customer will receive an email letting them know their wish has been granted. The customer now has the option to go online and purchase more.
- You can edit any of the order information including product quantities and then when you're ready, click to charge the order.
- The order will be created and logged to the allocation, and the customer will receive an order confirmation email.
- If the wish type is Request to Purchase More, you can choose to notify the customer by using the check box in the pop up window.
Bulk Granting Wishes by Customer
In your Allocation under the Wishes tab, you'll find a list of all Customers who have a wish.
You can search or filter the list by wish status, Customer Tag, or Product. To grant all wishes, do not filter the list before granting. Once you have filtered for the wishes you want to grant, select Actions> Grant Wishes.
- To grant wishes, click Actions > Grant Wishes
- If you don't want to grant all wishes, you can choose to search or filter the list of customers by wish status, customer tag, or product.

- When you click Grant Wishes, any wishes in the current view will be selected.

- If you don't want to grant all wishes, you can choose to search or filter the list of customers by wish status, customer tag, or product.
- A popup modal will appear with all Products that are contained in the selected wishes.
- For each Product choose how many you want to grant:
- None: Won't grant any of this Product
- All: Grants all each individual Customer wished for
- Specific quantity: Up to a specific amount that the Customer requested (not over)
- For example: If you enter '2'.
- Customer A requested 1, they'd receive 1
- Customer B requested 2, they'd receive 2
- Customer C requested 3, they'd receive 2
- For example: If you enter '2'.
- If your "Wish Type" is set to "Request to purchase more" , you'll have the option to notify these Customers that their wish has been granted.

Quantities are granted top to bottom (alphabetically). If you select a specific quantity to grant, for example 1, each Customer will receive 1 of this Product.
If you have limited inventory, we recommend filtering the list down further by who you want to receive it first.
Bulk Creating Orders
If the Wish Type is set to 'Commitment to purchase more', once wishes have been granted, you can proceed to charge Customers for the additional bottles.
NOTE:
Before charging Customers for a new Order, it is best to ensure that all their wishes have been granted to avoid additional charges and separate orders.
Also please note that all bulk orders will be set to shipping. If you want them to be for pickup, they must be done individually.
- Filter your list of wishes and then select Actions > Create Orders.
- A modal will appear letting you know how many new Orders will be created
- Each new Order will use the customer's default shipping and billing information. If they do not have a default on file, then the new Order will fail and you will see an error message on any failed Orders when the bulk action is complete.
- If you want to process any orders for Pick Up and not shipping, they must be done individually, either before creating bulk Orders or exclude those customers from your current selection. (All Orders created through the bulk action WILL be set to shipping.)

- When the bulk action is complete:
- You will receive an admin email letting you know. (You can also refresh your screen to see the wishes update.)
- Orders will be created for the selected Customers and they will receive an Order confirmation.
- If any Orders could not be created, you'll see an error on both the "Wishes" tab and under Settings > Bulk Actions.
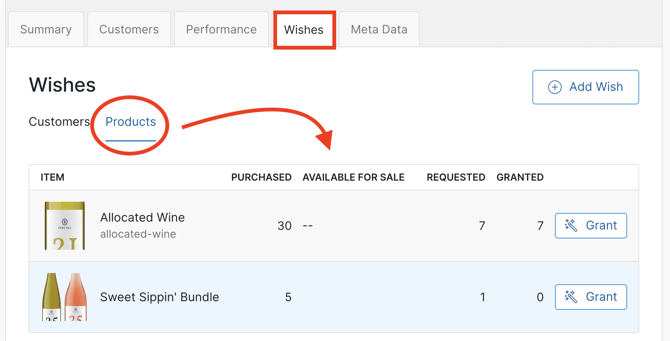
Bulk Granting Wishes by Product
In the Wishes > Products sub tab, you will see a summary of all products in your Allocation. This gives you the opportunity to grant wishes based on your Products and the inventory you have remaining.
- To grant wishes for a specific product, click Grant.
- You can then specify how many you want to grant. This number will be granted across wishes for all Customers.

- You can then specify how many you want to grant. This number will be granted across wishes for all Customers.
- To view a list of all wishes for a specific Product, click on the Product you wish to view.
- Here you will see the same wishes that display under the Customers sub tab, but only for the selected Product.
- You can choose to filter down the list further, or you can click Actions > Grant Wishes.

Making Allocated Products Public
- In the Allocation: When you want to remove Products from an Allocation you will need to manually remove it from the Allocation.
- Navigate to Store > Allocations > select the allocation and under 'Products' click Remove next to the Product you wish to remove.

-
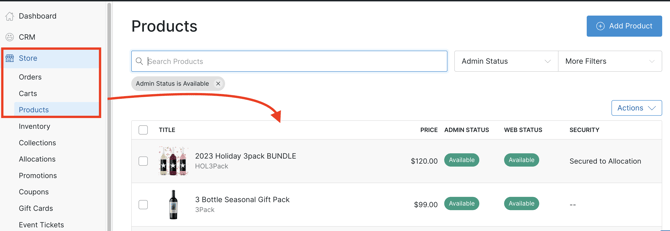
Navigate to Store > Products.
-
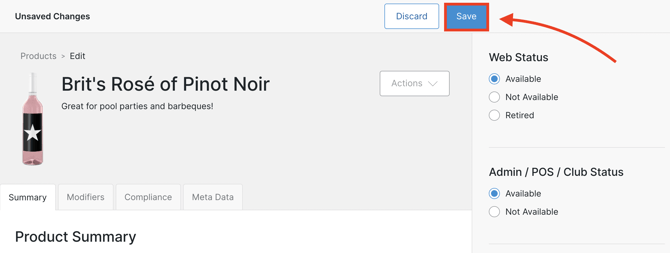
IMPORTANT: In each of the Products, temporarily setting the Web status to Not Available first, and then changing it back to Available on the Web. (If you follow this process, this clears any allocation Carts, and the items will not be added back to the Carts once it's made 'Available').
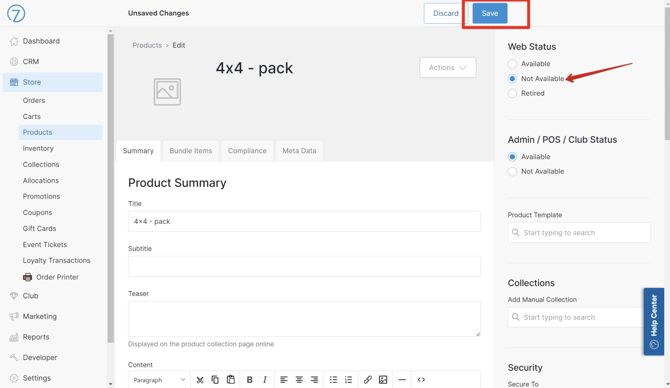
- Scroll down to the 'Security' section. Use the drop down menu under Secure To and select Public.


- Click Save Product.
- Once you make all of the Products Public, the 'Add to Cart' button will display for all Customers.
Help! I don't see the Allocations Link on the front end
If you do not see the Allocations link in the front-end Customer Dashboard, it just means that you need to clear C7's cache. It's easy - here's how.
- Go to Settings > General.
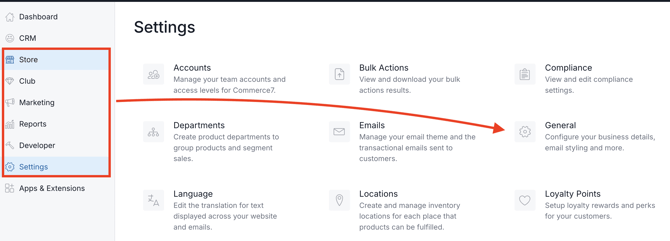
- Click the pencil icon in the General section.
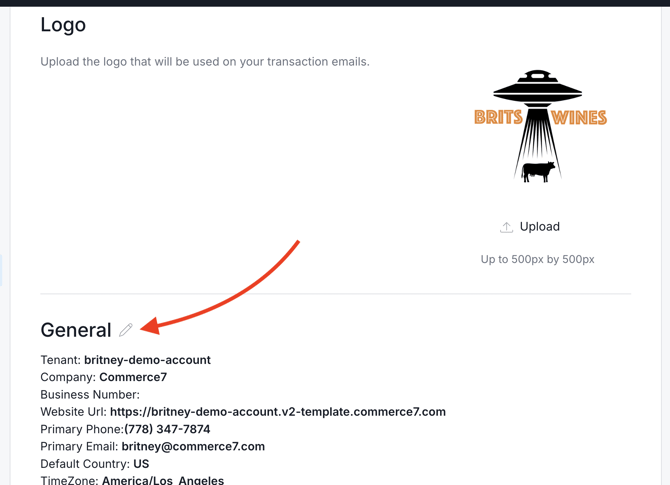
- Scroll to the bottom of the page and click the Save button.
- Now, when you log into the front end, you will see the Allocation link on the Customer Dashboard.
Changing the Display Order of Allocated Products
Allocation page display order is random, and cannot be customized. The good news is that there is a workaround.
Display order of allocated Products cannot be customized. However, a great alternative is to create a Collection.
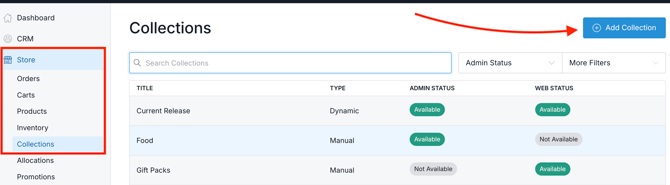
- Once you have created your Allocation, head over to Store > Collections.
- Click the Add Collection button.
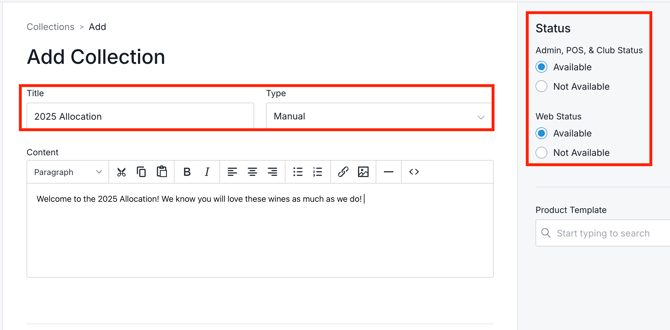
- Enter a Title for the Collection.
- Choose 'Manual' as the Type.
- Be sure to make it available in the various Channels.
- Click the Save Collection button.
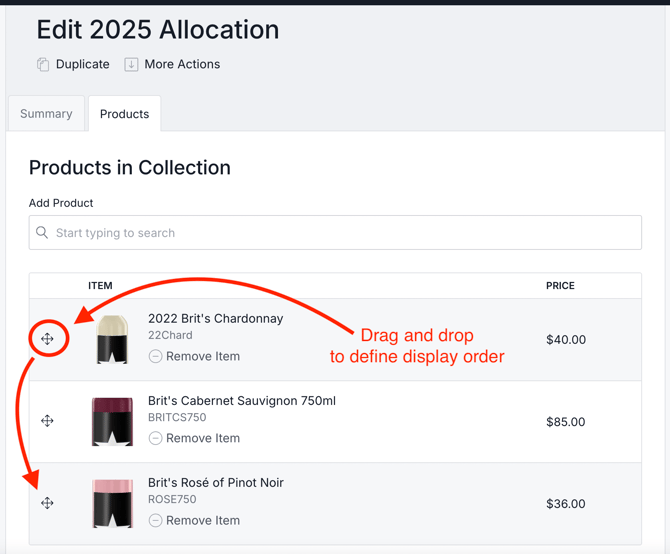
- Click on the Products tab.

- Add the Allocated Products to the Collection.
- Drag and drop the Move Icon to define the display order. (The new display order is auto-saved).
- Click on the Summary tab.
- Scroll down to the SEO section and click on the Collection URL to see it on your website.
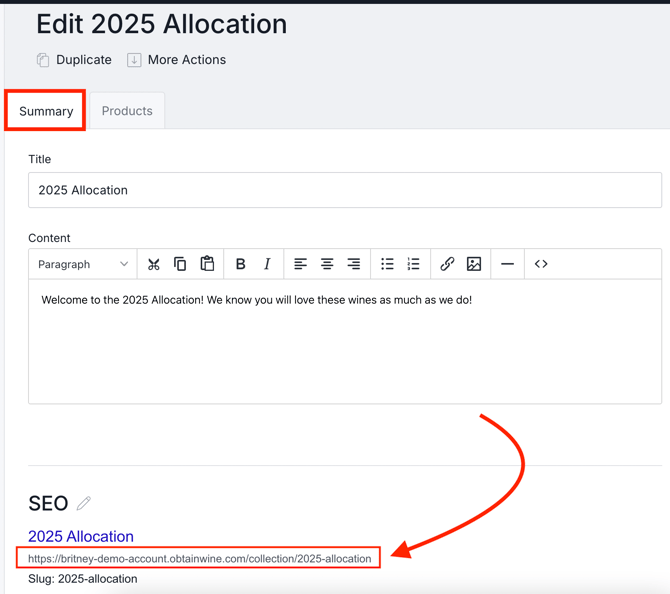
- Now you can use this URL in your email marketing campaign instead of the Allocation page URL. Note that this does not change the display order on the actual Allocation page.
- Because the items are technically in an Allocation, all Allocation features (like wishes, etc) will still apply.

- Because the items are technically in an Allocation, all Allocation features (like wishes, etc) will still apply.