- Help Center
- Point of Sale
- External Hardware (Printers, Barcode Scanners & Cash Drawers)
Installing a new SSL certificate for Epson local printers.
The 2023 certificate expires on Jan 10th 2024, and the new certificate needs to be installed on all Epson Local Integration Printers (Not Cloud Integration) before this date to ensure printing receipts continues to work.
Note that this is for Local integration printers (not cloud).
Logon to the Printer(s) Web Interface
- Turn the printer off and on again and it will print out a receipt listing the IP address of the printer.
- Enter this IP address into a web browser and you will be prompted to login
- The username is epson
- The password is either epson or the printer serial number.
SSL Certificate Installation
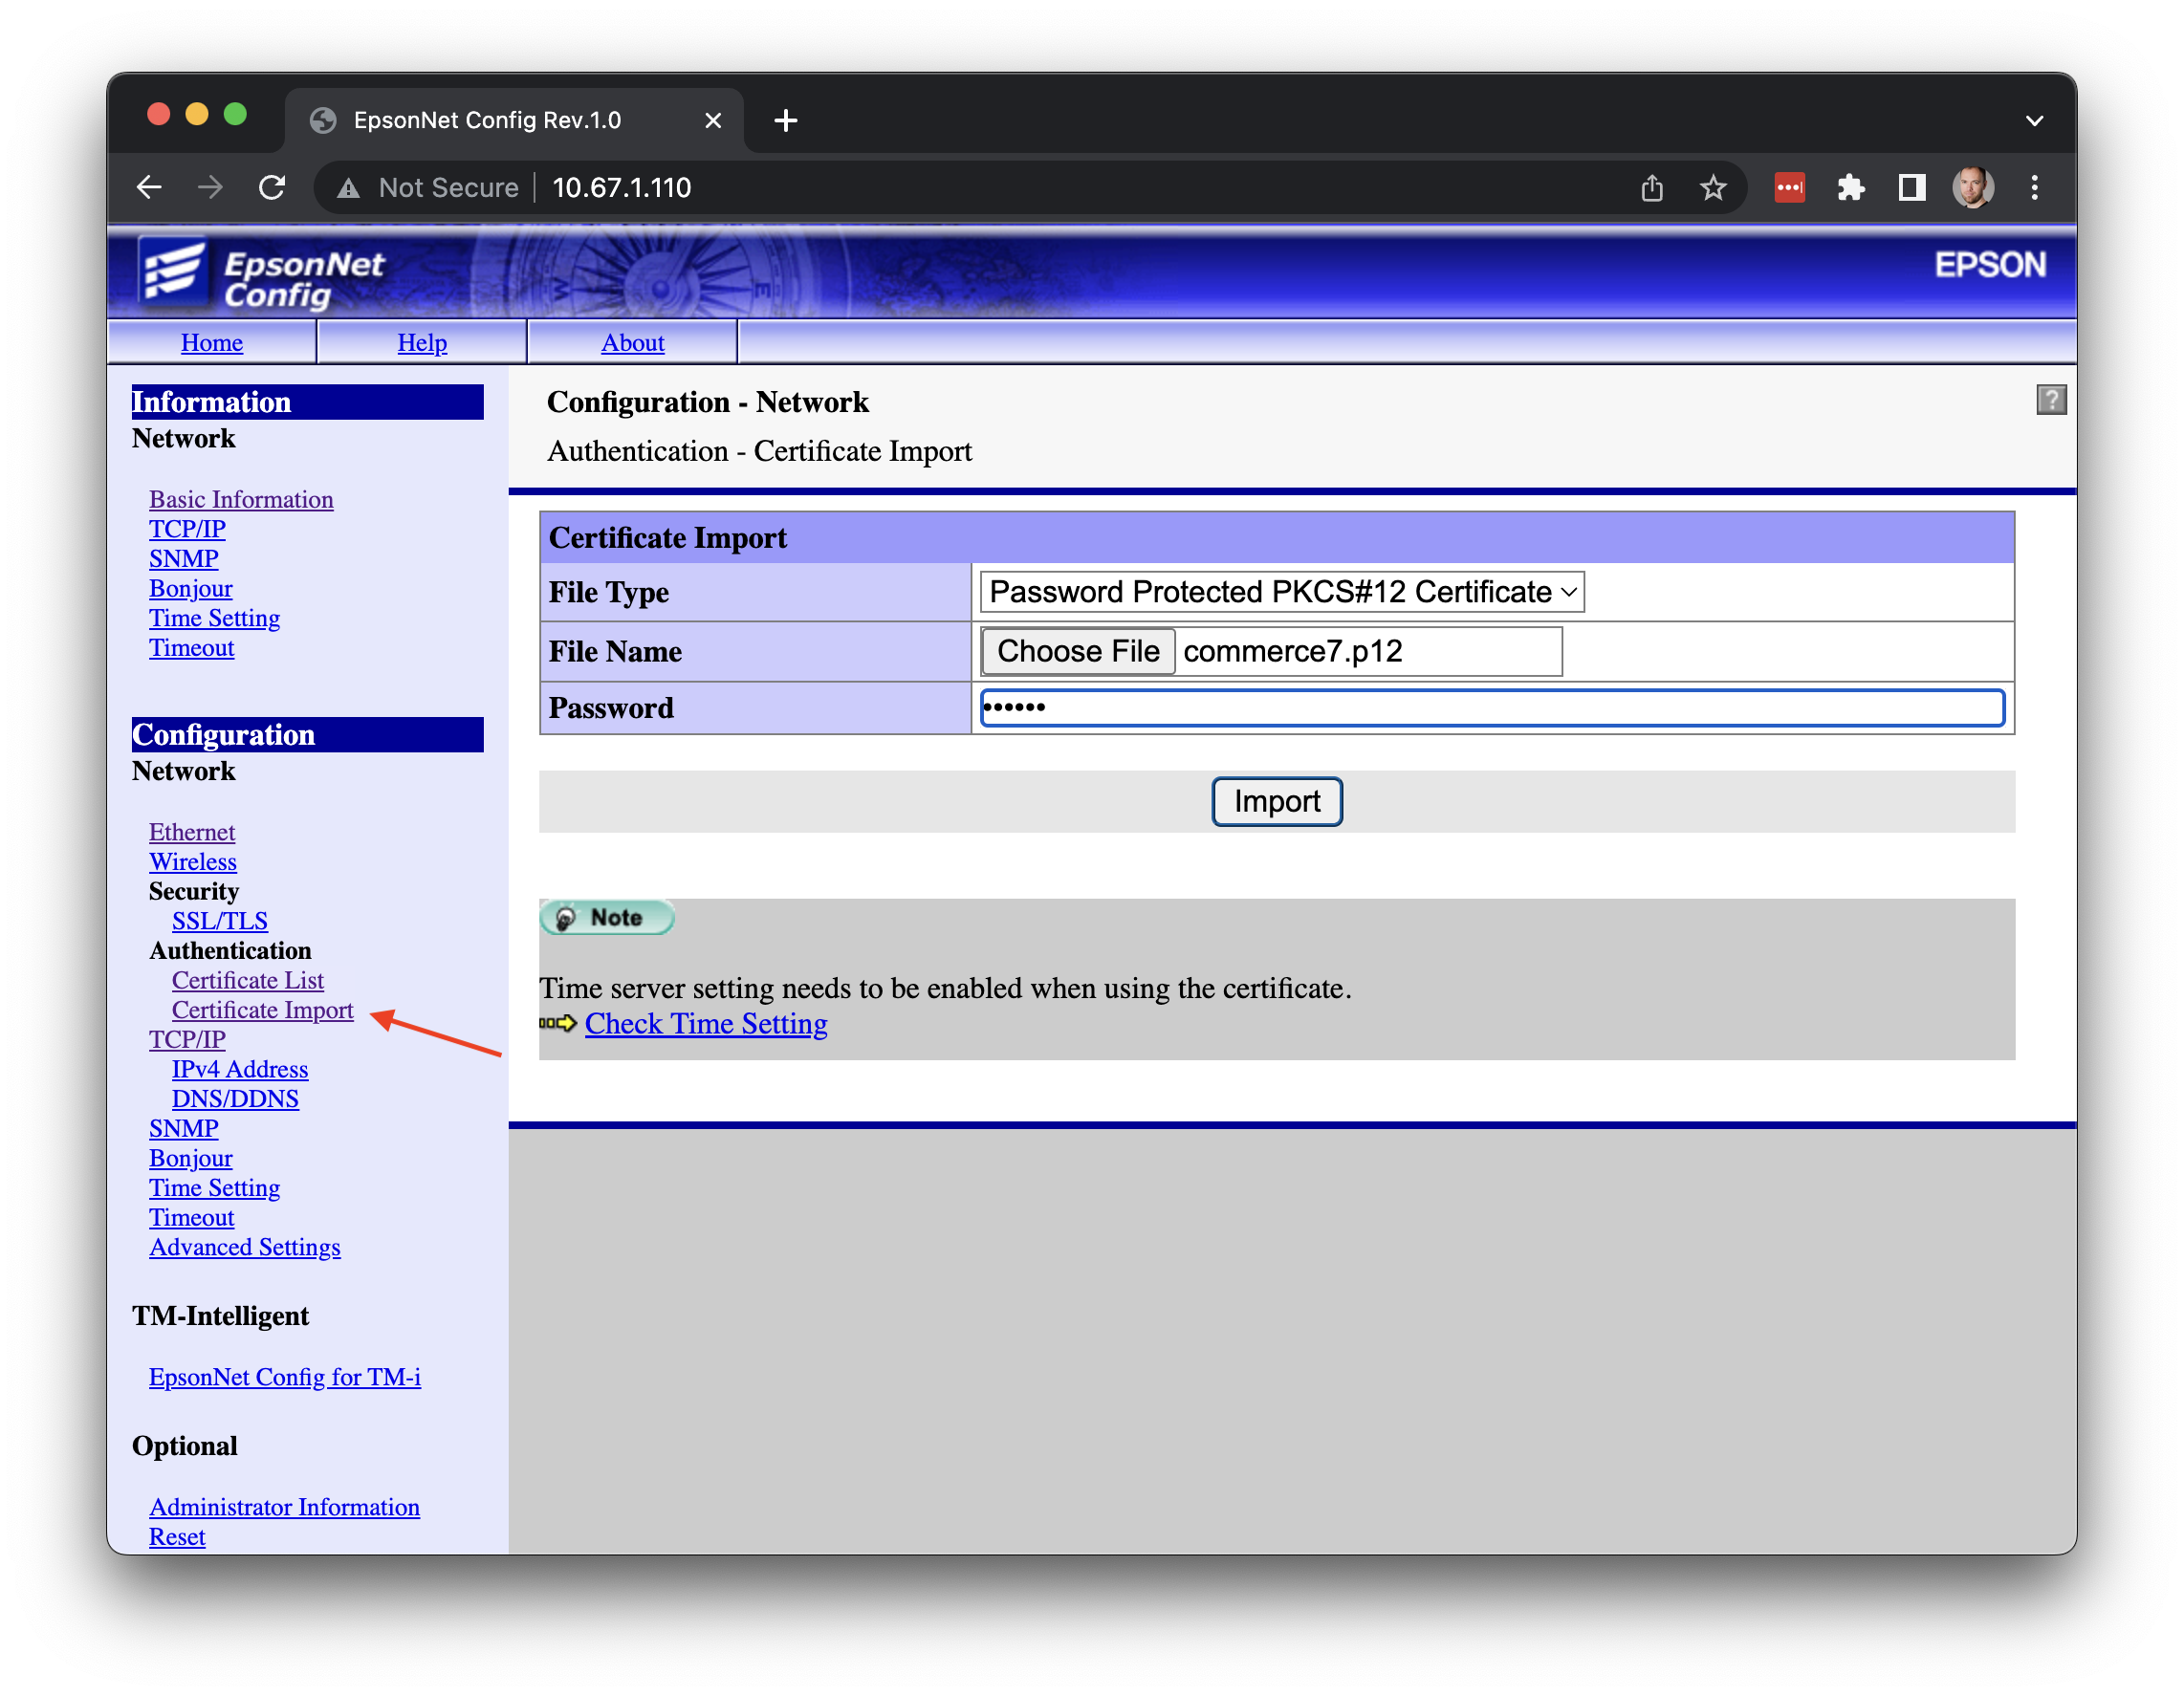
- Import the SSL Certificate
- Choose Certificate Import
- Select File Type = Password Protected PKCS#12 Certificate
- Download this file Commerce7.P12 and then click Choose File and find this file in your downloads folder.
- Enter the password c72024 and click Import, then click Restart and wait for the printer to restart, this page will be displayed after restarting.
- Configure the printer to use the new SSL certificate imported
- Select SSL/TLS in the left menu
- Select the drop down for Server Certificate and choose "CA-Signed Certificate2"
- Click Send and Reset, and the printer will restart.
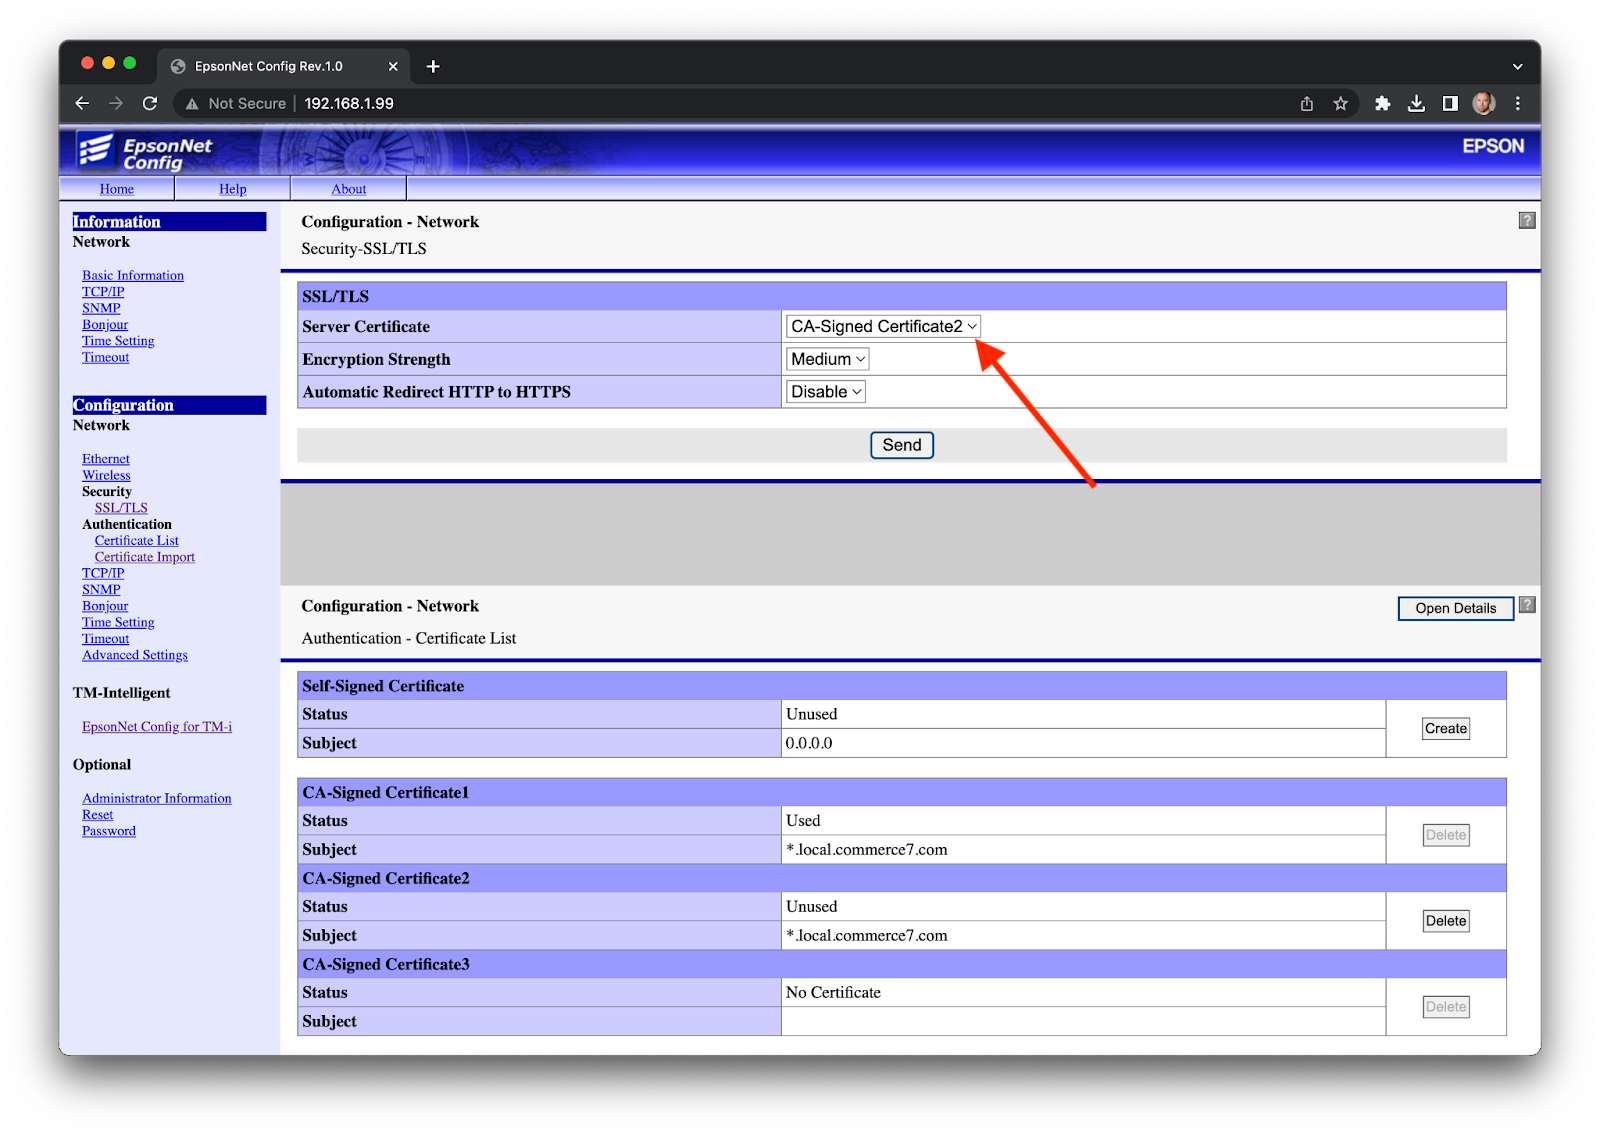
- Remove the old certificate
- Select SSL/TLS in the left menu
- Click delete next to "CA-Signed Certificate1"
- Click Execution and Reset to restart the printer.
- You are finished. Nothing further is required, printing will work as usual.