The Magtek DynaFlex II GO device is a payment terminal compatible with Commerce7. This is a wireless device that offers a quick and seamless customer experience. Follow these instructions to get your Magtek DynaFlex II GO device up and running.

Getting Started
Follow the instructions below to set up the device based on if you're using iOS or Windows. Once the device is configured, add it to your Commerce7 POS Profile settings.-
Magtek DynaFlex II GO Setup for iPad or iPhone (iOS - Bluetooth Only)
- Adding the Device to your POS Profile
- Workflow: Using the Magtek DynaFlex II GO
- Troubleshooting
Stuck? Having trouble with installation? Sometimes simply deleting the MagneFlex app and re-installing it is the best course of action.
However, if you need help with set up and would like to set up a Zoom call to walk you through it - send us an email at support@commerce7.com.
Setting Up Magtek DynaFlex II GO for Commerce7 (iOS / Bluetooth)
You can pair a single Magtek DynaFlex II GO to multiple iPads tablets following the steps below. If you have multiple Magtek DynaFlex II GO's do not pair multiple Magtek DynaFlex II GO's to one tablet as it is not possible to select which one to use.
Note that if you are using an iPad, your iPad must be able to run the latest iOS version. (It may run on older iOS versions but compatibility is not guaranteed).- What's in the box?
- Magtek DynaFlex II GO device
- USB-C (to Magtek DynaFlex II GO) to USB-A (to computer/charging) cord
- Charging/Docking stand with USB-A connector (to computer/charging)
- On your iOS device, download the MagneFlex Browser for iOS (click here) or you can search for "MagneFlex" in the App Store.
- !!IMPORTANT!!: Ensure that you are on MagneFlex version 3.0.5 Build 31 or later.

- Note that if you are using an iPad, your iPad must be able to run the latest iOS version. (It may run on older iOS versions but compatibility is not guaranteed).
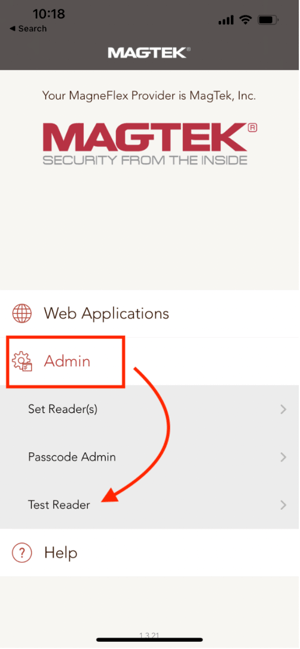
- To connect it to the reader, first open MagTek App, click Admin and click Test Reader.
- Select DynaFlex II GO (BLE) from the readers to test.

- Now it's time to pair the device with the Magneflex app via Bluetooth.
- Ensure Bluetooth is enabled on your IOS device (under Settings > Bluetooth).
- Place your DynaFlex II GO into its dock.
- Put your DynaFlex II GO device into pairing mode: Hold down the left side button for 4 seconds. You will hear 4 beeps and will see LED lights 1 & 4 flashing.
- Now, QUICKLY select DynaFlex II GO from the list. This screen quickly times out, so be sure to choose DynaFlex II GO within a couple of seconds.

- A pairing request will open. Enter six zeros 000000 and click Pair. (If you do not see this prompt, it's likely that Bluetooth is not enabled in your device settings.)
Note: you must complete this pairing before the green light stops flashing on the DynaFlex II GO.
- This will connect to the DynaFlex II GO and within 10-30 seconds you will be prompted to swipe a card to confirm the DynaFlex II GO is paired successfully. (This will not charge your card)

- After swiping the card you will see the swipe data and your reader is now paired successfully. (You will also see 3 solid green LED lights on the DynaFlex device).

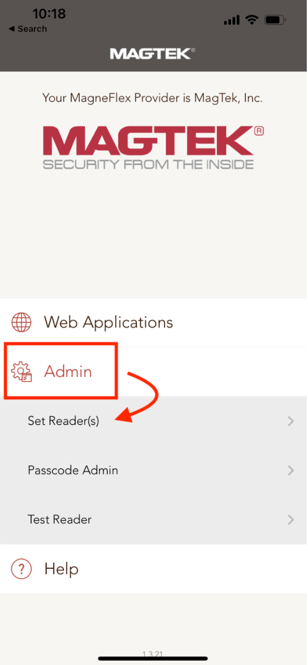
- Now go back to the home screen and click Admin, select Set Reader(s)
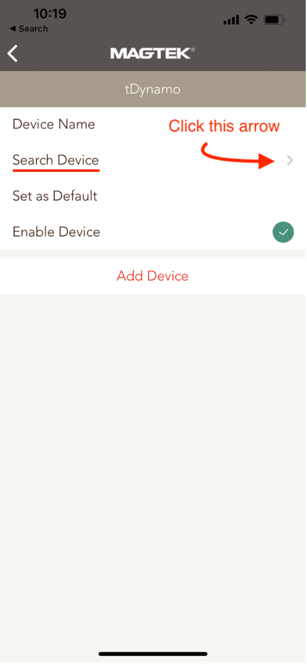
- Check the circle next to Wireless Device, then select the arrow to the right of DynaFlex II GO

- Click Search Device
- Select the DynaFlex II GO device

- Select Set as Default, then click Add Device

- You will be taken back to this screen and you will see a message at the top.

- Your device is now paired and set up with the DynaFlex II GO!
Now we just need to add some settings for it to use Commerce7 POS.
Adding Commerce7 POS to MagneFlex as the "Default Web App"
Now that your iOS device is paired and set up with the DynaFlex II GO, you just need to configure the device to connect to the Commerce7 App.
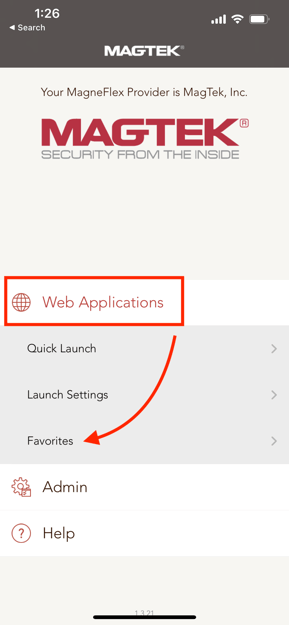
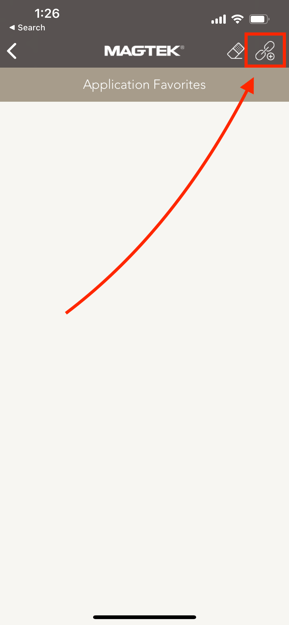
- On the MagneFlex App, click Web Applications and select Favorites
- Click the paperclip / link icon in the upper right corner
- Type in "POS" for the name
- Click Set as default website
- Then on Enter URL and Credentials click Browse to login page >
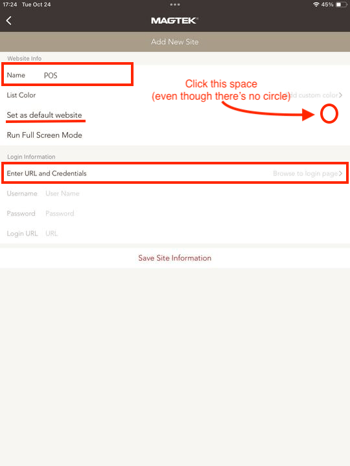
- Enter https://pos.platform.commerce7.com and click Go on your keyboard

- Click off of the field / minimize the keyboard on your device, then click the arrow icon (see image below) at the bottom right of the screen.

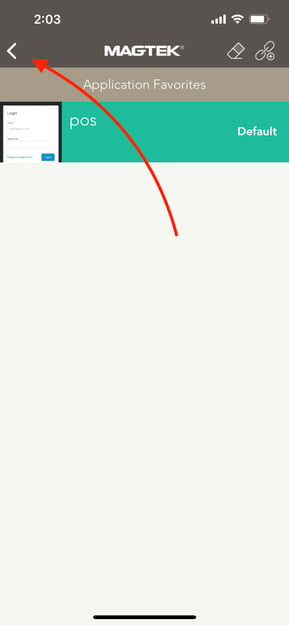
- Click Save Site Information to save this favorite.

- Now you can click the back arrow
- Back on the home screen, click Web Applications and then Launch Settings
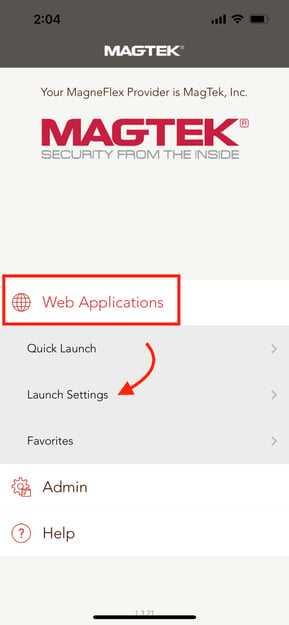
- Check Default Web App
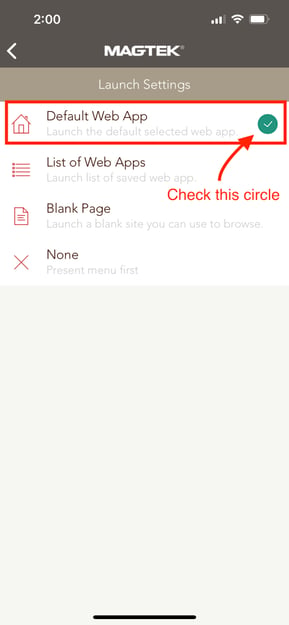
- Now you can close the app and re-open it and it will open Commerce7 POS as the default App.
- Note: If you have already set up Commerce7 as the default app, you can log into C7 by simply clicking on the Quick Launch link.
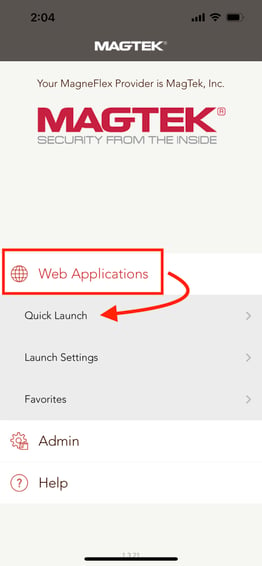
- Note: If you have already set up Commerce7 as the default app, you can log into C7 by simply clicking on the Quick Launch link.
- Finally, add the DynaFlex II GO device to your POS Profile. Learn how below.
- In Admin, go to Settings > POS Profiles
- Select the POS Profile(s) that you want to add the device to. (If you don't have a POS Profile yet, learn more about setting one up here.)
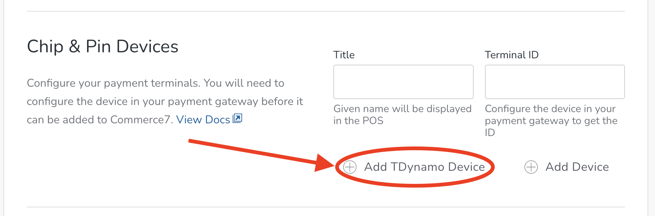
- Scroll down to Chip & Pin Devices
- Click Add TDynamo Device (Even though you are setting up the DynaFlex device, please choose tDynamo for these steps).
- NOTE: It may look like you need to enter in a Title and Terminal ID, but that is not the case. It's been configured in the background.
You only need one POS profile and one tDynamo entry no matter how many DynaFlex II devices you have.
Delete the DynaFlex II GO Pairing from your POS Profile
If you need to delete the DynaFlex II GO pairing from your POS Profile, simply click on the trashcan icon beside the tDynamo entry. (If you do not see the trashcan icon beside the tDynamo entry, click 'Add Device' button first).

Workflow: Using the DynaFlex II GO
NOTE that you will be defining 'TDynamo' (as opposed to DynaFlex) in the following workflow steps.
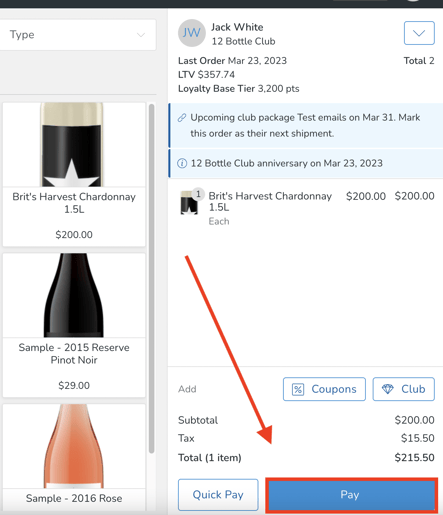
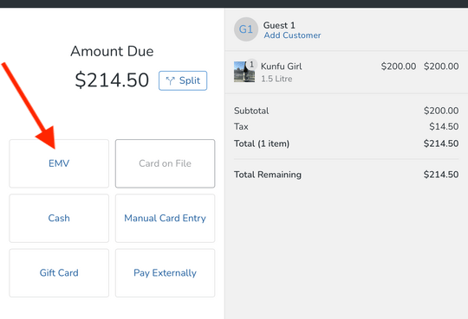
- When your Customer is ready to checkout, click the Pay button in your POS device.
- On your POS device, click 'EMV'.
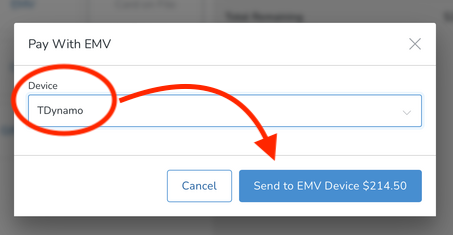
- Choose tDynamo and click the 'Send to EMV Device button'. You'll see a progress screen as it connects. (Note that the system will remember the last device that was used, so it will be automatically selected for you. In other words, you will not need to actively choose it each time).
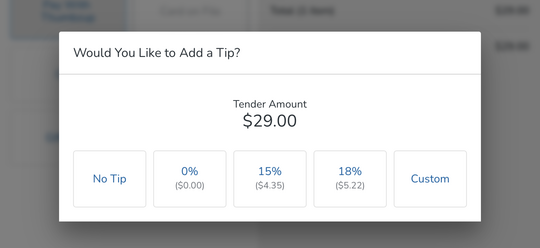
- This will bring up a Tip modal on your POS device. Hand the device to your Customer so that they can choose an applicable tip.
- Finally, ask the Customer to swipe, tap or insert the card into the DynaFlex device to complete the transaction.
Note that debit cards cannot be used. Since the device does not have a PIN entry option, it can only process credit card payments.
Troubleshooting
- I'm getting a 'Local Storage' error when logging into Commerce7 on the Magneflex app.
- First simply try swiping up to close the Magneflex APP, and then re-open it. This often resolves the issue.
- If that doesn't work, do this:
- On the iPad showing the error, go to Settings -> Safari -> Advanced.
- Verify that 'Block all cookies' is toggled to off. (The Magneflex browser shares these settings with Safari, so this setting may be disabled).

- Once you've checked that, reboot the iPad.
- Why can't I send a transaction to the DynaFlex II GO device?
- A few things to try:
-
- Be sure the device is turned on.
- If you are still experiencing issues, one option you can try is to uninstall the MagneFlex app from your mobile device and then reinstall it. After reinstalling the app, you will need to repeat the setup steps mentioned above from the beginning. This can sometimes help resolve any persistent issues you may be encountering.
- If it's still not working, you may want to download the Magtek Test App which can be used to test the device to make sure it is working. This will help you determine if the issue is your setup or the device itself.
- Can debit cards be used with the DynaFlex II GO?
No. Since the device does not have a PIN entry option, it can only process credit card payments.